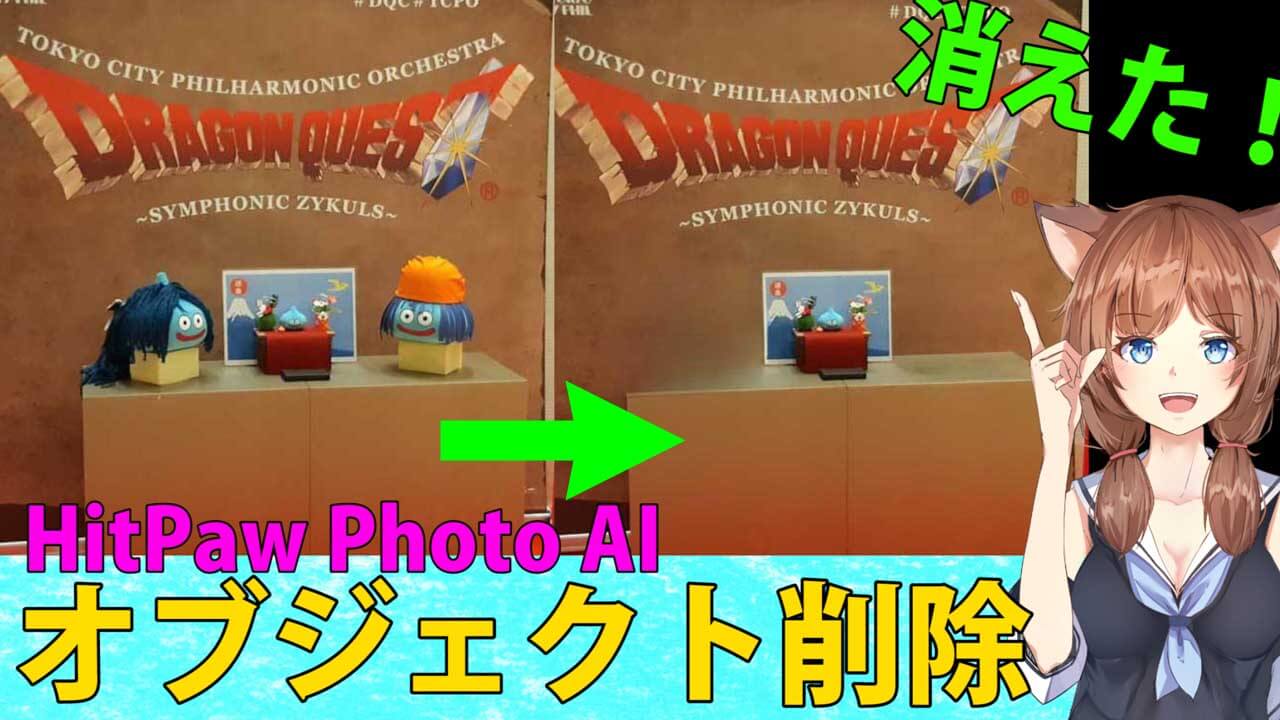
androidのスマホでは、最近よく見かける消しゴムマジックですが、写真に写り込んだ不要なものを消去できるってスゴイですよね
パソコンのソフトでも出来ますが、チョット操作感が高度で使いにくおものも多いです…
そこで今回は、簡単に作業を行えるアプリをご紹介します

HitPaw FotorPeaの新しく追加された機能で、HitPaw FotorPeaがあればだれでも使えます

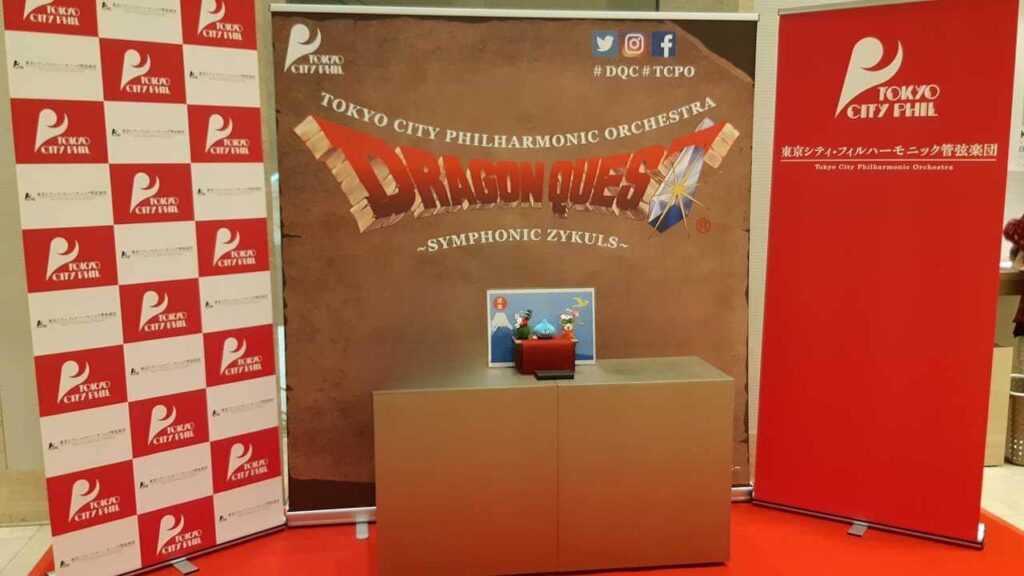
写真に写り込んだ不要なものを消去ができるHitPaw FotorPea
高度な写真編集ツールを使って写真から物体や人物を削除するのは、難しく感じられるかもしれませんあ
HitPaw FotorPeaを使えば、以下の4つの簡単な手順でこれが可能になります。
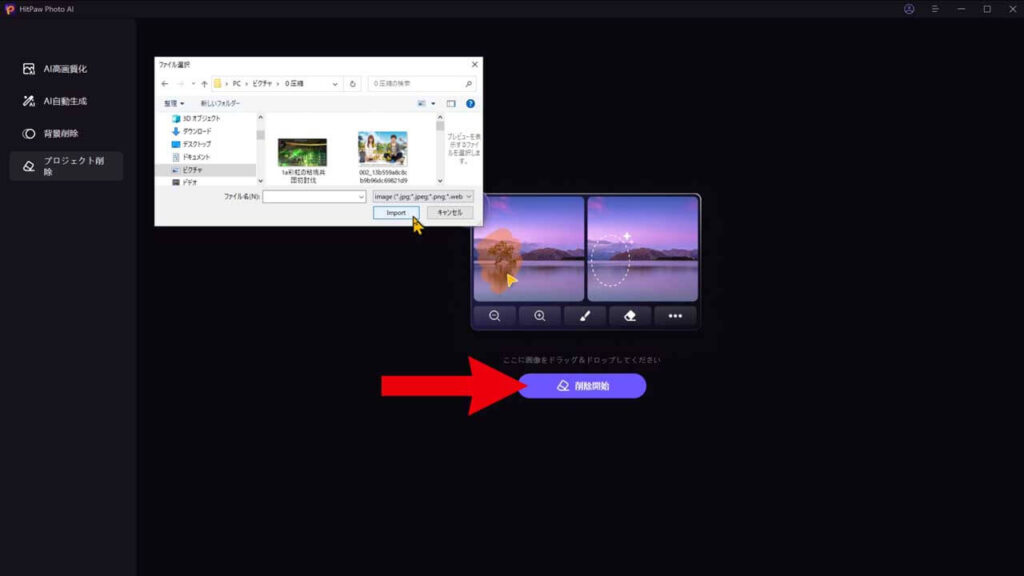
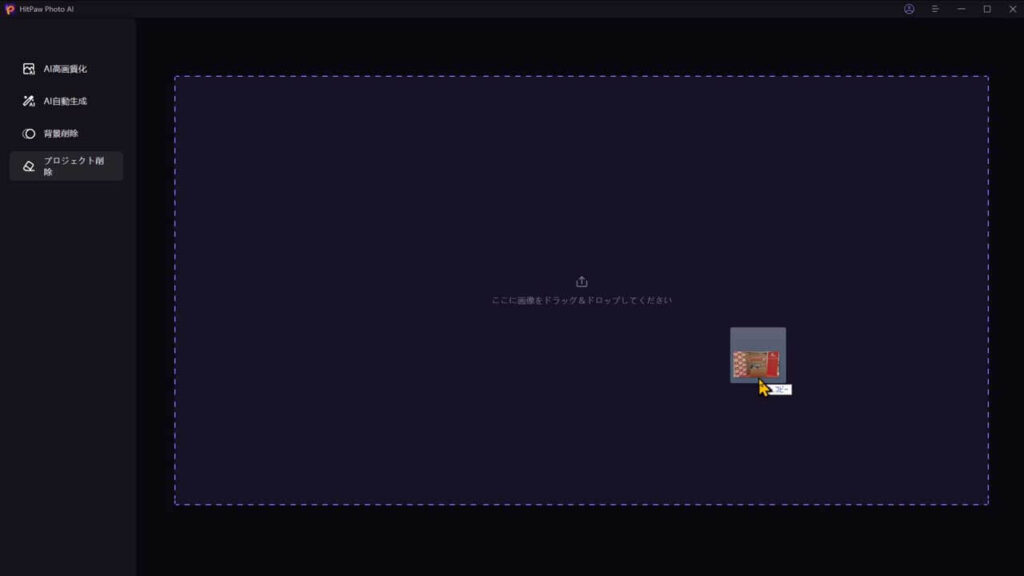
写真のインポートをします
オブジェクトの削除をクリックします

現在、オブジェクト削除じゃなくプロジェクト削除に翻訳ミスがあるカモです
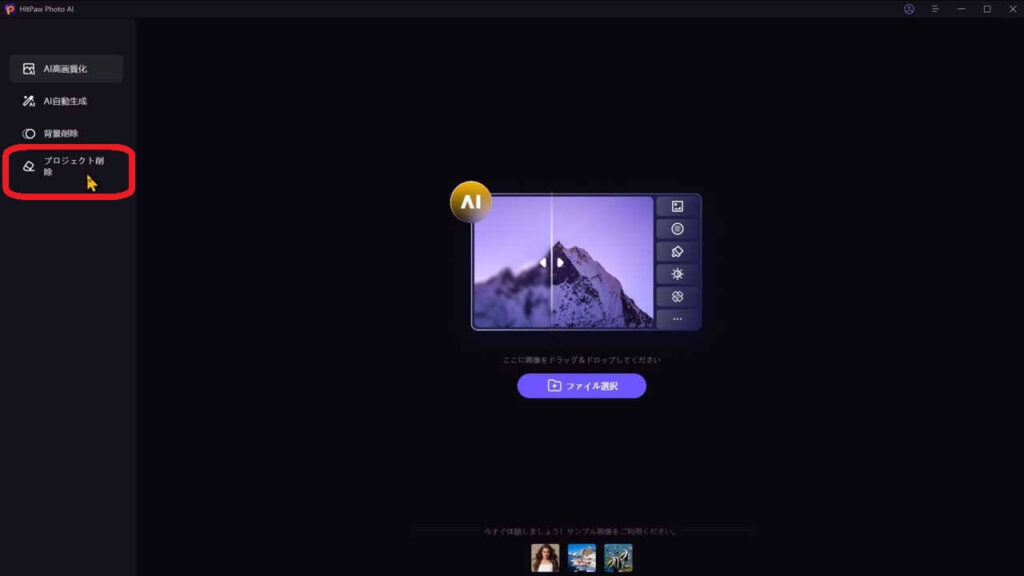
写真を選ぶために「削除開始」をクリックするか、ドラッグ&ドロップでインポートします。
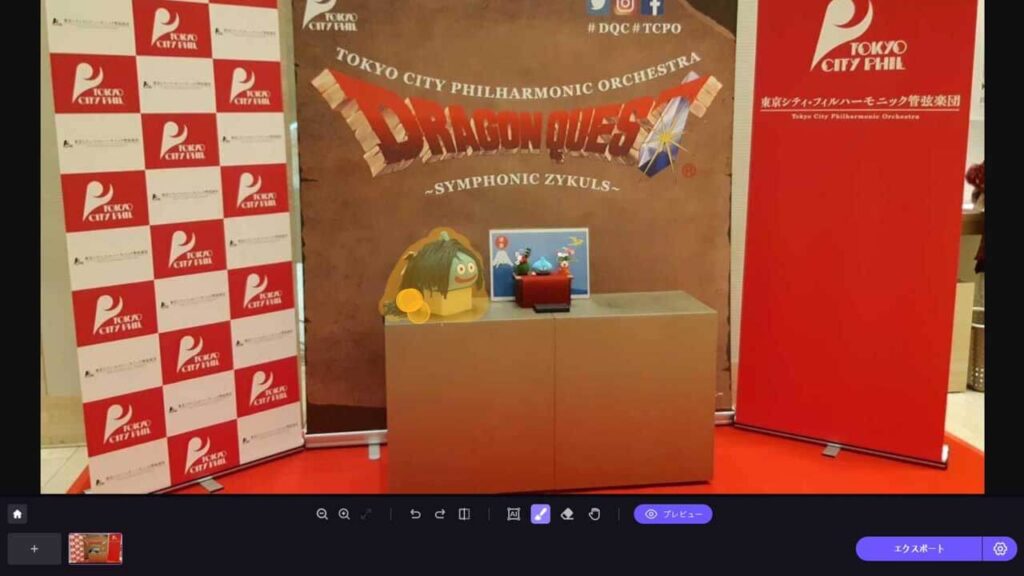
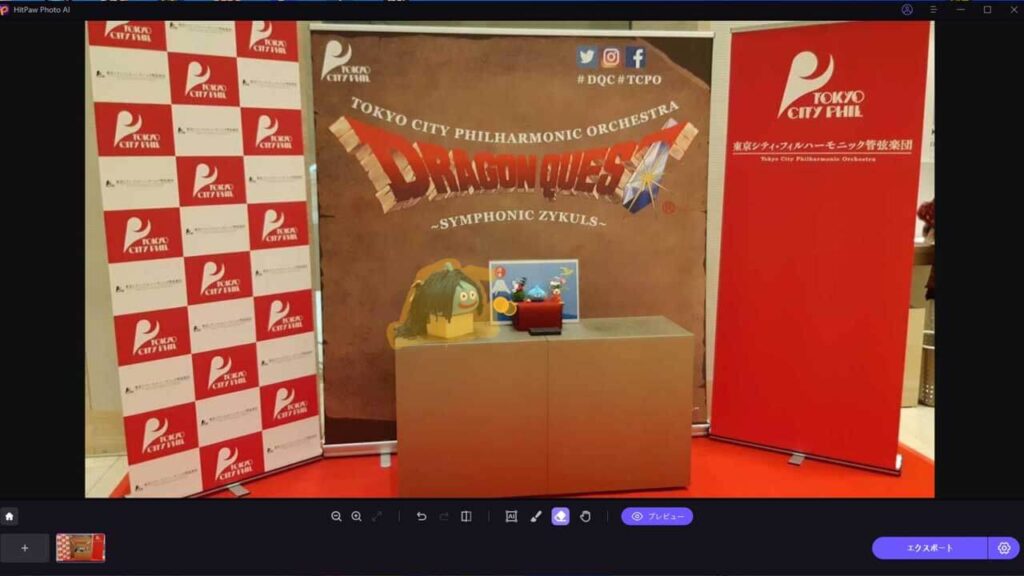
ブラシ、またはボックス選択ツールの選択をします
製品画面下部にある、ブラシまたはボックス選択します。

ボックスはこのように範囲を指定します

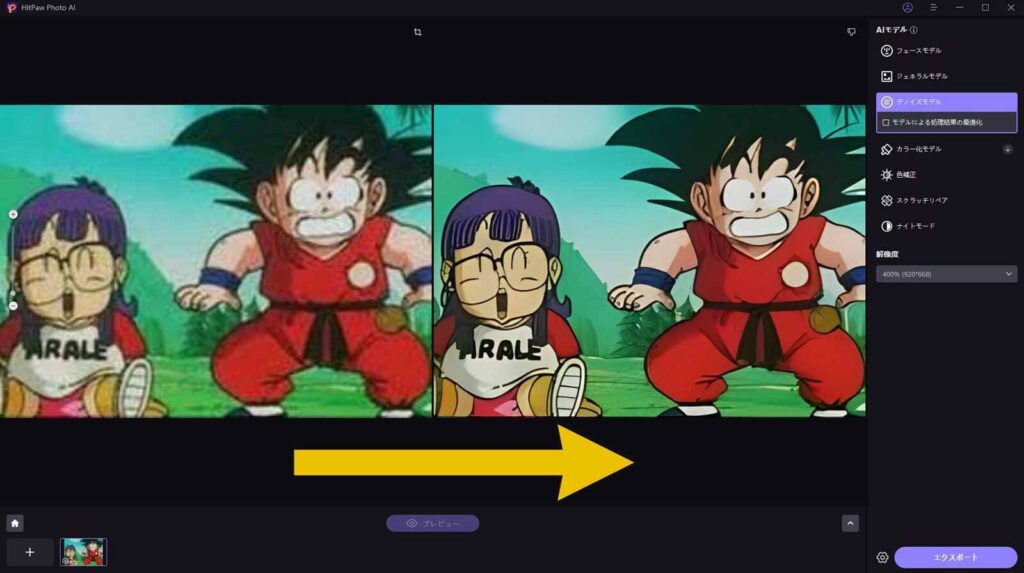
あとは、AIが自動判定して不要なもの判定を行ってくれます

ブラシはこのように、自分で範囲を指定することができますよ
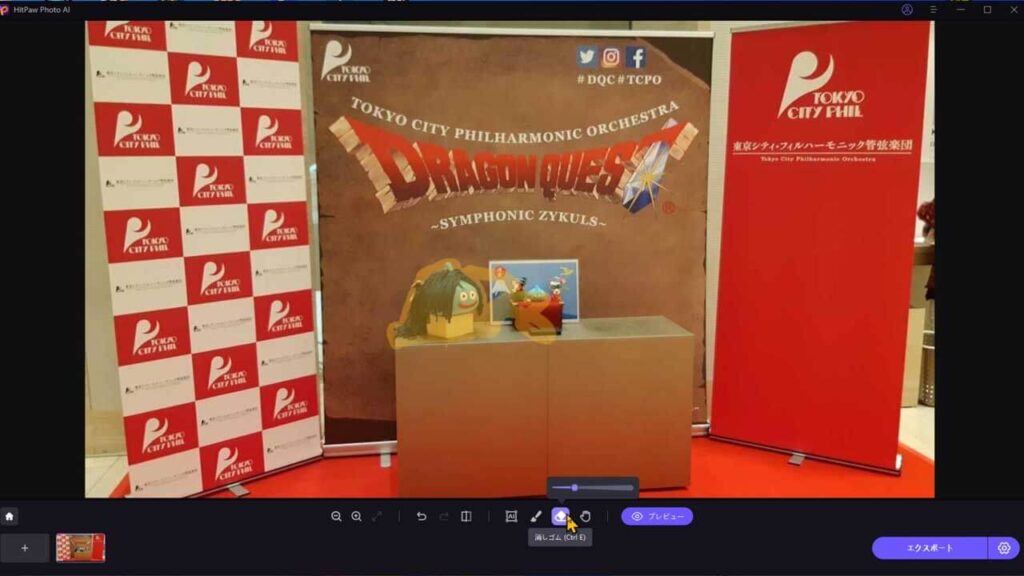
選択範囲の調整 はみ出したら、消しゴムで
選択した範囲がハイライトされたら、必要に応じて選択範囲を削除したり、追加したり、縮小したりできます。
もし現在の選択に満足できない場合は、「元に戻す」ボタンをクリックしてオブジェクトを再選択します。
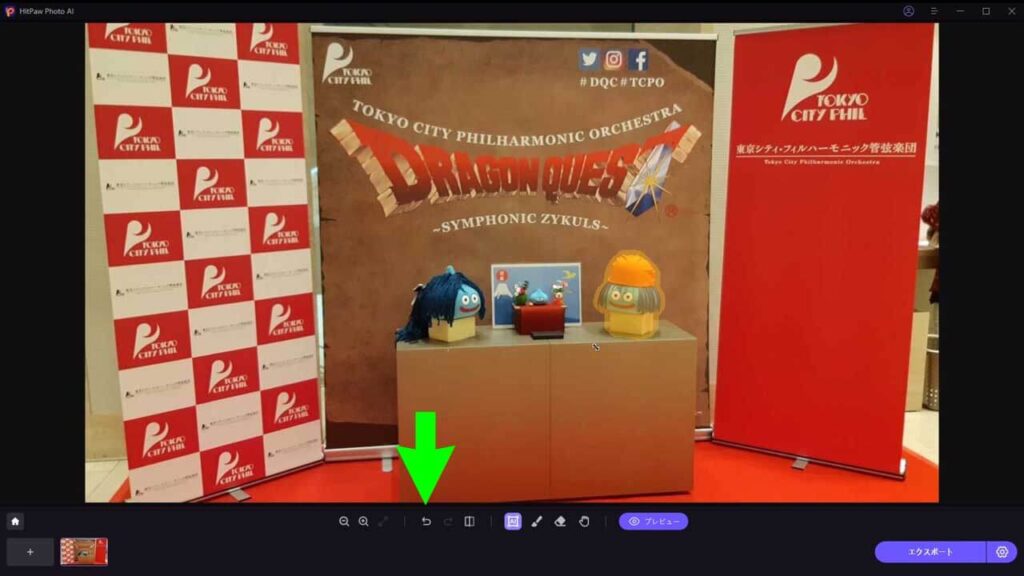
もしくは、消しゴムを使って、選択範囲を削り調整することができます
ブラシのサイズはサイズバーをドラッグして調整できるので、細かな作業する時には先細にして作業を進めるといいですね
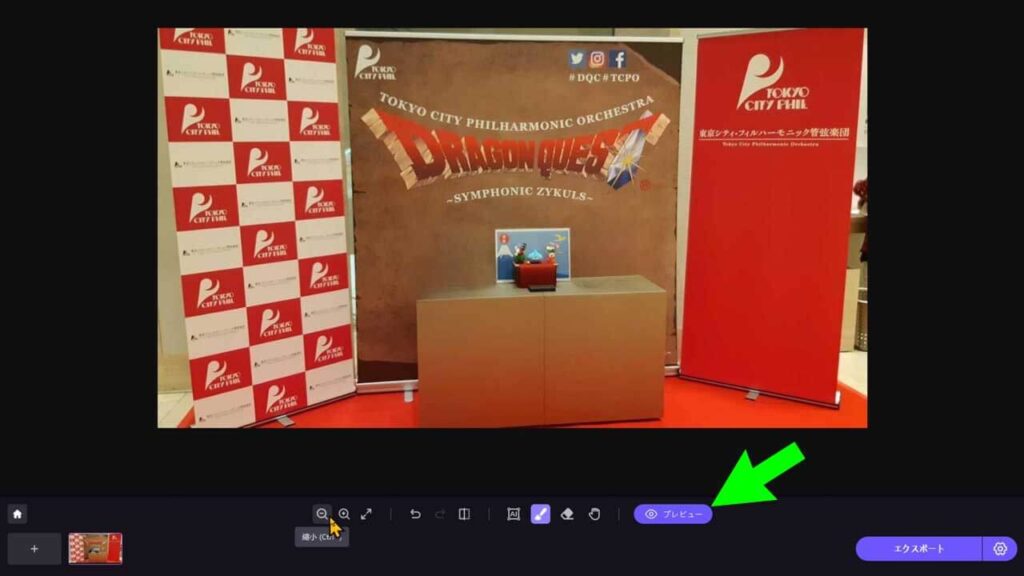
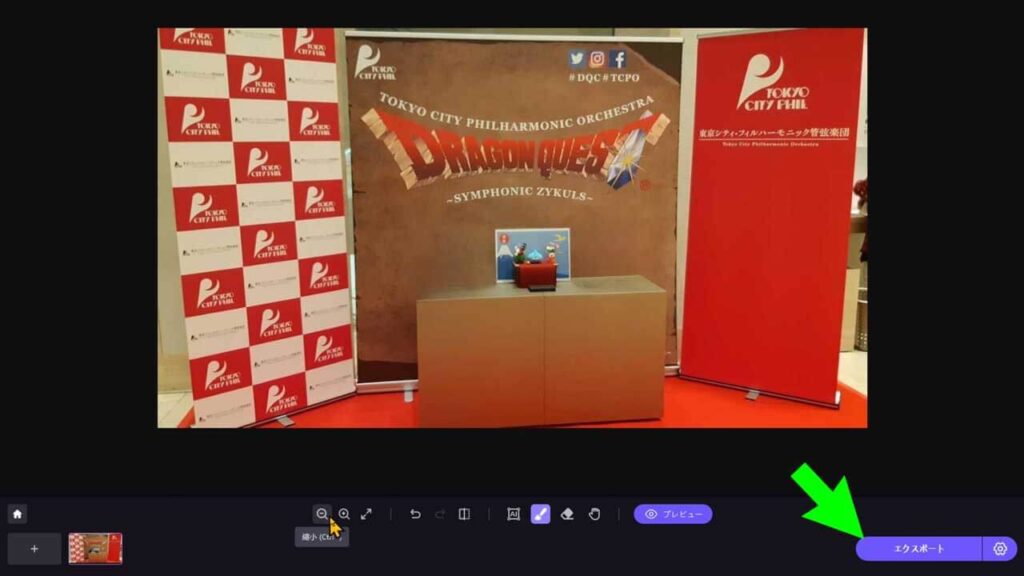
写真のプレビューとエクスポート
「プレビュー」ボタンをクリックして、写真からオブジェクトを削除した結果を確認します。
満足できたら、保存先を設定し「エクスポート」をクリックして、編集した写真を保存します。
これらの手順に従えば、HitPaw FotorPeaを使って簡単に写真から不要な物体や人物を削除できます。
HitPaw FotorPeaのオブジェクト削除の補足
右下に歯車マークがあるので、パソコンへの出力先フォルダを指定することができます
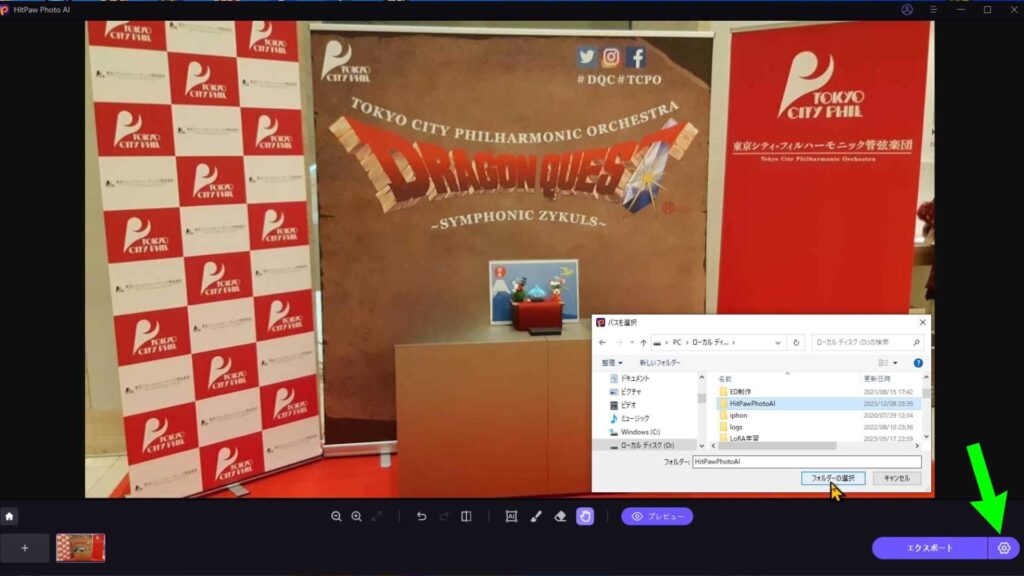
せっかく作った画像ファイルがどこにあるか分からなくならないようにするために、フォルダしておくといいですよ
HitPaw FotorPeaのオブジェクト削除の感想
数年前まで画期的だったこの技術も、最近はよく見かけることも多くなりました
写真に写り込んだ不要なものを消去ができる機能は、HitPaw FotorPeaの主な機能ではないですが、この機能は画像を高画質化するメイン機能に付属するアプリとしてとても便利です
 みけねこまる
因みに、写り込んだ人を消すことも可能なのだ
仕上がりも、特にほかのソフトと比べて特筆ところはないものの、機能性に遜色はなくこんなに手軽に行えるところがいいですね
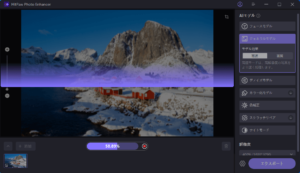
HitPaw FotorPeaは主な機能は下の写真のように画像を高画質化以外にも、以下の新機能が追加されています
また、主な機能である画像を高画質化については、コチラの記事で詳しく解説していますので、興味ありましたら読んでくださいね
HitPaw FotorPeaの仕様
製品概要
HitPaw FotorPeaは、HitPaw社が手掛ける写真・画像を高画質化するソフトウェアです。
対応する画像フォーマット
入力可能な画像フォーマット
*.png *.jpg *.jpeg *.WebP *.tif *.tga *.bmp *.jfif
出力可能な画像フォーマット
*.png *.jpg *.jpeg *.WebP *.tif *.tga *.bmp *.jfif
製品に関する詳細は、公式サイトでも確認できます。
ライセンスについて
HitPaw FotorPeaには、無料版・有料サブスク版・買い切り版(永久ライセンス)があります。
無料版は有料版と比べて変換後の画像の出力(エクスポート)ができません。
無料版では全く出力できないのは淋しいところですが、無料版で試して良ければ有料版のライセンスを購入してもいいですね
有料版のライセンスには、以下の3種類が用意されています。
- ・一ヶ月ライセンス(1ヶ月間利用可能)
- ・一年ライセンス(1年間利用可能)
- ・永久ライセンス(事実上の買い切り版)
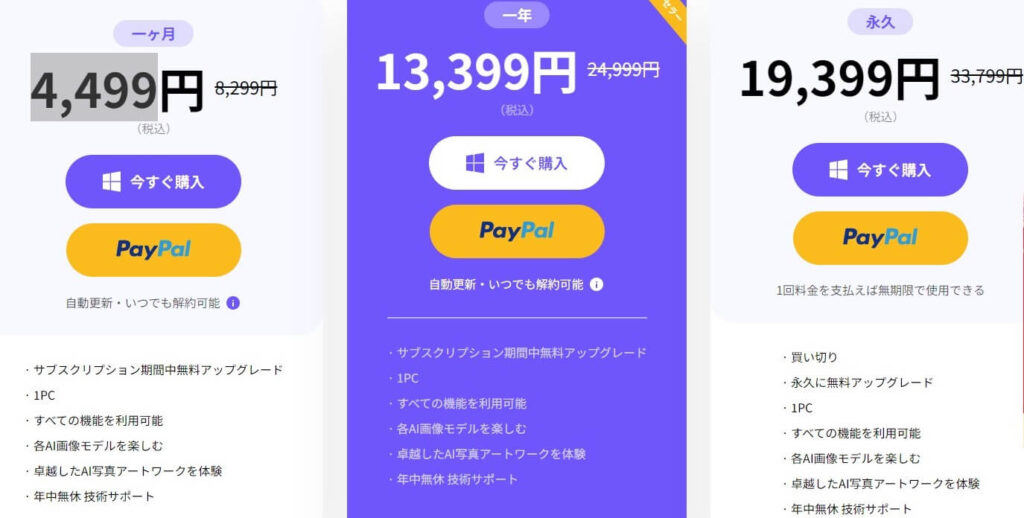
※Windows版とMac版で価格は異なりますので、料金の違いは、HitPaw FotorPea公式サイトでご確認お願いします
サブスクが嫌いな人もいるので、永久ライセンス(買い切り版)があるのがいいですよね
回きりでも無償アップデートが付いている所もステキね
実際の価格は、変動もあるかもしれないので下記の公式サイトで確認してください。