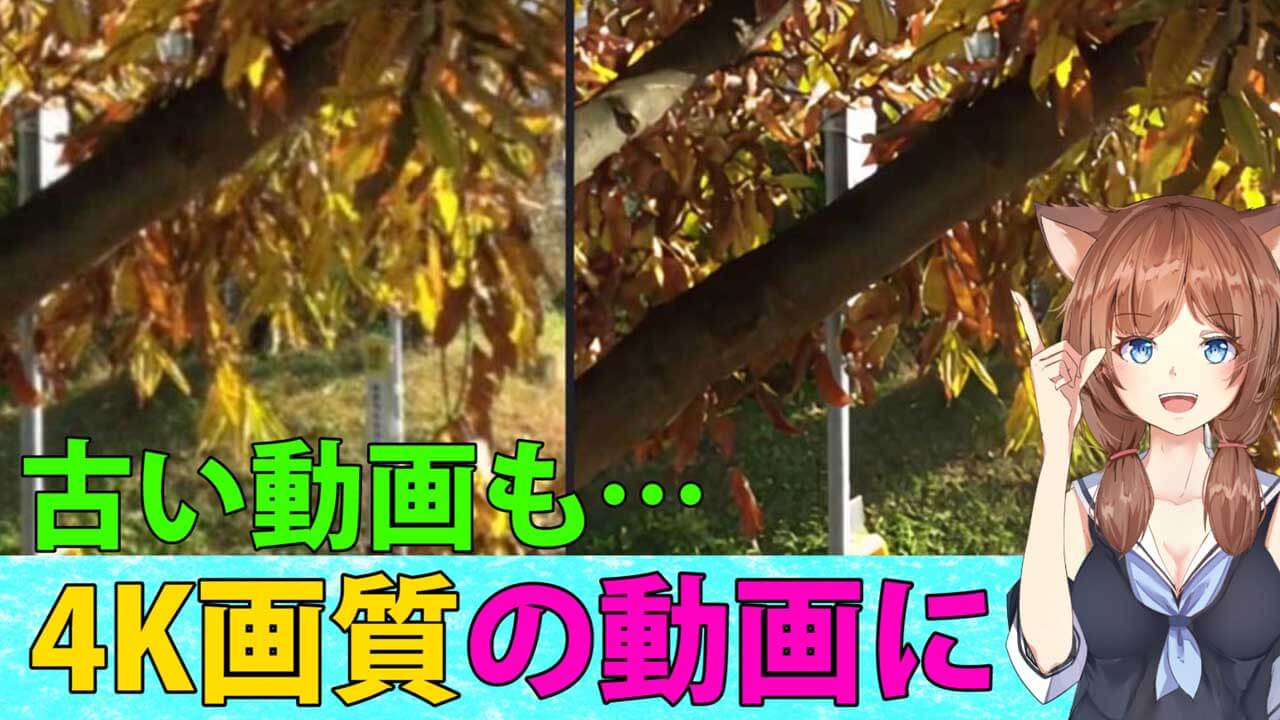
最近のカメラやスマートフォンは技術が進歩しているため、少し前に撮影した写真でも、画質が荒く見えたり、ぼやけてしまうことがありますね…

前に撮った写真でも、最新のカメラで取ったような写真に自動補正・高画質化ができるソフトができましたよ
私のおすすめするHitPaw FotorPeaは、AI技術を駆使して、画像の画質や解像度を向上させることが可能なソフトウェアです。
ワンクリック操作で、ピンぼけした写真や傷がある写真、古い写真をHD画質以上に仕上げることができます。
私も愛用しているHitPaw FotorPeaの解説をしますね

最近の生成AI界隈は、なんでもスゴイ!スゴイ!と煽られがちですが、HitPaw FotorPeaは、本当に実用的なAIです
ピンぼけ・古い写真を高画質に自動補正 HitPaw FotorPea
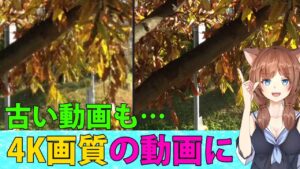
HitPaw FotorPeaは、AI技術を活用して、画質の低い写真や画像を高画質に変換することができます
ガラケーや初期のスマホで撮った写真て、すごく画質が悪く感じませんか?
その時代の写真を、最新のiPhoneで撮ったような鮮明な画質にすることができるんですよ
解像度を上げても画質を落とさないことや、ぼやけたを補正したり、白黒写真をカラーに変換したりすることも可能です。
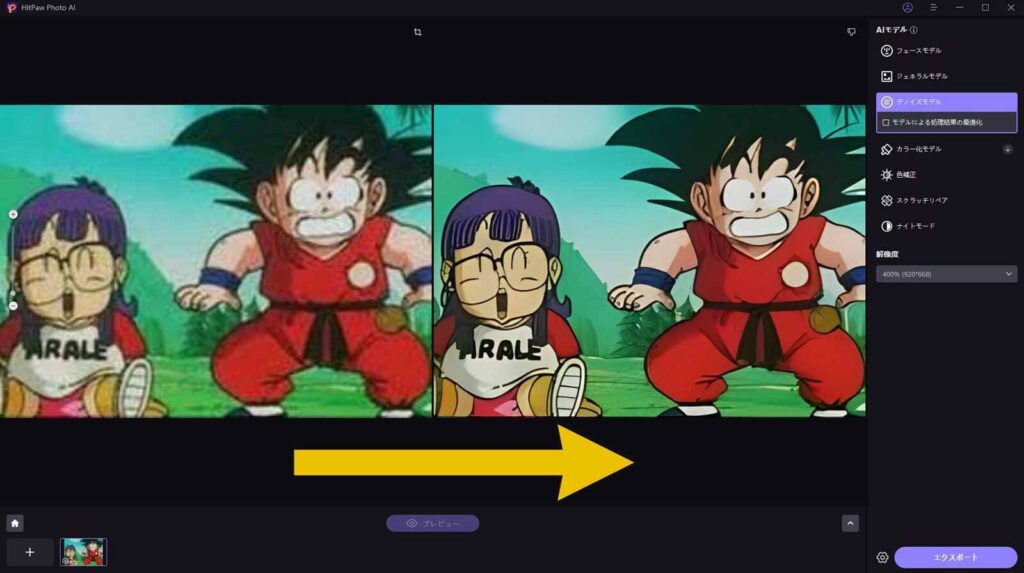
因みに、アニメもこんなにスッキリとした映像に変えられます
 みけねこまる
オラ、わくわくすっぞー
HitPaw FotorPeaを実際に使用し、ノイズが入った低画質のノイズ除去や、ぼやけた画像ファイルを高画質に変換する方法を説明しますね
HitPaw FotorPeaで出来ること、主な特徴
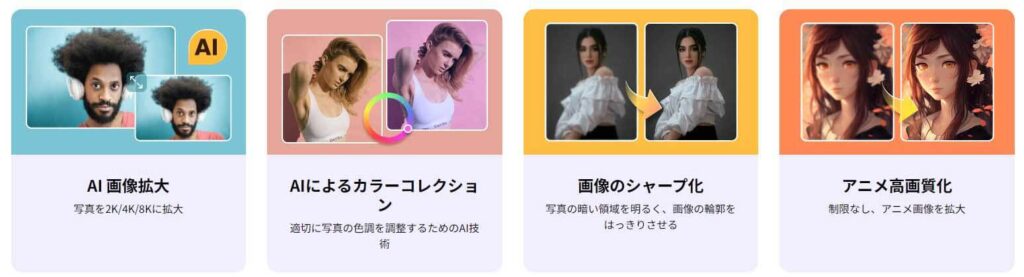
- WindowsでもMacでも使える、最高のAIによる自動補正機能を備えたソフト
- 解像度の低い写真も、イラストも画像を高画質化します
- 超簡単操作!たったワンクリックで、あなたの写真が驚くほど美しく変わります。
- 高精度のノイズ除去機能で、ぼやけた画像も鮮明に甦る。
- 画質を一切落とすことなく、画像を拡大・縮小できる
下記で際しく説明しますが、最短この4ステップ画像を自動補正し高画質化できますよ
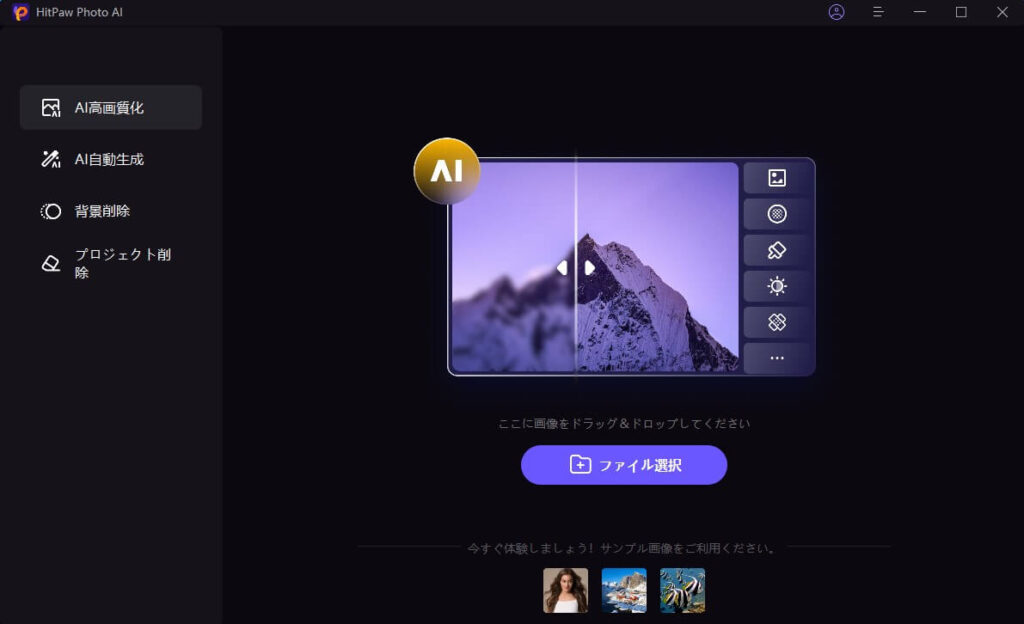
HitPaw FotorPeaを起動する
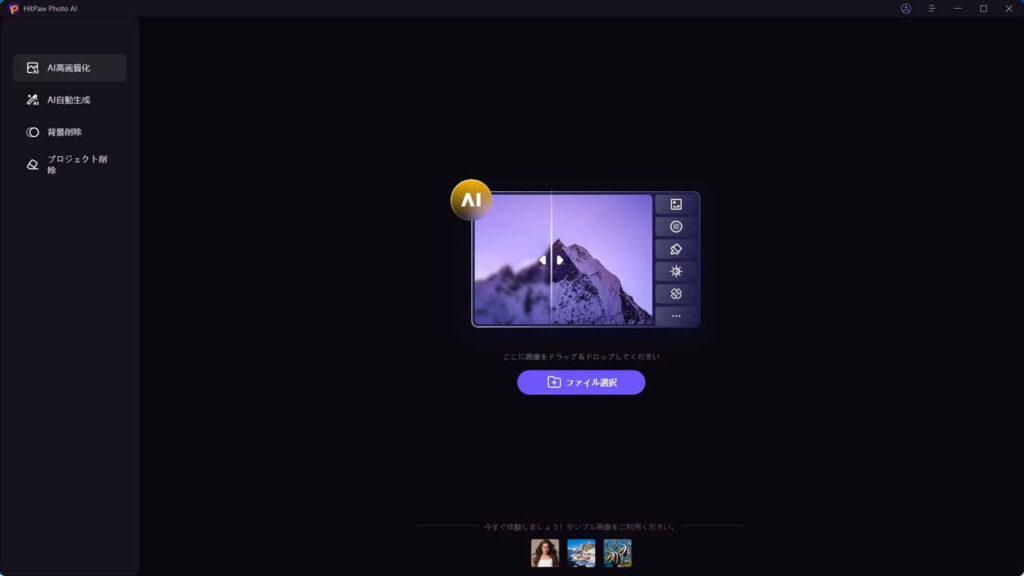
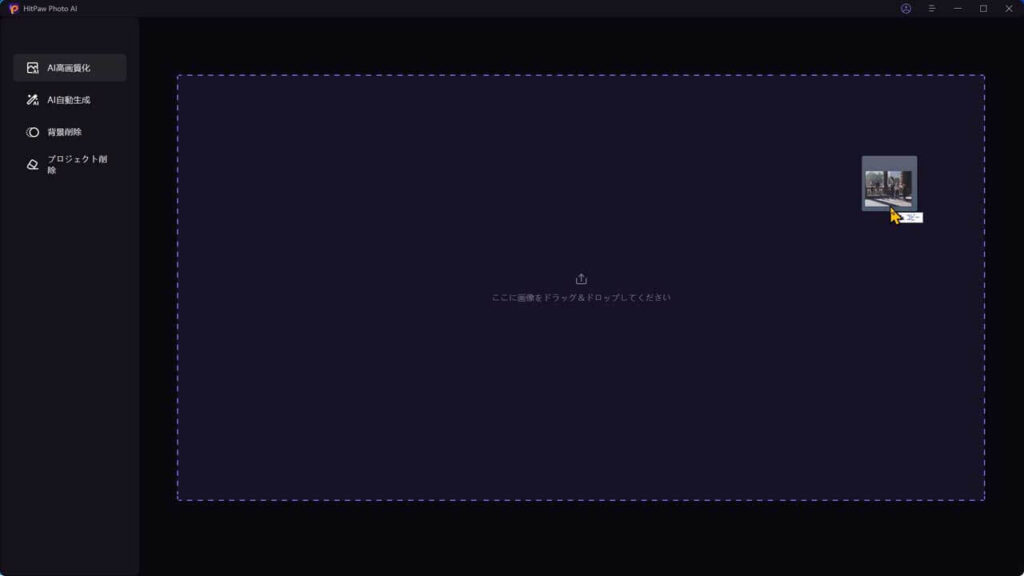
画像ファイルをドロップ
プレビューを押す
エクスポート

スマホで見ている方は分かりにくいと思いますが、信じられないくらいキレイになりましたね
その他、調整はいろいろできるもの、これだけで画像がキレイにすることができるよ
みけねこまるめっちゃ簡単なのだ
詳しくは、下記でも解説予定ですが、ビビッと来た人はHitPaw FotorPea公式サイトでもより詳しく確認してね
超最新の機能が追加!画像生成AIも新搭載!?
HitPaw FotorPea(HitPaw Photo AI)は、以前のHitPaw Photo Enhancerバージョンから2023年12月にリニューアルされ、幾つかの新機能が追加されました
- テキストや画像からAIを使って、AIイラストやフォトリアルAI画像を自動生成
- 画像の背景を簡単に削除や置き換え、自由自在に変えることが可能
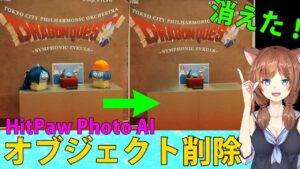
- 写真から不要なオブジェクトや見知らぬ人物・いらないものを消去
画像生成も簡単に操作ができて、HitPaw FotorPeaを起動して、画像生成をクリックすれば、UIが立ち上がるので、プロンプトを入力して生成するだけ
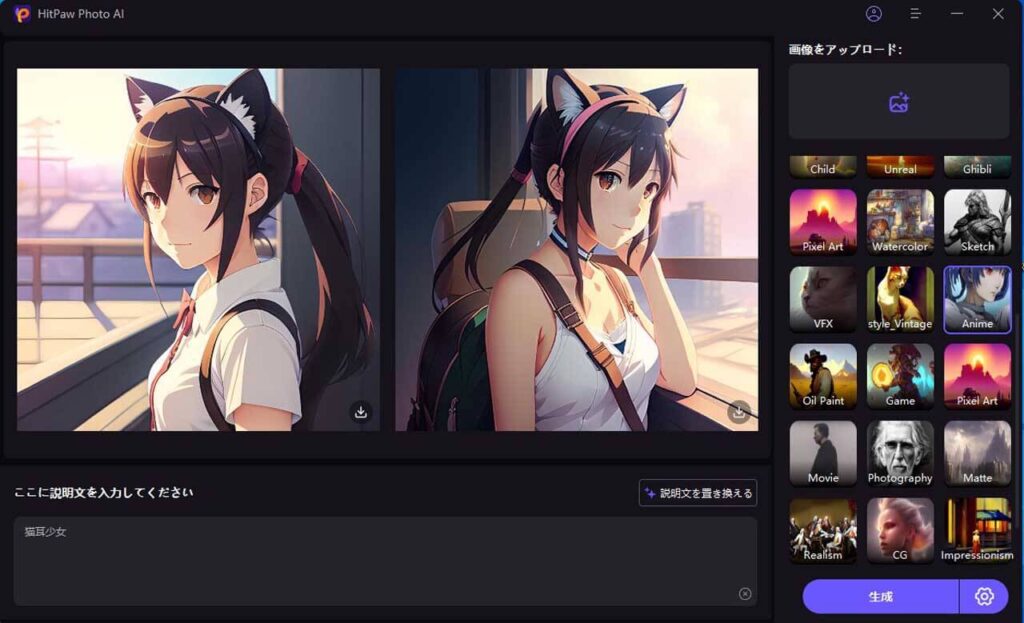
日本語でプロンプトの入力が可能の様です。
「猫耳少女」1単語でこのAIイラスト生成ができちゃいました
課金してwebサービスの画像生成AI使うならこれで良い様な気がしますね
みけねこまるスゴい機能だけど、パソコンのスペックが心配なのだ…
その心配は問題ないよ
パソコンの環境推奨スペック、またはオンラインサービス版
パソコンへのインストールするダウンロード版だけでなく、web上で作業が行えるオンライン版もありますよ
パソコンの環境推奨スペックは、要点を上げると以下の様な感じです
- Windows 11/10 64-bit
- Intel i3 第4世代またはAMD Ryzen 3相当以上
- ストレージ 2GB以上
- メモリ 8GB以上
- NVIDIA GTX 950またはAMD Radeon 460相当以上
※詳しくは、公式サイトの動作環境ページにて確認してください
みけねこまるパソコンのスペックを言われても、チョット分かりにくいのだ…
グラボが入っている5年以内に買ったパソコンなら、高確率で動く感じですね
生成AI機能がついているソフトでは、かなり負荷の少ない仕様ですね
その他、詳細な仕様にについては後ほど解説します
まずは、詳しく出来ることと、使い方を見ていきましょう
HitPaw FotorPeaの入手方法 インストール
HitPaw Photo AIのインストール方法について、分かりやすく説明しますね。
Windows版のインストールで手順を紹介します。
はじめに、HitPaw FotorPea公式サイトにアクセスしましょう。
サイトにアクセスしたら、「無料体験はこちら」のボタンを見つけてクリックします。
※購入を考えている人は、そのまま【購入】の方をクリックです
インストーラーファイルがダウンロードされます。
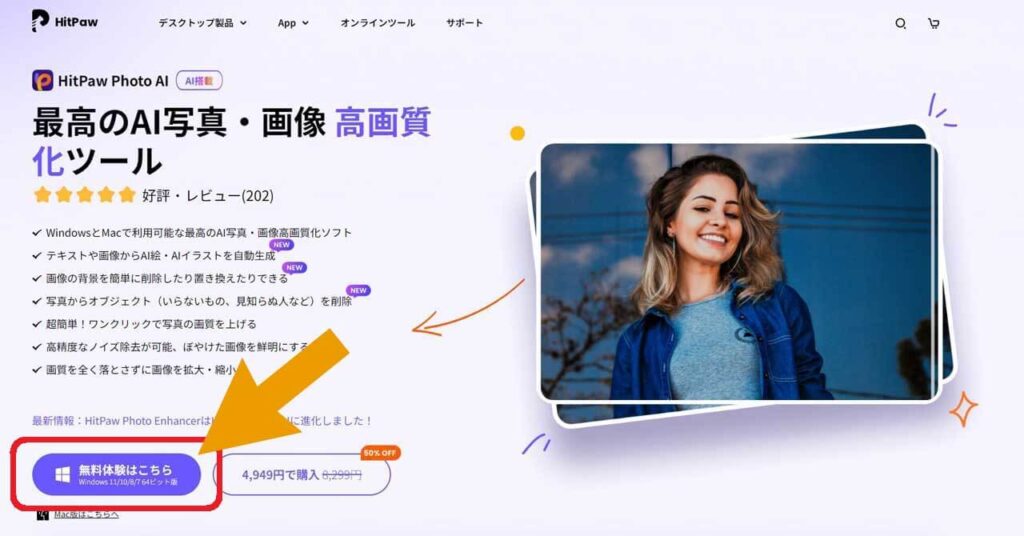
「無料体験はこちら」をクリック!
ダウンロードしたファイルをダブルクリックで起動します。
インストーラーが起動しますので、インストールをクリックします。
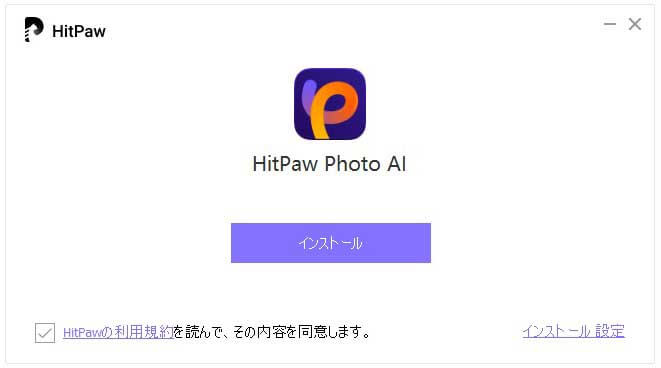
インストールが終わると、自動でHitPaw Photo AIが立ち上がります
ディスクトップにもショットカットアイコンが作られていると思いますので、次回からはそちらをダブルクリックしてね
無料体験は、これでこのまま使っていけます
HitPaw FotorPeaの入手方法 やり方
かんたんに行える基本的な使い方は、上記しましたが、ここではもう少し詳しく解説していきます
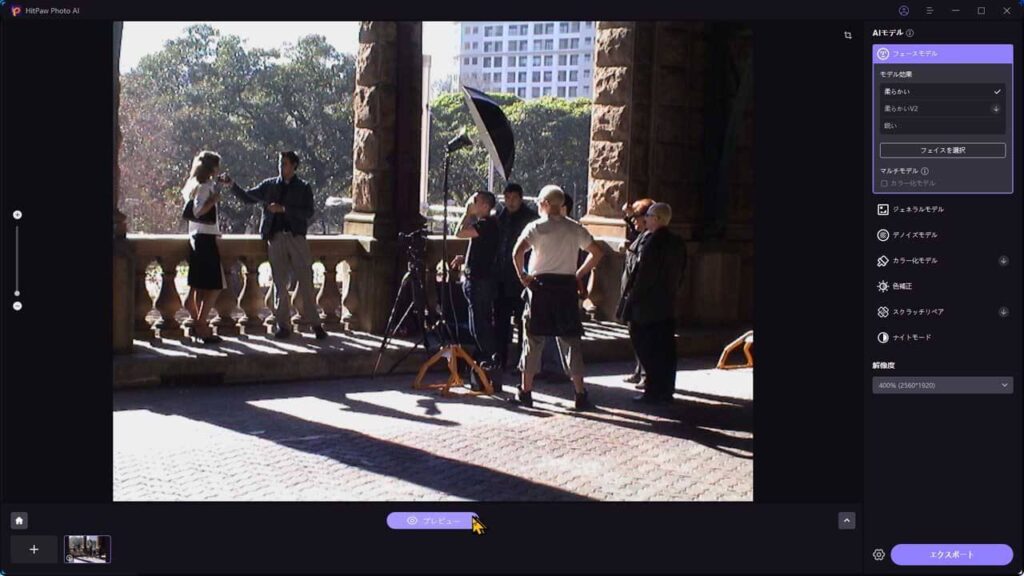
画面の右側にあるAIモデルを使用して、好みに合わせて画質を向上させることができます。
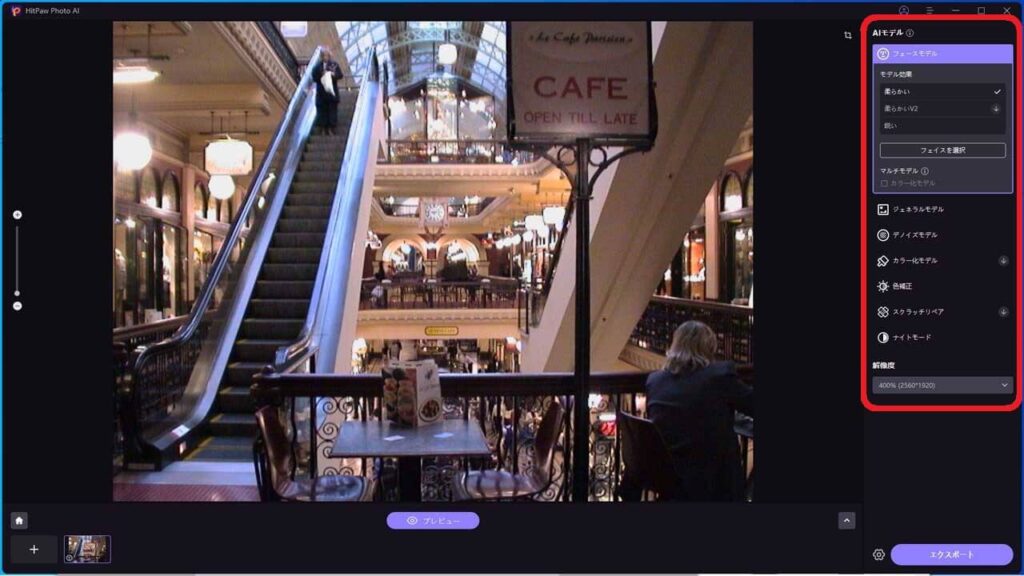
AIモデルの選択
利用可能なメニューは以下の通りです
- フェイスモデル:顔のディテールを強化するための特化モデルです。
- ジェネラルモデル:一般的な画像向けの高画質化モデルです。
- デノイズモデル:ノイズを除去し、クリアな画像を得るためのモデルです。
- カラー化モデル:色の再現性を高めるためのモデルです。
- 色補正:露出や彩色不足の画像を補修
- スクラッチリペア:傷のある写真を修復
- ナイトモード:暗い場所で撮影された写真を明るくする
これらのオプションを選択して、画像を自分の好みに合わせて調整できます。
代表的なモードを解説しますね
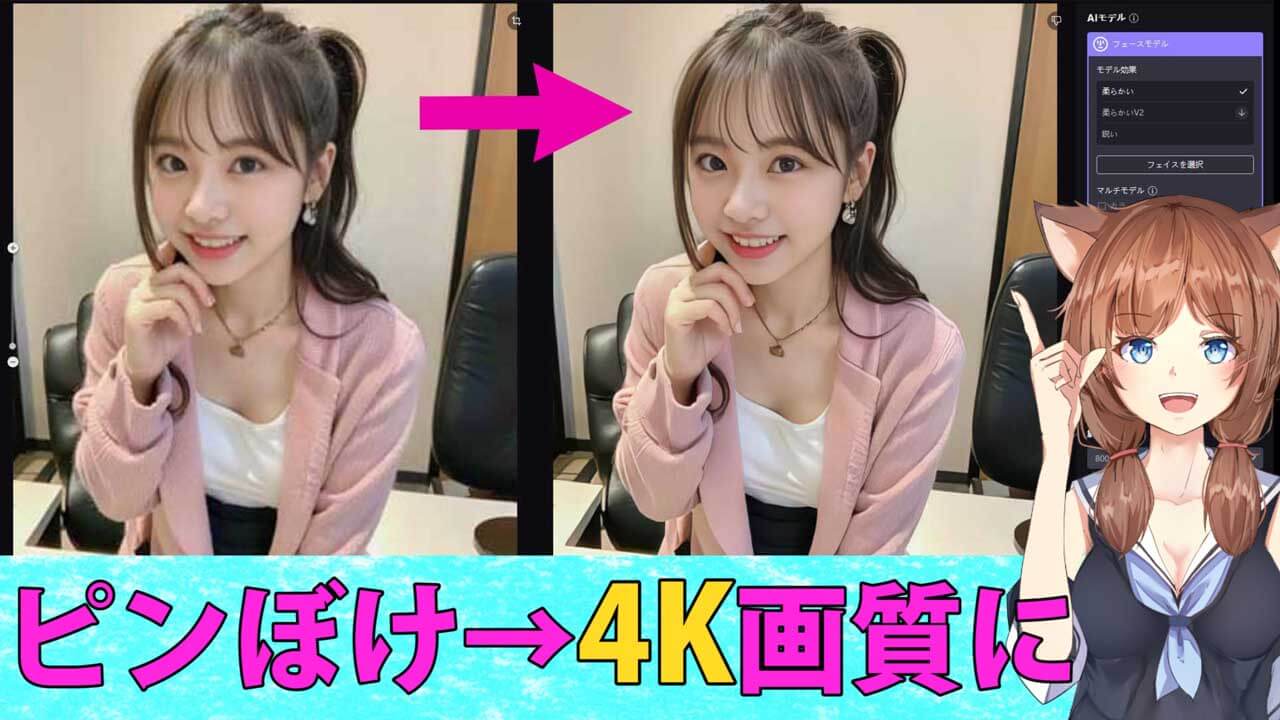
フェイスモデル
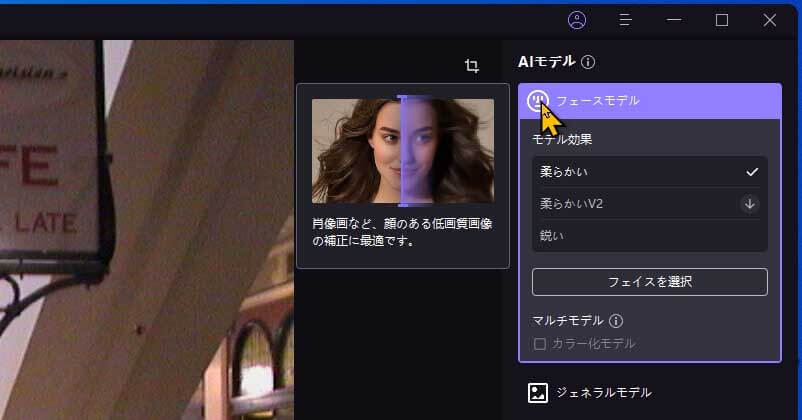
ぼやけた人物の写真や、古い写真の鮮明化してくれるモデルです
ぼやけてしまった人物の写真や、輪郭がはっきりしない古い写真をクリアにしたい時には、フェースモデルという技術がとても便利です。
この技術を使えば、ポートレート写真や年季の入った写真のぼやけを大きく改善し、写真を鮮明にすることが可能になります。
ジェネラルモデル
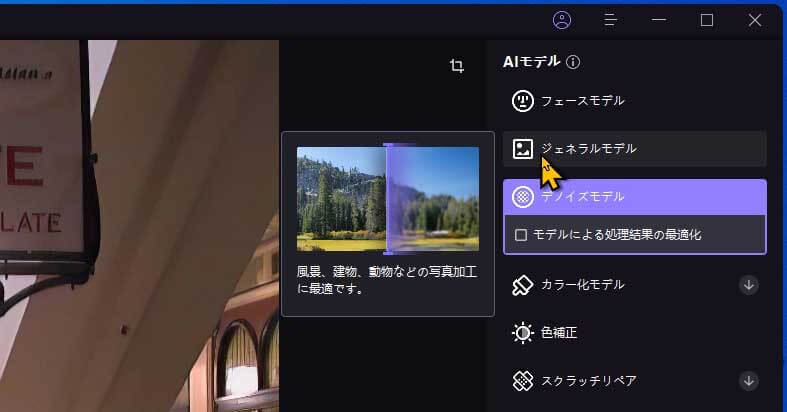
風景、建物、動物など、形や外観がはっきりしている素材を鮮明にするのに最適なモードがあります。
デノイズモデル
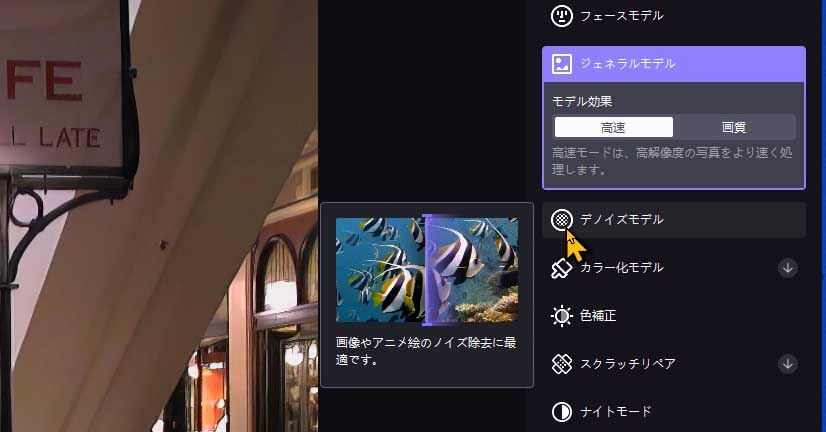
画像やアニメのノイズ除去に適したモデルです
輪郭がぼやけた画像や、一部が霞んで見える画像は、AIより自動補正されで鮮明さを回復させます。
カラー化モデル
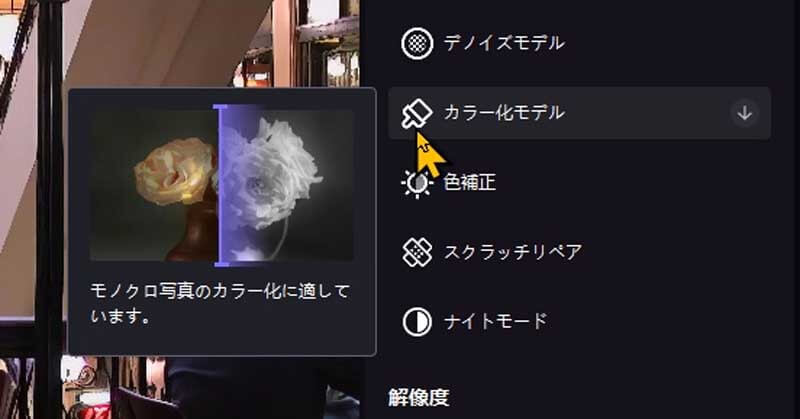
モノクロ写真のカラー化に適したモデルです
画像のぼやけた輪郭や、色が薄くなっている部分などの問題は、AI(人工知能)技術を使って改善することができます。
AIは、たくさんのデータを分析して、これらの問題を最適な方法で修正します。
画像はもとの明瞭さを取り戻すことができます。
※全てのAIモデルは別記事にて解説してます
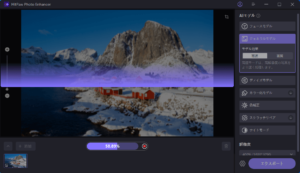
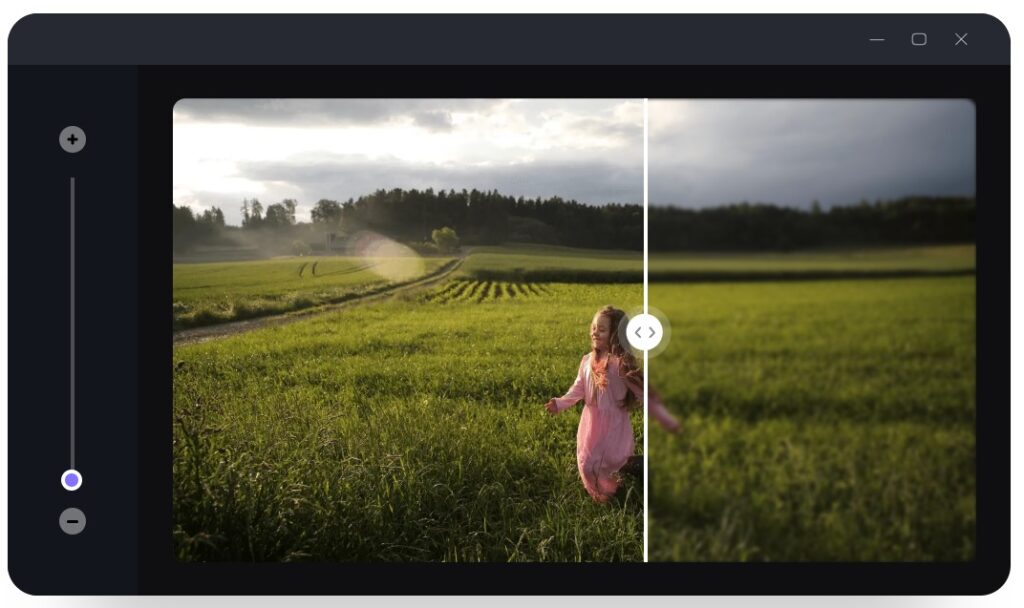
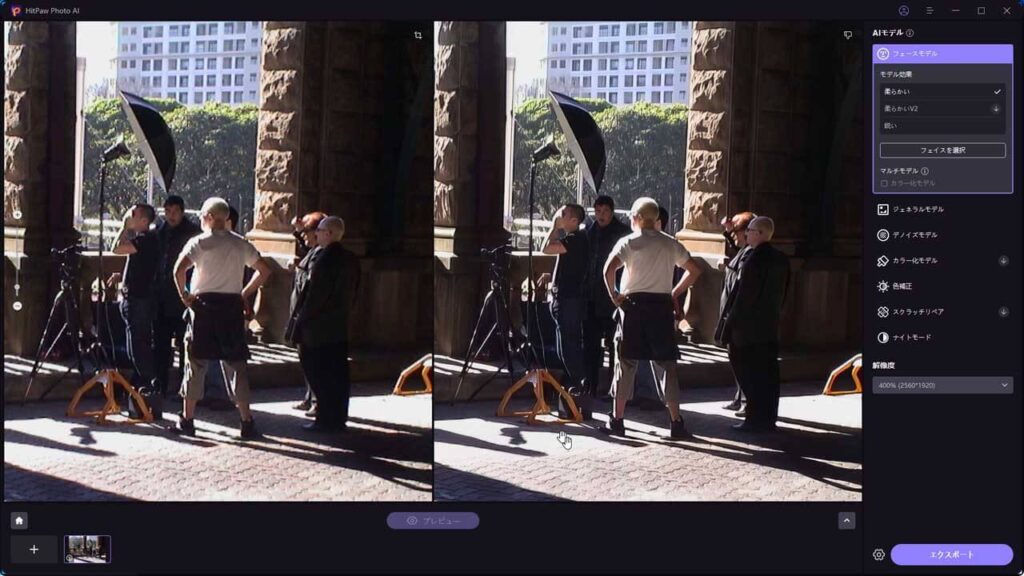
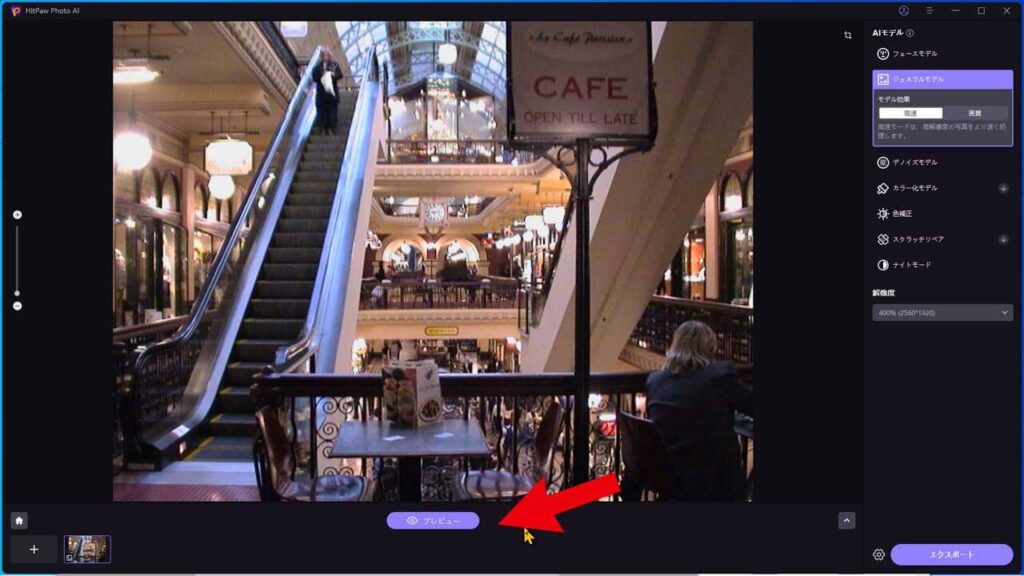
プレビュー
補正したい画像ファイルを読み込み、AIモデルを選択したら、プレビューをクリックしましょう
 みけねこまる
キレイにプレビューされたのだ
くっきり、はっきり透明感が出ましたね

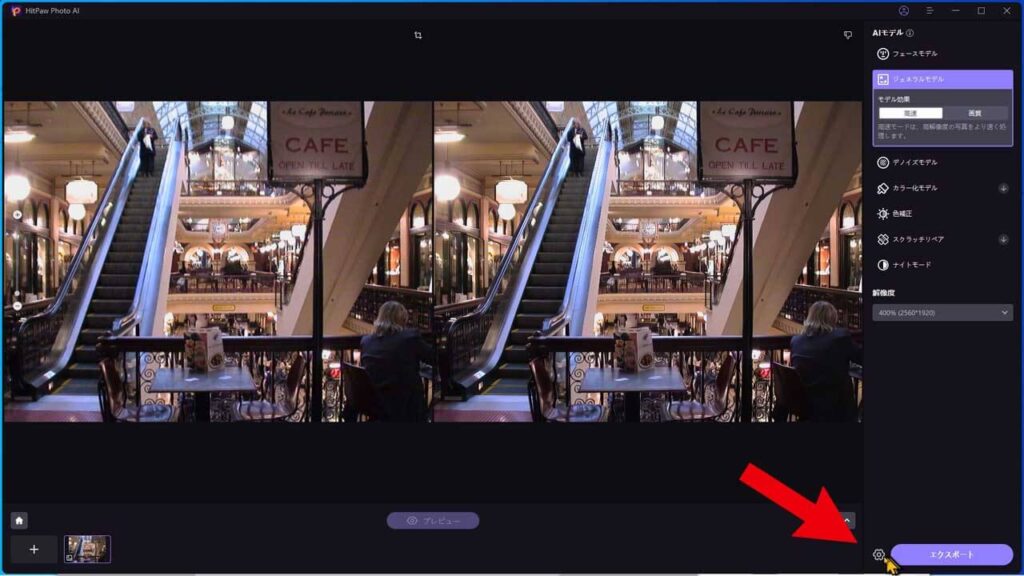
出力の設定
このまま出力・エクスポートすることができますが、保存場所などを指定しておいた方が分かりやすいので、設定しておきましょう
画面右下の歯車マークをクリックしてください
コチラのウインドウが開きます
パフォーマンスや、保存オプションを設定することができます

今回は出力先だけを変えておきますね
保存先のプルダウンメニューから、参照をクリックすると好きな場所に出力できます
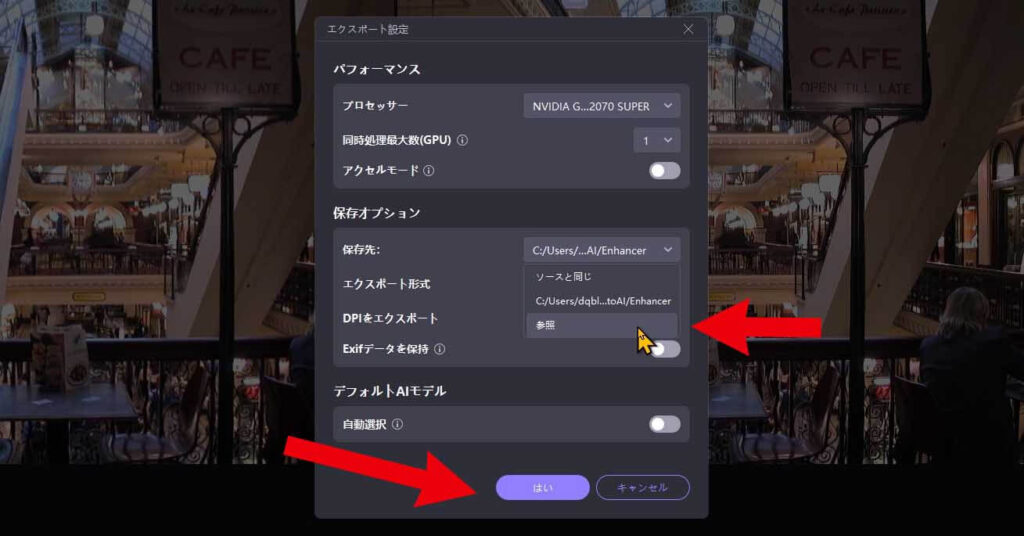
変更後は【はい】をクリックすれば設定保存されます
出力・エクスポート
最後に出力します
画面右下にある【エクスポート】をクリックしてね
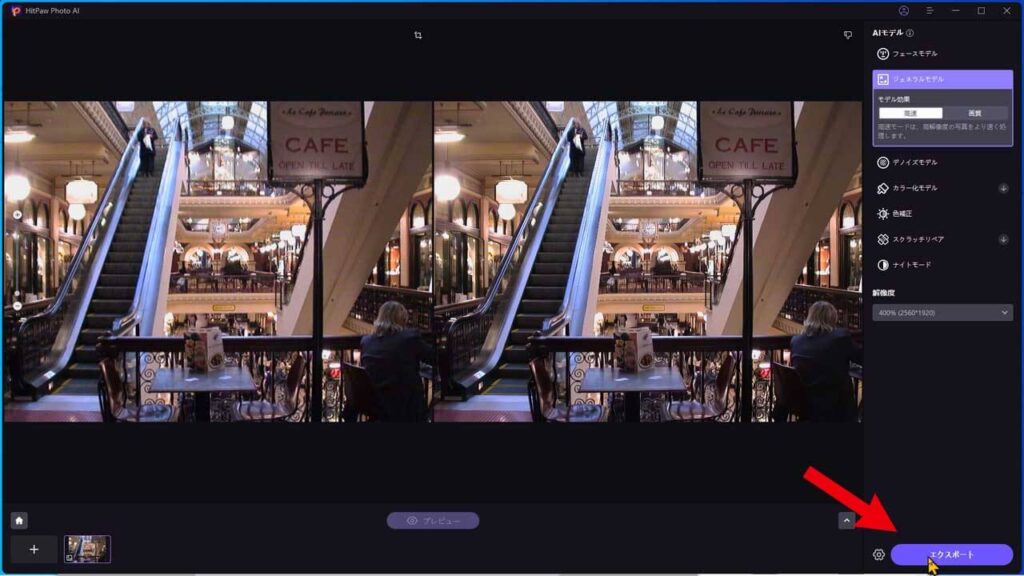
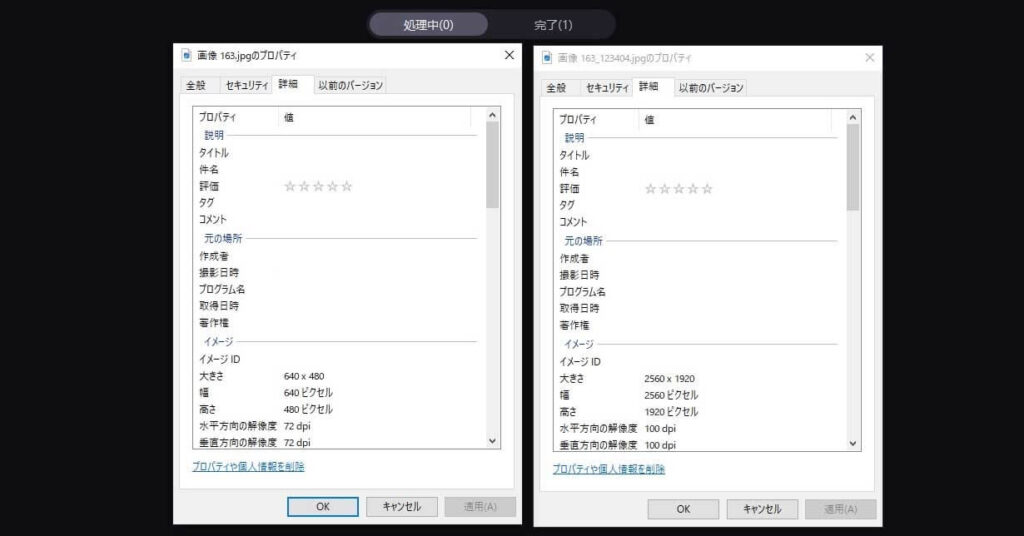
画質も綺麗になりましたが、解像度がかなり上がっていますね
HitPaw FotorPea 評価・評判
HitPaw FotorPeaはAIを搭載しており、画質が低い写真や画像を驚くほど鮮明にしてくれます。
操作は非常に簡単で、初心者でもすぐに使いこなせるのが魅力的です。
解像度を上げるだけでなく、さまざまな補正をすることも可能です。
特に、ぼやけた写真や傷ついた古い写真、ピントが合っていない写真がある方には、このソフトは非常に有用です。
画面上のノイズやボケた輪郭線が鮮明な画像に修正されると、画像のクオリティが劇的に向上し、まるで新しい写真のようになります。
また、モノクロ写真をカラー化する機能は、写真に新たな生命を吹き込み、リアリティと説得力を大幅に高めてくれます。
無料版で試すことができるので、気軽に高画質化の体験ができますね
HitPaw FotorPeaは以前から評判が良く世界で600万人が使った、HitPaw Photo Enhancerがリニューアルした新しいバージョンです
HitPaw FotorPeaは、古い写真の思い出を蘇らせたり、曖昧な画像を鮮明にしたい方に特におすすめです。
HitPaw FotorPeaの詳細な仕様
製品概要
HitPaw FotorPeaは、HitPaw社が手掛ける写真・画像を高画質化するソフトウェアです。
対応する画像フォーマット
入力可能な画像フォーマット
*.png *.jpg *.jpeg *.WebP *.tif *.tga *.bmp *.jfif
出力可能な画像フォーマット
*.png *.jpg *.jpeg *.WebP *.tif *.tga *.bmp *.jfif
製品に関する詳細は、公式サイトでも確認できます。
ライセンスについて
HitPaw FotorPeaには、無料版・有料サブスク版・買い切り版(永久ライセンス)があります。
無料版は有料版と比べて変換後の画像の出力(エクスポート)ができません。
無料版では全く出力できないのは淋しいところですが、無料版で試して良ければ有料版のライセンスを購入してもいいですね
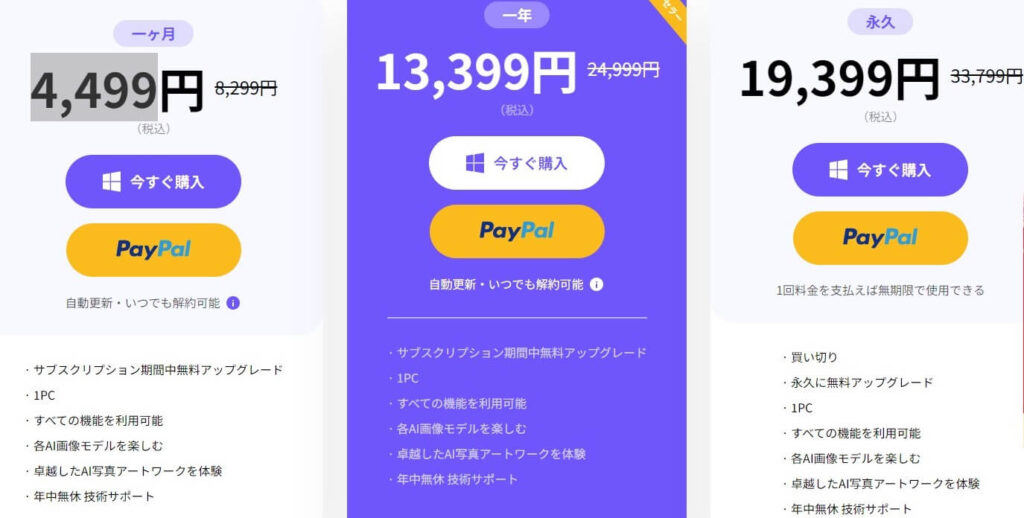
有料版のライセンスには、以下の3種類が用意されています。
- ・一ヶ月ライセンス(1ヶ月間利用可能)
- ・一年ライセンス(1年間利用可能)
- ・永久ライセンス(事実上の買い切り版)
※Windows版とMac版で価格は異なりますので、料金の違いは、HitPaw FotorPea公式サイトでご確認お願いします
サブスクが嫌いな人もいるので、永久ライセンス(買い切り版)があるのがいいですよね
回きりでも無償アップデートが付いている所もステキね
実際の価格は、変動もあるかもしれないので下記の公式サイトで確認してください。
HitPaw FotorPea製品ページ
https://www.hitpaw.jp/photo-enhancer.html
因みに、動画版もありますよ
アカウント登録・ライセンス取得・購入について
HitPaw FotorPeaのアカウントの登録・ライセンス取得と、購入するする方法を説明します。
まず、トップ画面の右上にある人型アイコンをクリックします。
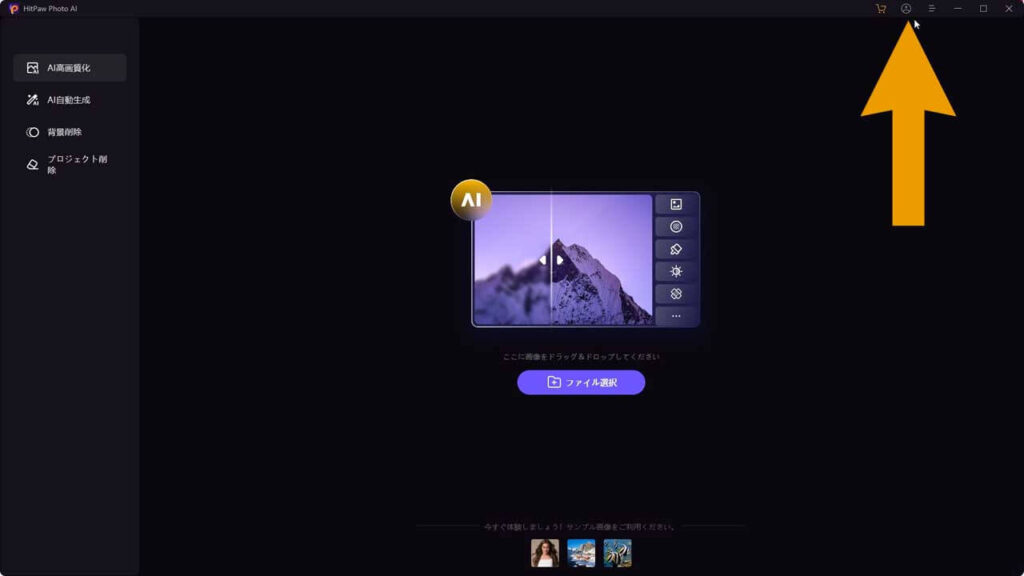
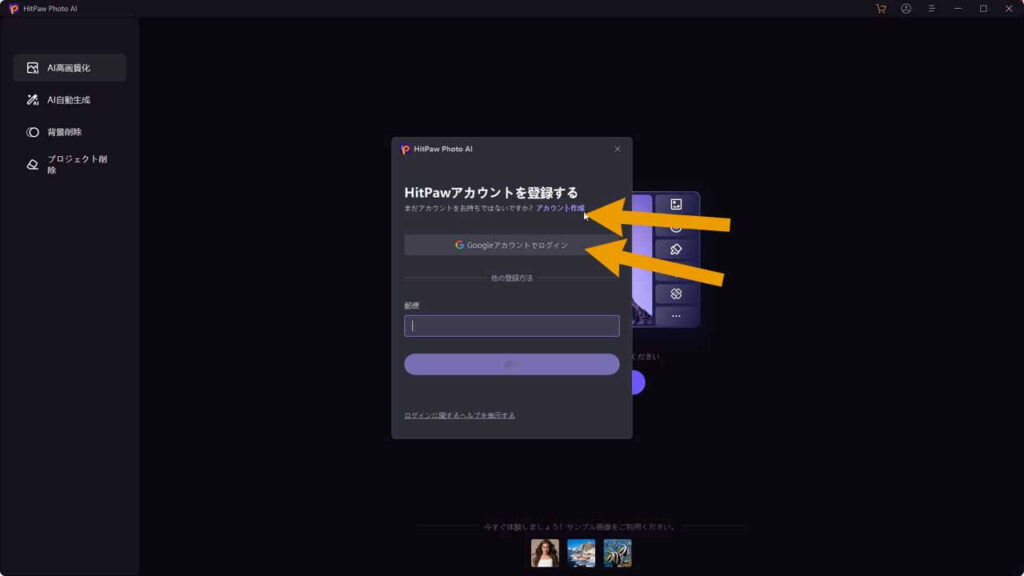
HitPawアカウントを登録するの画面が開きますので、メールアドレスで登録するか、Googleアカウントでログインしてください
アカウントをすで取得している場合、表示された画面で「メールアドレス」と「パスワード」を入力します。
チョット文字化けしていますが、「郵便」となっている所に、登録したいメールアドレスを記入
登録したいパスワードを、パスワード欄に先に入力してください
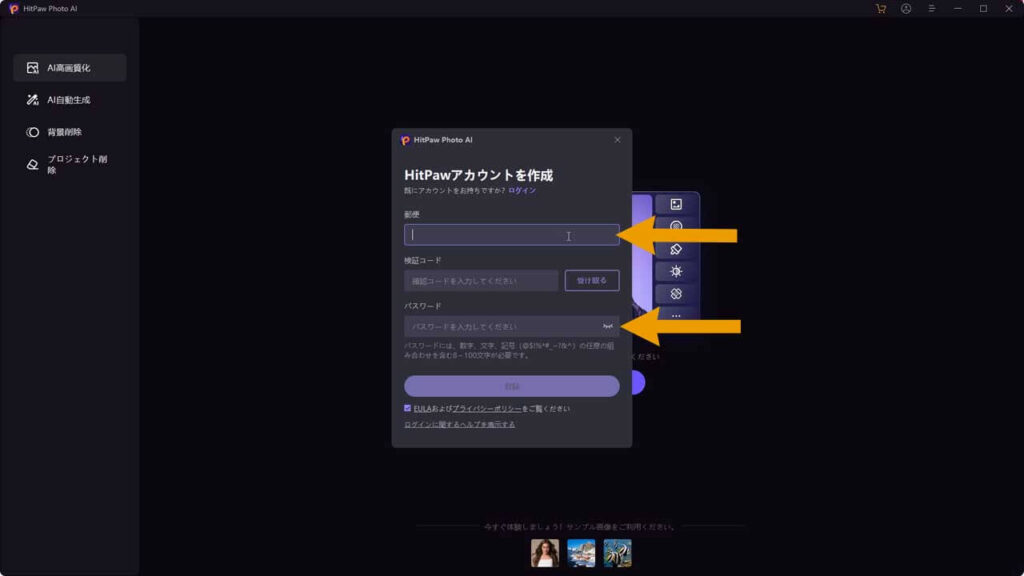
次に、承認コードのところに、【受け取る】ボタンがありますので、クリックしてください
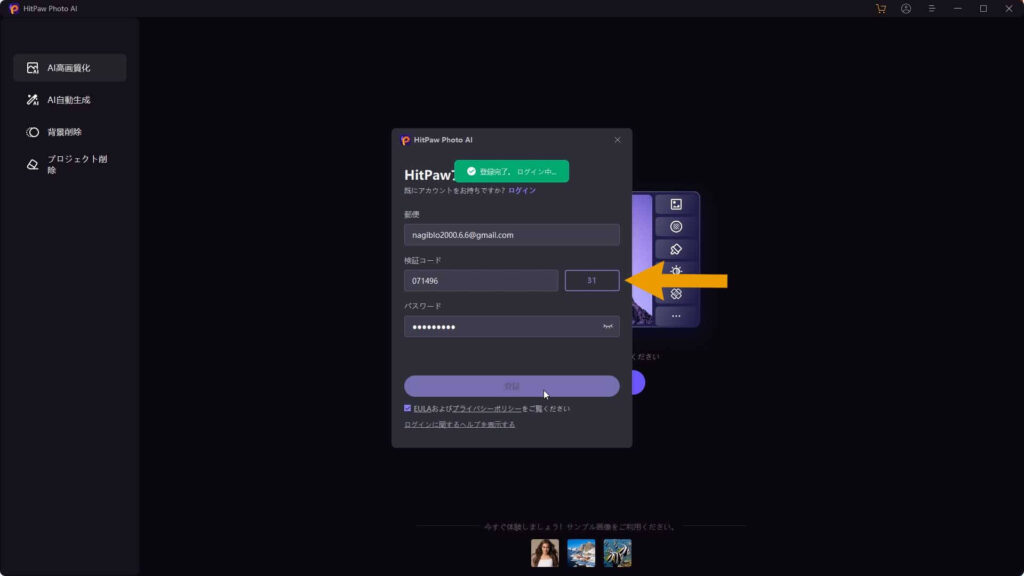
承認コードがメールアドレスに届きますので入力しましょう
みけねこまるボタンを押して、60秒しかないのでチョット忙しいのだ
承認コードを入力すると、登録ボタンが明るくなるので、承認コードのカウントが終わるまでに、登録ボタンをおしましょう
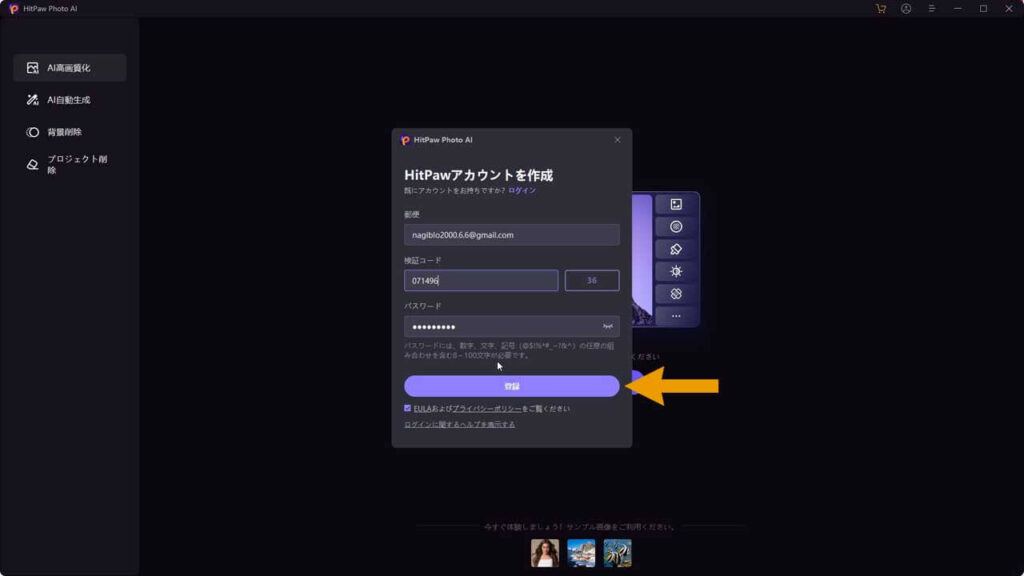
これで、HitPaw FotorPeaのアカウント登録ができました
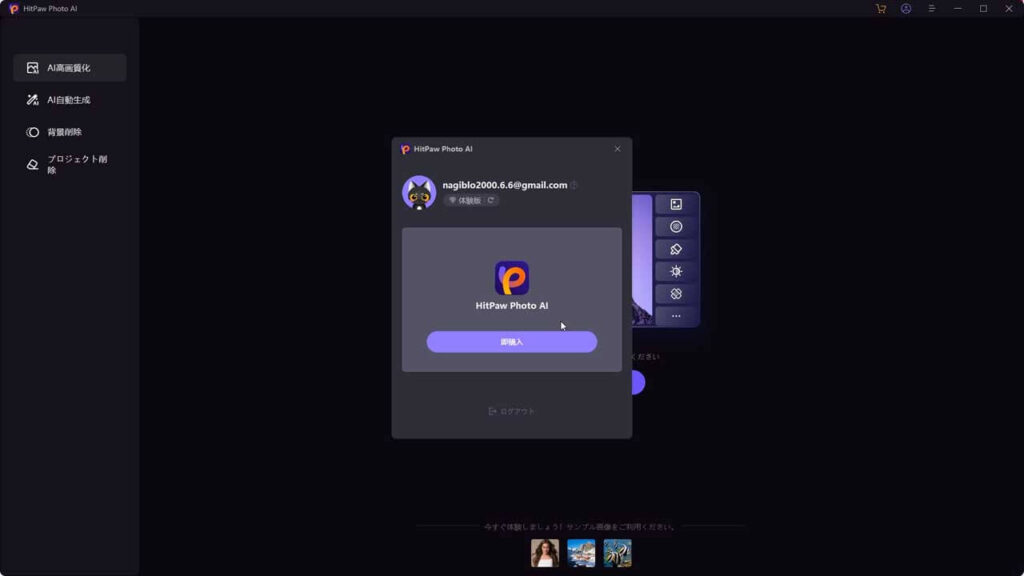
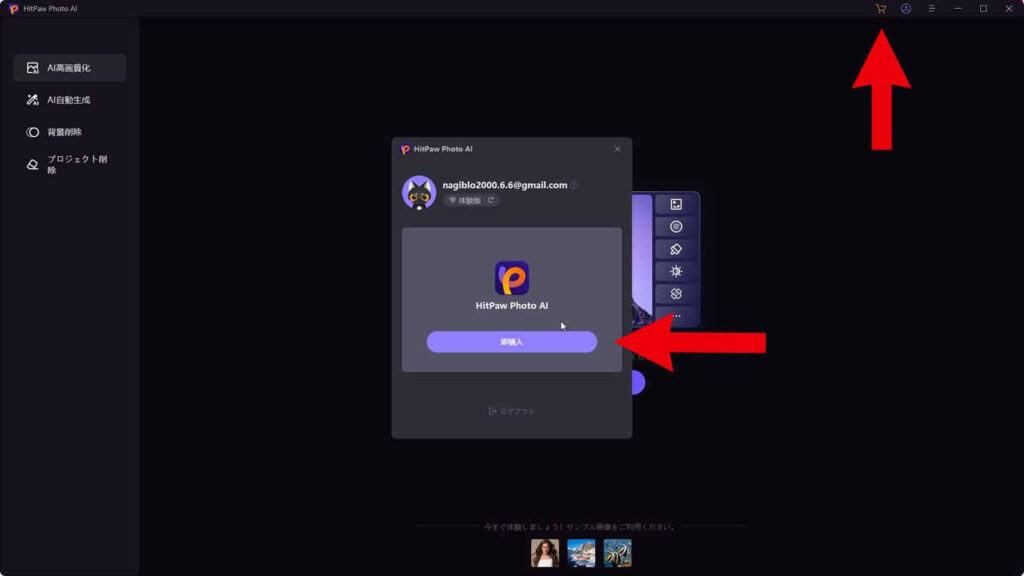
無料版で試す方は必要ありませんが、エクスポート(出力)には、サブスク版か、買い切り版(永久ライセンス)に申し込む必要があります
新しく開いたウインドウの【即購入ボタン】もしくは、上のカートのアイコンから申し込みができます
\ 体験版で試してみる /