
今日は、SWELLのカスタマイズ サイト全体設定にあるタイトルデザインの各種設定を解説していきます
と、いっても、この項目は選択するだけなんですが、SWELLを購入するか迷われている方や、既にお使いの方にもどこをどんなに変えられるのか、設定できるデザインも含めてご紹介していきます

コチラの記事では、SWELLで設定できる各タイトルの場所と、デザインの種類 設定方法が分かります
紹介する項目は次の通りです
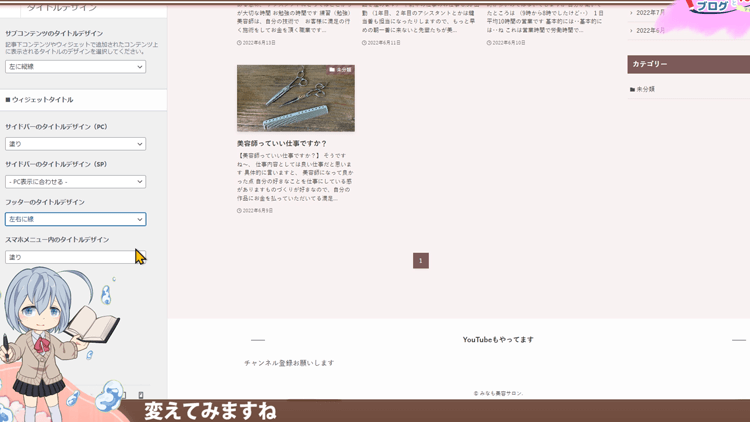
- サブコンテンツのタイトルデザイン
- サイドバーのタイトルデザイン(パソコン画面向け)
- サイドバーのタイトルデザイン(スマホ向け)
- フッターのタイトルデザイン
- スマホメニュー内のタイトルデザイン
【SWELLカスタマイズ】サイト全体設定/タイトルデザイン
さっそくですが、SWELLで設定できるタイトルの全てのデザインを実演設定しながらご紹介していきます
まずは、サブコンテンツのタイトルデザインですが、こちらは記事ページの本文下に表示される「この記事を書いた人」や「関連記事」などのエリアのタイトルのことです
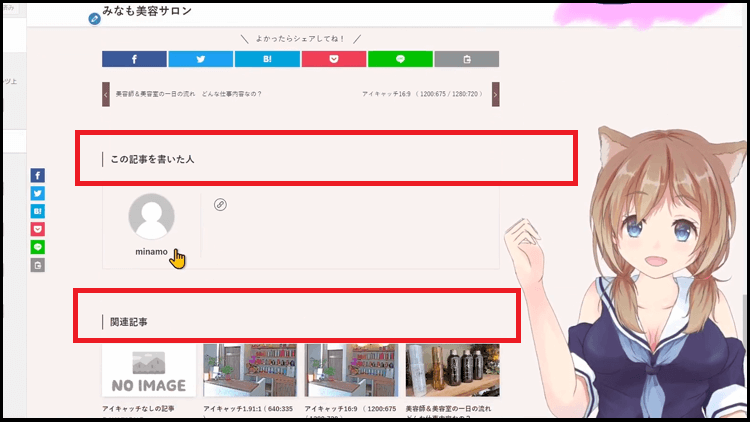
こちらですね。このデザインを変えることが出来ます
また、メインコンテンツ内に挿入されるウィジェットのタイトルのことを指しています。

どういうこと?
こちらはですね、どういうことかといいますと、すべての記事の記事上部や記事下に設置する機能をウィジェットの方で設定できるんです。
コチラを設定しますと、この様にタイトルがつきますので、このデザインを設定することが出来ます
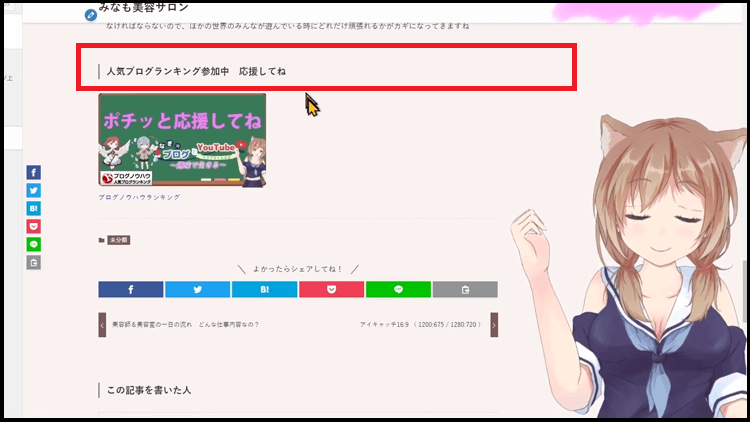
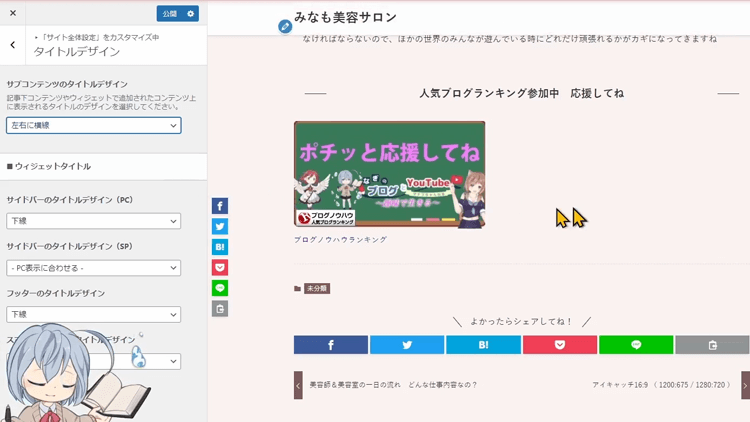
サブコンテンツのタイトルデザイン
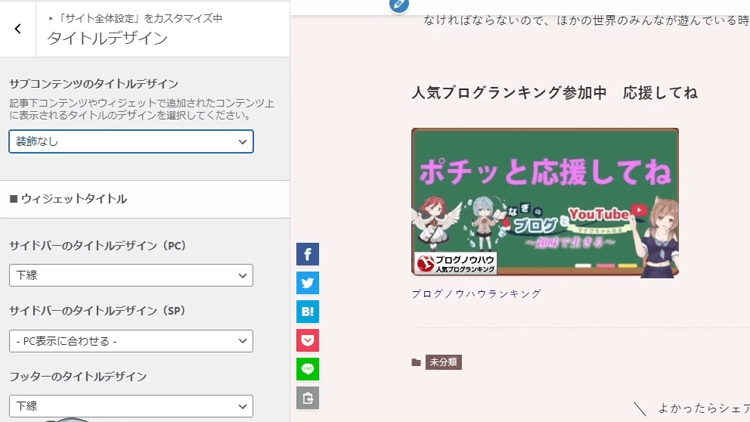
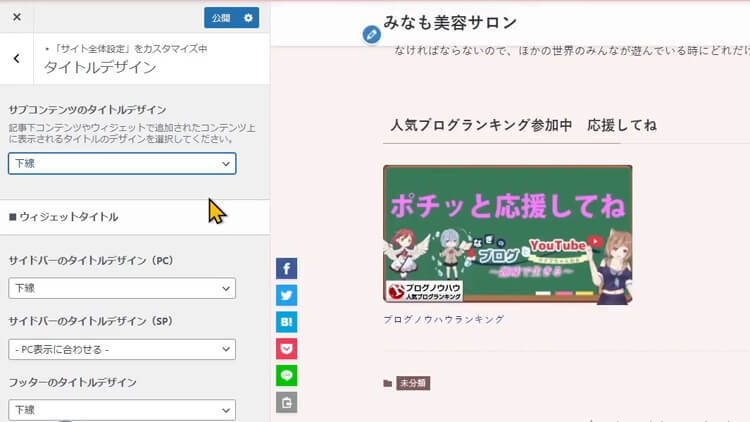
サブコンテンツのタイトルデザインは、こちらで4つのタイプの中から選ぶことが出来ます
4つのデザインを表示してみますね
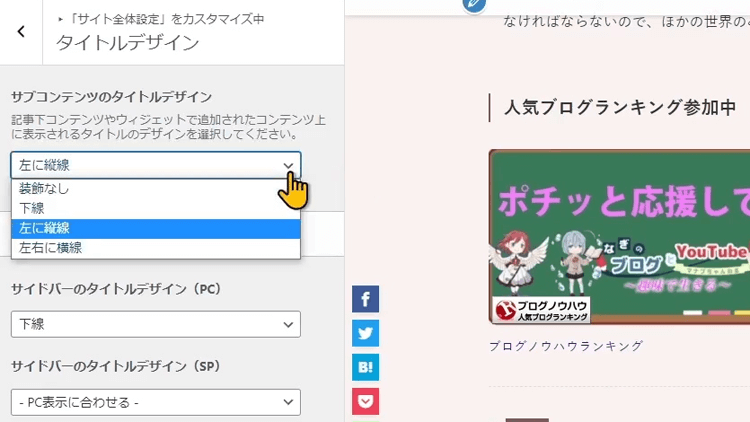
デフォルトは左に縦線になってると思います。装飾なしにしてみます。
装飾が消えたね
次は下線にします
せんが入りましたね
つぎは、左右に横線にしてみます
左右の両サイドに部分的に線が入ったね
このような感じです
ウィジェットタイトル
次は、ウィジェットタイトルの項目を実演解説していきますね
サイドバーのタイトルデザイン(PC)
まずは、サイドバーのタイトルデザイン(PC)です
こちらも4種類のデザインが用意されていますね
デフォルトは下線に設定されていますが、他にサブコンテンツのタイトルデザインの所でご紹介したと同じ、デザインの左に縦線 左右に横線
そして塗りの4つのデザインになります
この様に、タイトルの背景が塗りになりまして、文字が白に反転します
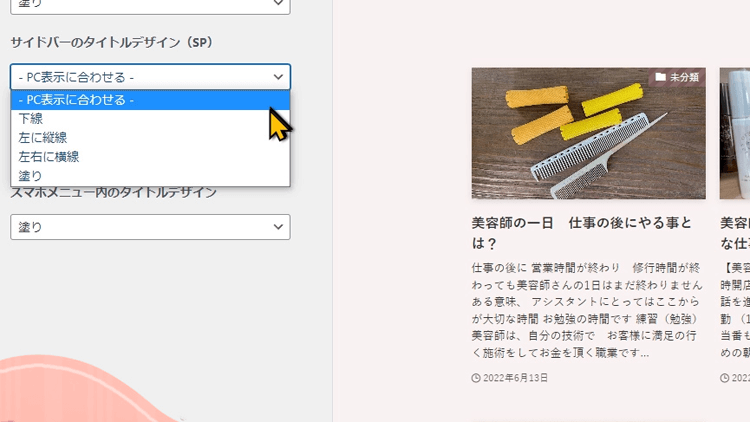
サイドバーのタイトルデザイン(SP)
パソコン画面用と、別のデザインでスマホ用にも設定しておけます
パソコンと同じ表示で良ければ、PC表示に合わせるのままにしてください
スマホ用デザインを変えたい場合は、こちらもサイドバーのタイトルデザイン(PC)の所で設定できる4種類を用意してありますので、好きなデザインをえらんでみてください
下線 左に縦線 左右に横線 塗りと、なります
フッターのタイトルデザイン
つぎは、フッターのタイトルデザインを実演解説します
フッターは、WordPressの一番下のエリアになりますね
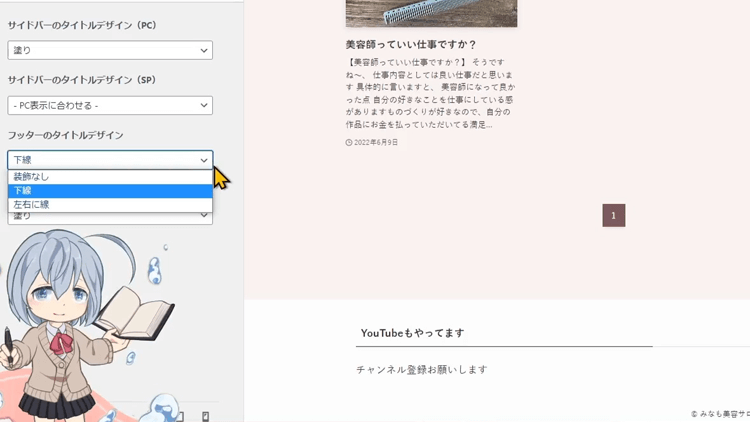
フッターのエリアのタイトルのデザインを変えることが出来ます
デフォルトでは下線になっていますが、そのほかにもう1つ左右に線のデザインが用意されています
このような感じになります
機能面ではウィジェットの方で設定していきます。ウィジェットの方は、詳しくは後々、専門の記事を書きますが、こちらの画面で、各パートに追加項目を付けて行けます。

いまいちよく分からない…
どういうことかと言いますと、SWELL公式ページのフッターでご紹介します

この様に追加項目を表示できるようになります
軽く設定方法をお話しますと、例えばカテゴリーを選びますと、プルダウンして選択できる項目が現れますので、設置したい場所、今回はフッターなのでフッターを選択します。そしてウィジェットを追加をクリック。
そうしますとフッター(PC)1の所にカテゴリーを編集できる項目が出来ます
必要項目を入力して、保存します。
後ほど、ウィジェット専門の解説動画の方を出させて頂きますので、ブックマークか、チャンネル登録してお待ちいただけると嬉しいです
スマホメニュー内のタイトルデザイン
では、つぎですね
スマホメニュー内のタイトルデザインのほうですね
そもそもの、スマホメニューってなにかな?
スマホで見た時に、上の方に表示されている、こちらの横三本線の所をクリックしますと、表示されるメニューですね
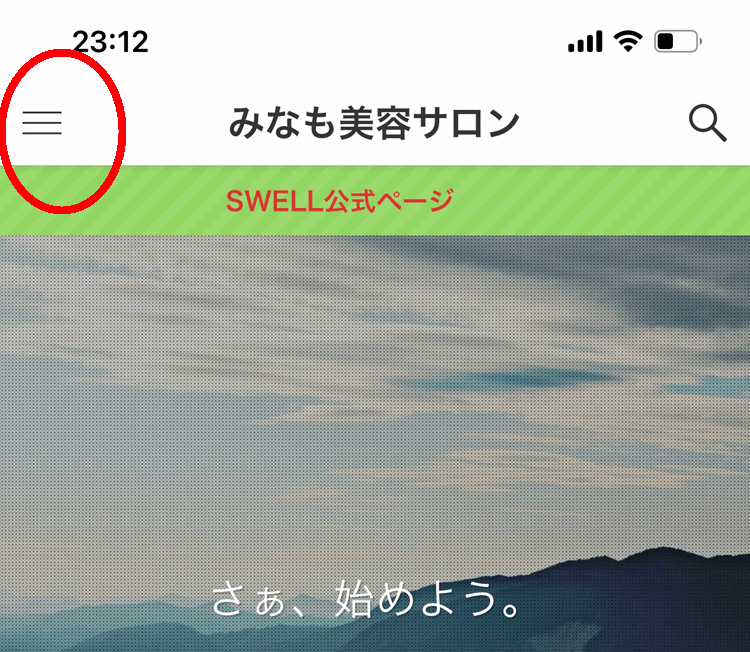
こちらのデザインを設定することが出来ます。

こちらも、これまでと同じように、下線 左に縦線 左右に横線 塗りの、4つのデザインが用意されています
全ての設定が終わりましたら、カスタマイズを離れる前に、公開をしておきましょう

アップデートで変更になる場所や、最新の詳細の情報などは、動画説明欄にSWELL公式サイトのリンクがありますので参考にしてくださいね
【SWELL】公式ページのコンテンツヘッダーに関する記事今日は、タイトルデザインの設定とデザインの種類でした
次回は、SWELLらしいトップページのデザインを作れるコンテンツヘッダーについて解説予定です
他にも、SWELLのカスタマイズに興味ある方は、コチラの記事も読んでもらえると嬉しいです
【SWELLカスタマイズ】
サイト全体設定
【動画】サイト全体設定/タイトルデザイン
現在、SWELLを中心にWordPressに関した動画を上げています。SWELLの使い方に迷った時には、辞書の様に使えるYouTubeチャンネルを作っています
興味ありましたら、チャンネル登録 高評価して頂けると嬉しいです
見てもらえる人が増えると、動画制作のモチベーションが上がります
最後まで見て頂きまして、ありがとうございました