![](https://nagi.blog/wp-content/uploads/2022/03/e83fa52eac00d47020c79e84425066c0-150x150.jpg)
今日は、SWELLのカスタマイズ サイト全体設定にあるコンテンツヘッダーの各種設定を解説していきます
![](https://nagi.blog/wp-content/uploads/2022/03/49ef664720433fb37002b605195c5e9b-150x150.png)
コンテンツヘッダーって何かな?
![](https://nagi.blog/wp-content/uploads/2022/03/e83fa52eac00d47020c79e84425066c0-150x150.jpg)
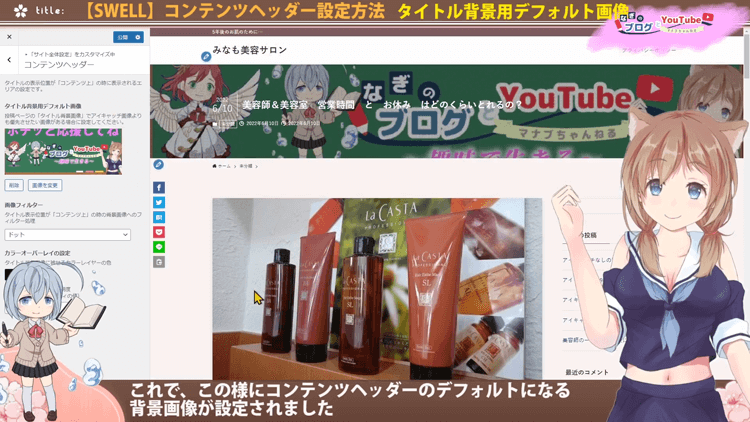
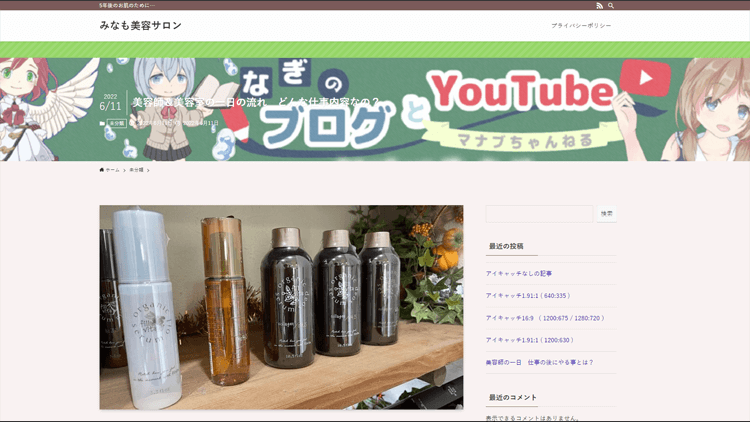
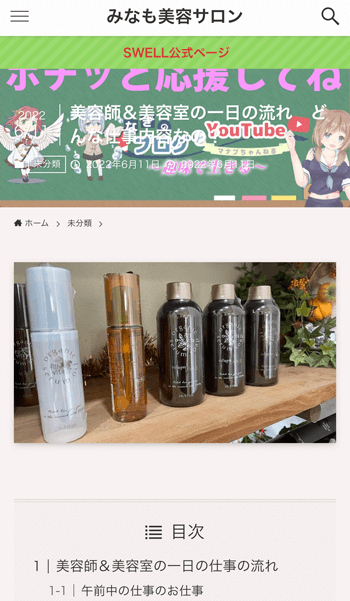
コンテンツヘッダーは、言葉で説明するより画像見た方が早いので、違いを表示します
![](https://nagi.blog/wp-content/uploads/2022/08/6c18873bf04707bf571753ed26a18c12.png)
![](https://nagi.blog/wp-content/uploads/2022/08/d5bdef8bcbc522ac7874945878c8bfa0.png)
![](https://nagi.blog/wp-content/uploads/2022/03/49ef664720433fb37002b605195c5e9b-150x150.png)
記事タイトルが上に独立した位置にいって、背景が画像に変わったね
そうだね、画像が独立したのは、他の設定も含めての事なんだけど、コンテンツヘッダーの設定は記事タイトルなどの背景の場所の設定となります
![](https://nagi.blog/wp-content/uploads/2022/03/975429aa9a80f4f9bc5ca68a5e46d0cf-150x150.png)
この記事を読むと、このコンテンツヘッダーに関する設定や、コンテンツヘッダーに使う画像のサイズ 縦横比率 どんな画像が良いのかについて理解できます
![](https://nagi.blog/wp-content/uploads/2022/03/975429aa9a80f4f9bc5ca68a5e46d0cf-150x150.png)
紹介する項目は次の通りです
【コンテンツヘッダー】
- タイトル背景用デフォルト画像
- 画像フィルター
- カラーオーバーレイの設定
- 画像のサイズ 縦横比率 どんな画像が良いのか?
コンテンツヘッダーに関連するSWELL公式ページや、アップデートで変更になる場合や、最新の詳細の情報などは、SWELL公式サイト/カスタマイズのリンクがありますので参考にしてくださいね
【SWELL】公式ページ|デザイン・レイアウト【SWELL】コンテンツヘッダー設定方法
![](https://nagi.blog/wp-content/uploads/2022/03/e83fa52eac00d47020c79e84425066c0-150x150.jpg)
では、コンテンツヘッダーの設定を実演解説していきますね
![](https://nagi.blog/wp-content/uploads/2022/03/e83fa52eac00d47020c79e84425066c0-150x150.jpg)
その前に、このまま設定を進めてもコンテンツヘッダーは表示されません
![](https://nagi.blog/wp-content/uploads/2022/03/49ef664720433fb37002b605195c5e9b-150x150.png)
どういうこと?
コンテンツヘッダーの設定をする前に‥やる設定
まず、コチラを見てほしいのですが
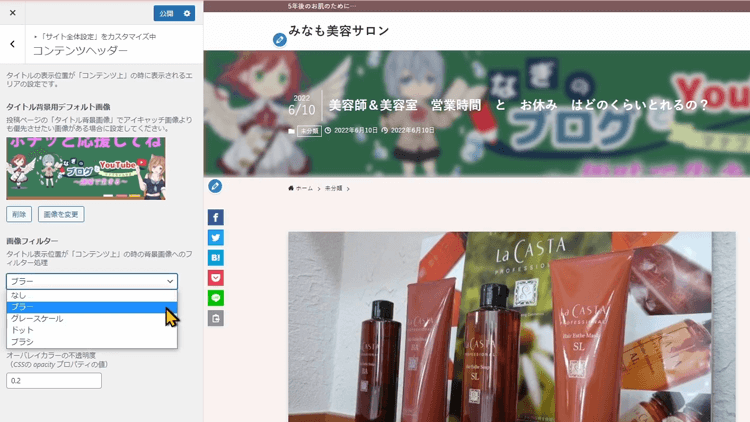
【タイトルの表示位置が「コンテンツ上」の時に表示されるエリアの設定です。】
となっています
![](https://nagi.blog/wp-content/uploads/2022/08/8152220a064df32a6142a0d27cd4eed0.jpg)
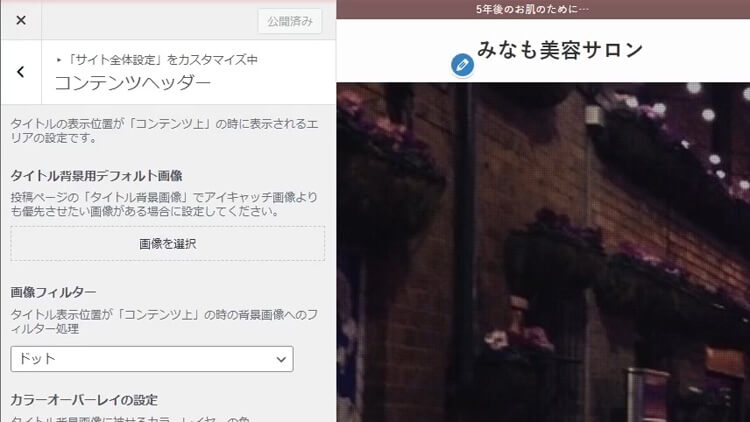
どういうことかといいますと、このデフォルト設定のまま、コンテンツヘッダーの画像を選んでも、この様に変化が起きません
![](https://nagi.blog/wp-content/uploads/2022/08/f4441c7e67dc3e0ab0fdbc14c139fac4.png)
なので、タイトルの表示位置を変える設定をします
![](https://nagi.blog/wp-content/uploads/2022/03/49ef664720433fb37002b605195c5e9b-150x150.png)
あ、冒頭で言ってた、「記事タイトルと背景画像が独立した位置になったのは他の設定」って言ってた事ね
![](https://nagi.blog/wp-content/uploads/2022/03/e83fa52eac00d47020c79e84425066c0-150x150.jpg)
そうそう、記事内に、記事タイトルを表示してると、コンテンツヘッダー画像は見えないのよ
「コンテンツ上」にする設定は、カスタマイズから設定できまして、投稿 固定ページをクリックしますと、タイトルがありますので、コチラをクリックしてください
![](https://nagi.blog/wp-content/uploads/2022/08/b5552d103b8db9e83c7f033dc5f24ffe.png)
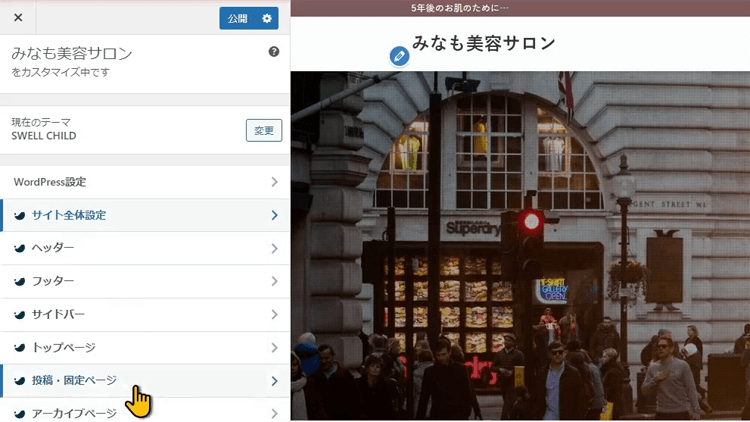
投稿ページ 固定ページごとに設定できます。
タイトルの表示位置の項目の所で、コンテンツ内になっているものを、コンテンツ上にかえましょう
![](https://nagi.blog/wp-content/uploads/2022/08/53ad56f7a4e6106fe950c2519431d3cc.png)
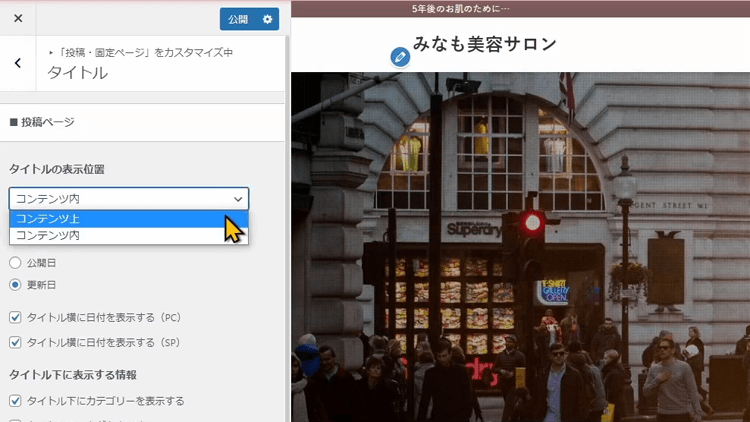
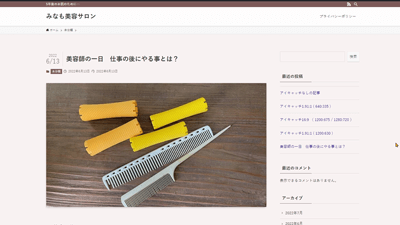
そうしますと、記事タイトルが上に独立する形になります。コンテンツヘッダー画像をなどを設定していなければ、アイキャッチ画像の一部がコンテンツヘッダーの背景になります
では、さきほどのコンテンツヘッダーの設定の場所に戻ります
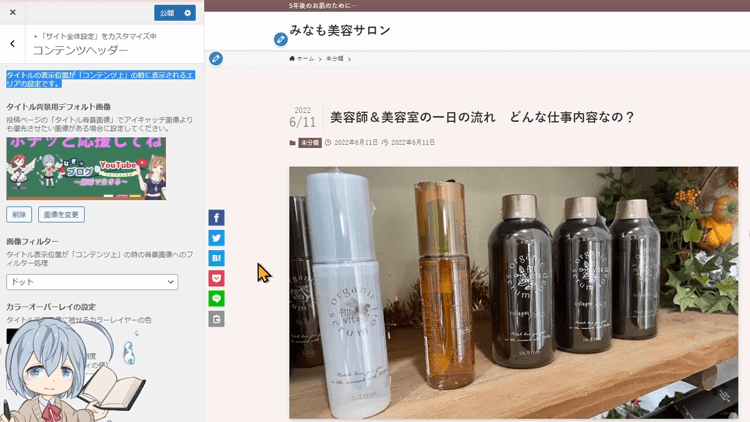
タイトル背景用デフォルト画像
タイトル背景用デフォルト画像の項目に画像を選択という所があるので、表示させたい画像を選択してみてください
![](https://nagi.blog/wp-content/uploads/2022/08/9266f73b4f32f7f75b422b7e41afc00f.png)
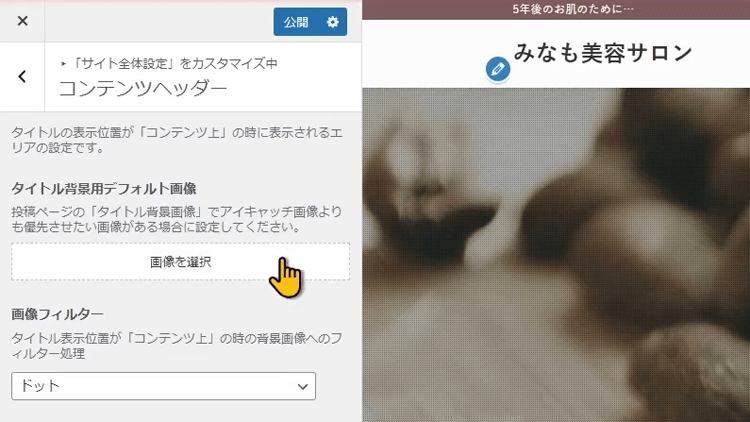
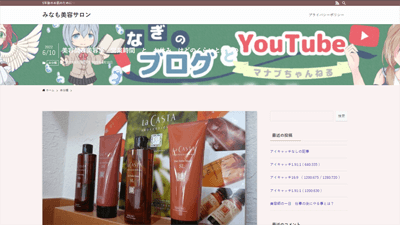
これで、この様にコンテンツヘッダーのデフォルトになる背景画像が設定されました
![](https://nagi.blog/wp-content/uploads/2022/08/325d84e85b628931cc9980c6e83e3a24.png)
![](https://nagi.blog/wp-content/uploads/2022/03/e83fa52eac00d47020c79e84425066c0-150x150.jpg)
因みに、各記事別にコンテンツヘッダーを設定する事も可能です
それぞれの記事の右側にある 設定項目の中にタイトルの背景画像という項目があります
![](https://nagi.blog/wp-content/uploads/2022/08/f87fa653a32a3b462dfb2432ded13866.png)
![](https://nagi.blog/wp-content/uploads/2022/03/e83fa52eac00d47020c79e84425066c0-150x150.jpg)
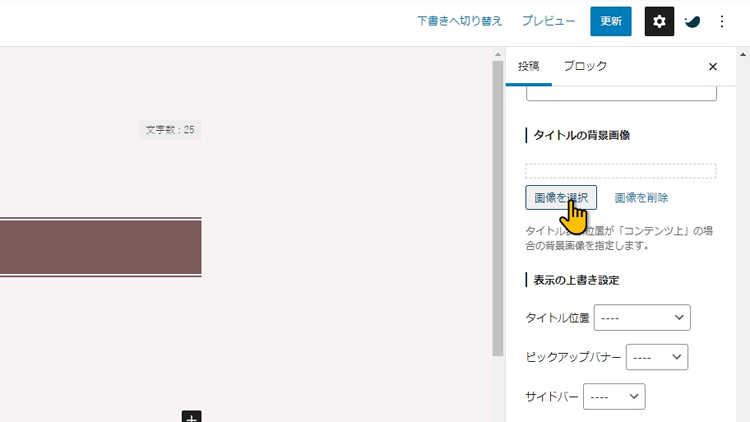
こちらの項目で設定すると、記事毎にコンテンツヘッダーの背景画像を設定することが出来ます
他の記事にいくと、先ほど選んだコンテンツヘッダーではなく、カスタマイズの方で設定した背景画像が表示されます
![](https://nagi.blog/wp-content/uploads/2022/03/e83fa52eac00d47020c79e84425066c0-150x150.jpg)
コンテンツヘッダーに表示される可能性ある画像は4つの項目の画像があります。
優先される順にご紹介しますと、次の順となります
記事別のタイトルの背景画像
↑
コンテンツヘッダー設定の所で行うタイトル背景用デフォルト画像
↑
アイキャッチ画像
↑
NO IMAGE画像
コンテンツヘッダーの推奨の画像サイズ
![](https://nagi.blog/wp-content/uploads/2022/03/49ef664720433fb37002b605195c5e9b-150x150.png)
推奨の画像サイズってあるのかな?
![](https://nagi.blog/wp-content/uploads/2022/03/e83fa52eac00d47020c79e84425066c0-150x150.jpg)
コンテンツヘッダーに関して、SWELL公式サイトで推奨しているサイズはないんだけど、いくつか考え方はあります。
SWELLのコンテンツ幅はデフォルトで1200pxに設定してあります
![](https://nagi.blog/wp-content/uploads/2022/08/19185ab4fe63f0be3435c282ed10c3f7.png)
![](https://nagi.blog/wp-content/uploads/2022/03/49ef664720433fb37002b605195c5e9b-150x150.png)
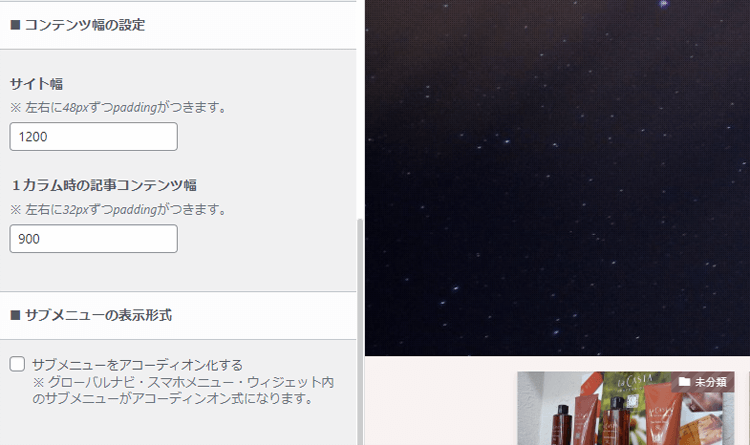
カスタマイズの基本デザインの中でサイト幅を設定できる項目で、デフォルトが1200pxだったよね
![](https://nagi.blog/wp-content/uploads/2022/03/e83fa52eac00d47020c79e84425066c0-150x150.jpg)
そうだね、なので、1200px以上が一定の基準になるかな
もしくは、no image画像の推奨サイズになっている1600pxになるかと思います。
![](https://nagi.blog/wp-content/uploads/2022/08/d3c000f8689d2dc456456b8813bf48d8.png)
特にサイズを指定しなくても、横幅をベースに最適化してくれるようなので、極端な事を言えば、どのサイズでも大丈夫ではあります。
が、あまり大きすぎると、サイトが重くなることもあるので、このくらいのサイズが良いかと思います
![](https://nagi.blog/wp-content/uploads/2022/03/e83fa52eac00d47020c79e84425066c0-150x150.jpg)
あんまり凝った背景にすると、この様に肝心のタイトルが読みにくくなるので、そんなに画質にこだわる場所じゃないかと思うわね
![](https://nagi.blog/wp-content/uploads/2022/03/49ef664720433fb37002b605195c5e9b-150x150.png)
シンプルな画像の方がタイトルの文字が読みやすそうね
![](https://nagi.blog/wp-content/uploads/2022/03/e83fa52eac00d47020c79e84425066c0-150x150.jpg)
1200px以下の画像を使っても、横幅いっぱいに表示してくれるようです
ただ、サイズによってはぼやけるので、いろいろ考えると1200px以上くらいがいいとは思います
コンテンツヘッダーの推奨の画像の縦横比率
![](https://nagi.blog/wp-content/uploads/2022/03/49ef664720433fb37002b605195c5e9b-150x150.png)
縦幅はどうなの?
![](https://nagi.blog/wp-content/uploads/2022/03/e83fa52eac00d47020c79e84425066c0-150x150.jpg)
縦幅に関しては、パソコン画面向けと スマートフォン向けで表示される幅が変わります。
![](https://nagi.blog/wp-content/uploads/2022/08/IMG_7705p350.png)
![](https://nagi.blog/wp-content/uploads/2022/03/49ef664720433fb37002b605195c5e9b-150x150.png)
柄の多い画像だと、スマホでみるとより見にくくなったわね
指定されているサイズや、推奨サイズは特にないですね。
16:9で横幅1200pxで投稿すると、横幅はそのまま表示されまして、パソコン向けでは真ん中あたりの約200pxくらいが表示され、スマホ向けでは470pxくらいが表示されました
なので、わたしのこのサイトは1200px 470pxの画像を使っていますが、正確なベストなサイズをご紹介出来なくて申し訳ありません
![](https://nagi.blog/wp-content/uploads/2022/03/975429aa9a80f4f9bc5ca68a5e46d0cf-150x150.png)
正確な数字が分かりましたら、追記しておきますね
![](https://nagi.blog/wp-content/uploads/2022/03/49ef664720433fb37002b605195c5e9b-150x150.png)
知っている人がいましたら、教えて頂けると嬉しいです
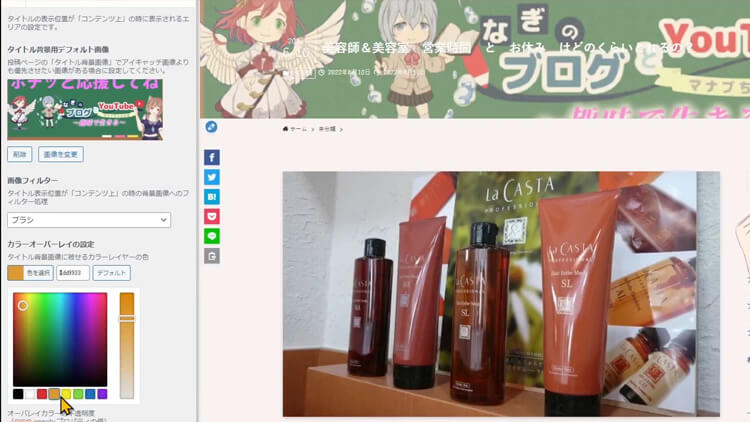
画像フィルター
つぎは、画像フィルターに関してご説明しますね
コチラは、コンテンツヘッダーの画像にフィルターをかけないか、4種類のエフェクトをかけることが出来ます
ブラー グレースケール ドット ブラシです
![](https://nagi.blog/wp-content/uploads/2022/08/f89013c3f10b7eb632b8c0a00fc25417.png)
![](https://nagi.blog/wp-content/uploads/2022/03/49ef664720433fb37002b605195c5e9b-150x150.png)
けっこう雰囲気が変わるよね
![](https://nagi.blog/wp-content/uploads/2022/03/e83fa52eac00d47020c79e84425066c0-150x150.jpg)
お好みで設定してみてください
カラーオーバーレイの設定
次は、カラーオーバーレイの設定ですね
こちらは、先ほど選択した画像フィルターに、色を付けてコンテンツヘッダーの色を変えることが出来ます
まずは、タイトル背景画像に被せるカラーレイヤーの色のところで、色を選択してみましょう
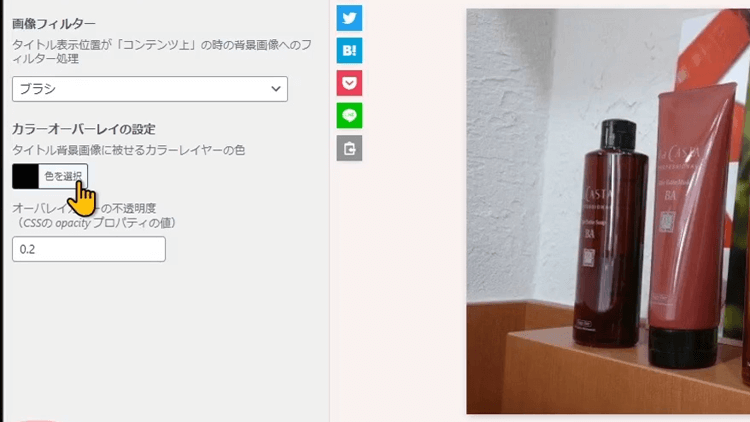
![](https://nagi.blog/wp-content/uploads/2022/08/633d9c966b6dd095726c472493b1d1c8.png)
けっこう雰囲気が変わります
![](https://nagi.blog/wp-content/uploads/2022/08/b3e9d35c48745cd861583af4437ac545.jpg)
つぎは、オーバーレイカラーの不透明度のところで、透明度を設定できます
数値が1に近ずくとより濃くなり、画像が隠れる感じになります
![](https://nagi.blog/wp-content/uploads/2022/08/401a9a185712c67205bc1e197f2582cb.png)
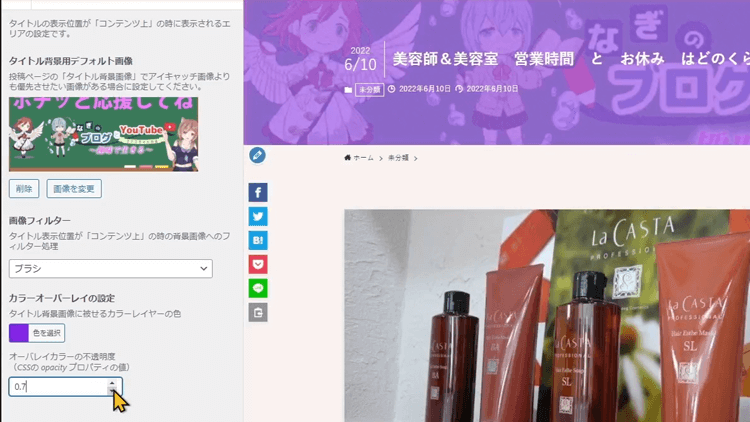
逆に、ゼロに近づくと薄くなり、ゼロになると完全に透明になります
設定が終わりましたら、公開をしておきましょう
![](https://nagi.blog/wp-content/uploads/2022/08/f75671d22dc95d3bc3c974cd950c67d1.png)
![](https://nagi.blog/wp-content/uploads/2022/03/e83fa52eac00d47020c79e84425066c0-150x150.jpg)
現在、SWELLを中心にWordPressやマーケティングに関した動画を上げています。
![](https://nagi.blog/wp-content/uploads/2022/03/975429aa9a80f4f9bc5ca68a5e46d0cf-150x150.png)
既に、SWELLのカスタマイズに関する記事はコチラの記事があります
![](https://nagi.blog/wp-content/uploads/2022/03/975429aa9a80f4f9bc5ca68a5e46d0cf-150x150.png)
SWELLの使い方に迷った時には、見て頂けると嬉しいです
【SWELLカスタマイズ】
サイト全体設定
![](https://nagi.blog/wp-content/uploads/2022/03/e83fa52eac00d47020c79e84425066c0-150x150.jpg)
最後まで見て頂きまして、ありがとうございました
![](https://nagi.blog/wp-content/uploads/2022/03/49ef664720433fb37002b605195c5e9b-150x150.png)
ありがとうございました
【動画】SWELLコンテンツヘッダー設定方法と画像推奨サイズ&縦横比率
![](https://nagi.blog/wp-content/uploads/2022/03/e83fa52eac00d47020c79e84425066c0-150x150.jpg)
興味ありましたら、チャンネル登録 高評価して頂けると嬉しいです
![](https://nagi.blog/wp-content/uploads/2022/03/49ef664720433fb37002b605195c5e9b-150x150.png)
見てもらえる人が増えると、動画制作のモチベーションが上がります