話題の画像生成AIイラストツール 本動画ではStable Diffusion WebUIに拡張機能のDynamicPromptsをダウンロードとインストールのやり方を解説します

Dynamic Promptsって何をするための機能かな?

プロンプトをランダムに組み合わせられるweb UI用の拡張機能です
実用的には、髪型とか、洋服とか、サイズを決めかねている時に、とりあえずプレビューして一覧を見たい時とかってあるでしょ?
そんな時に、自分でプロンプト作成と、生成を繰り返さなくても、ランダムに生成してくれるなどの用途があります
さっそく、解説に入りますが、DynamicPromptsはチョット難しいのです。

現在、Stable Diffusionや画像生成AIに関する記事は、以下のものがありますので参考にしてね
この記事に、特に関連する記事はコチラ
【Dynamic Prompts】インストール方法とダウンロード
それでは、ダウンロードからインストールするまでを解説しますね

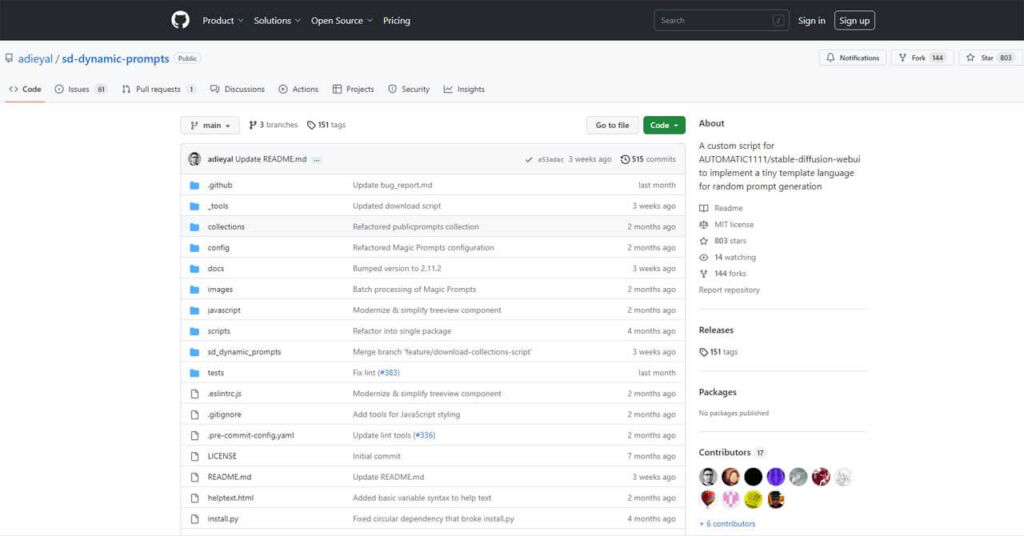
Stable Diffusion WebUIのお話をするときに度々お世話になる、githubのサイトからインストールすることが出来ます
githubのサイト内の、Dynamic Promptsのページを開こう
まずは、githubのサイト内の、Dynamic Promptsのページを開いておきましょう
検索でgithubのページに行きまして、検索窓にDynamicPromptsといれると、表示されます
そうしましたら、クリックして開いておいてください
URLを載せてあるので、コチラを使って頂いても大丈夫です
Stable Diffusion WebUIにインストールしよう
そうしましたら、Stable Diffusion WebUIにDynamic PromptsインストールしますのでStable Diffusion WebUIを起動してください
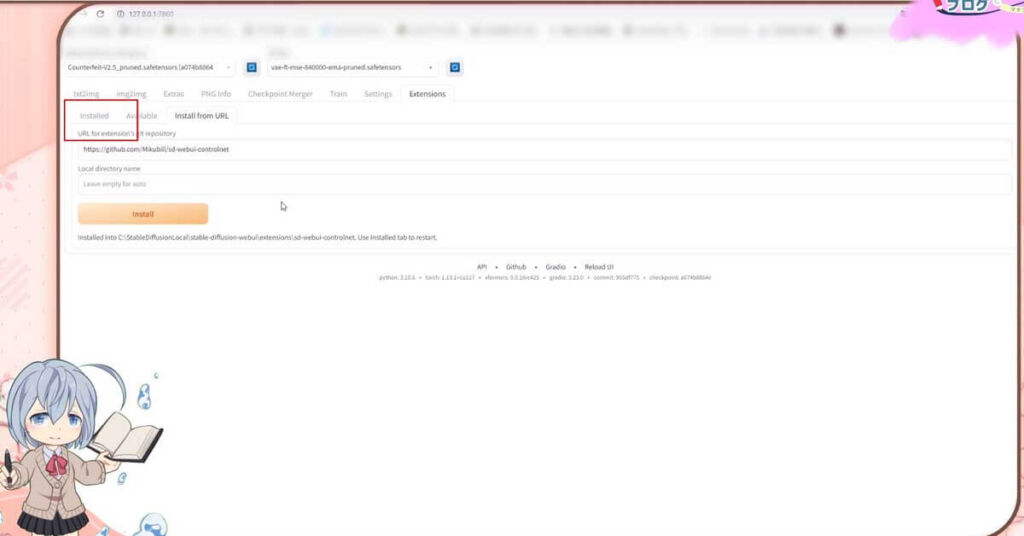
Stable Diffusion WebUIのExtensions というタブがあるので開きます
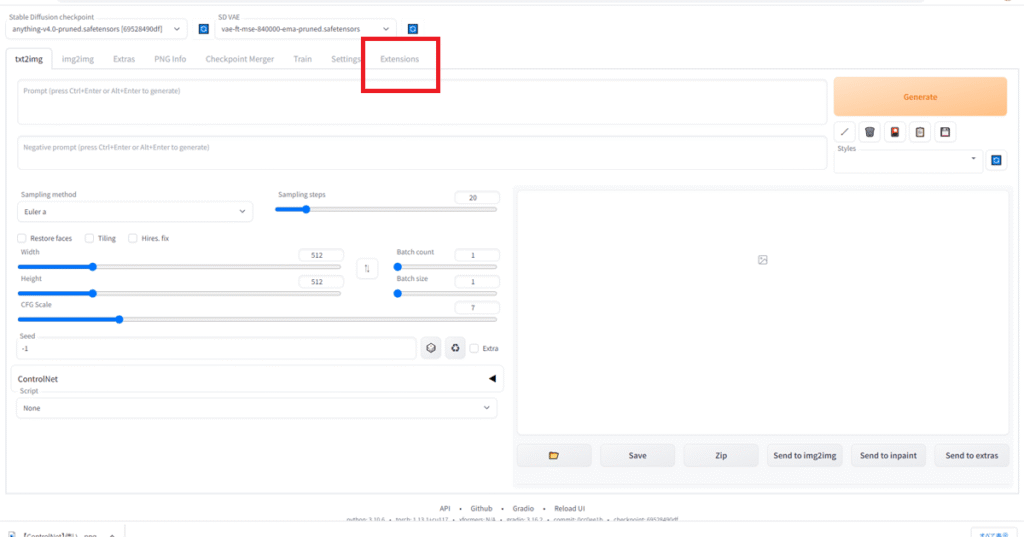
そのなかに、install from URLというタブがありますので開きます
この画面が、表示できましたか?

はい、出来ました
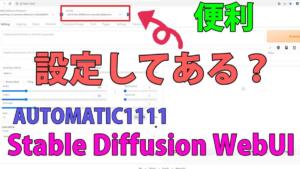
ここの上の空欄のところに、URL for extension’s git repositoryという欄があります
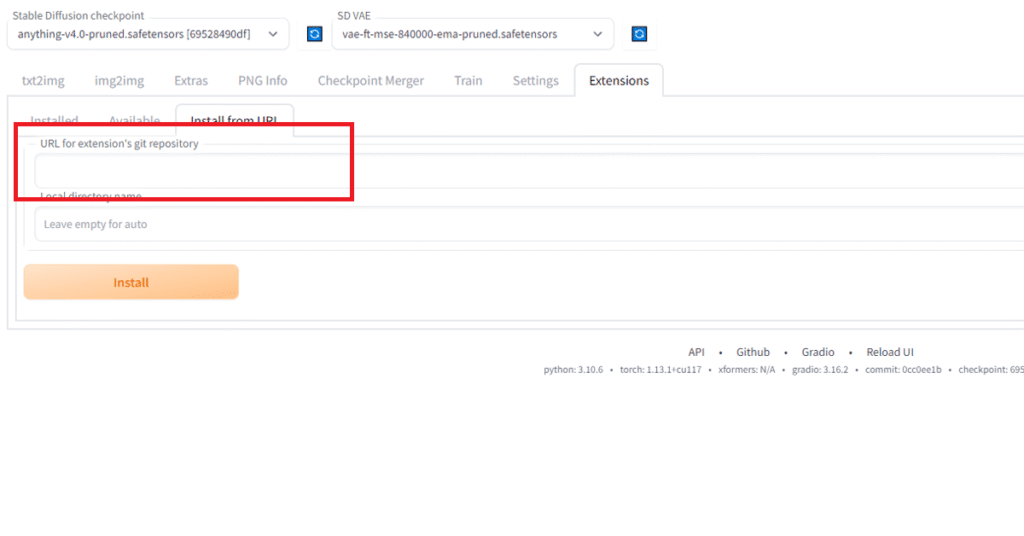
ここに、先ほどのDynamic PromptsがダウンロードできるページのURLをかきこみます
まずは、URLをコピーしましょう
そして、ペーストですね
できましたら、下の【install】ボタンを押してください
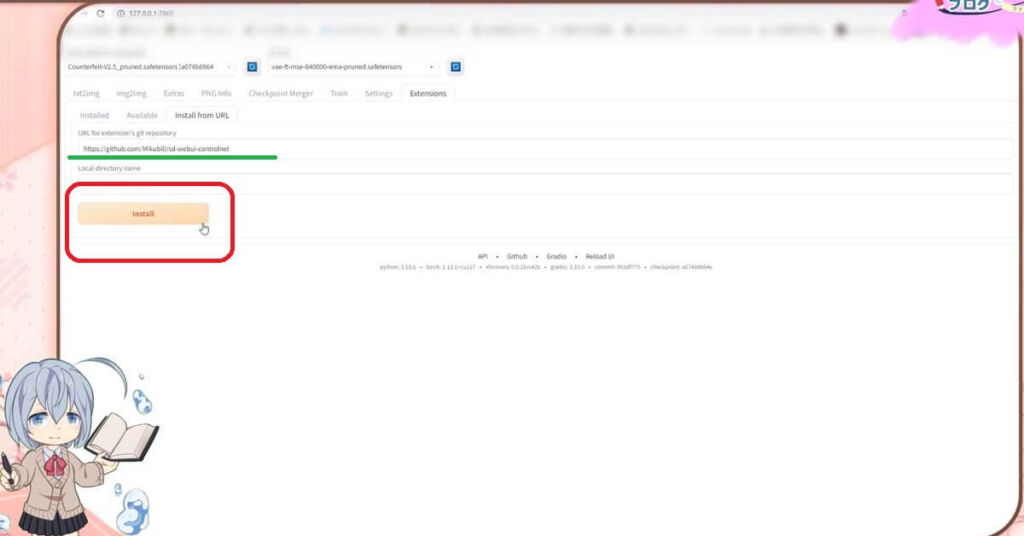
1分以内で、ダウンロードが終わると思います
なにか、表示されましたよ
インストールが終わったみたいです
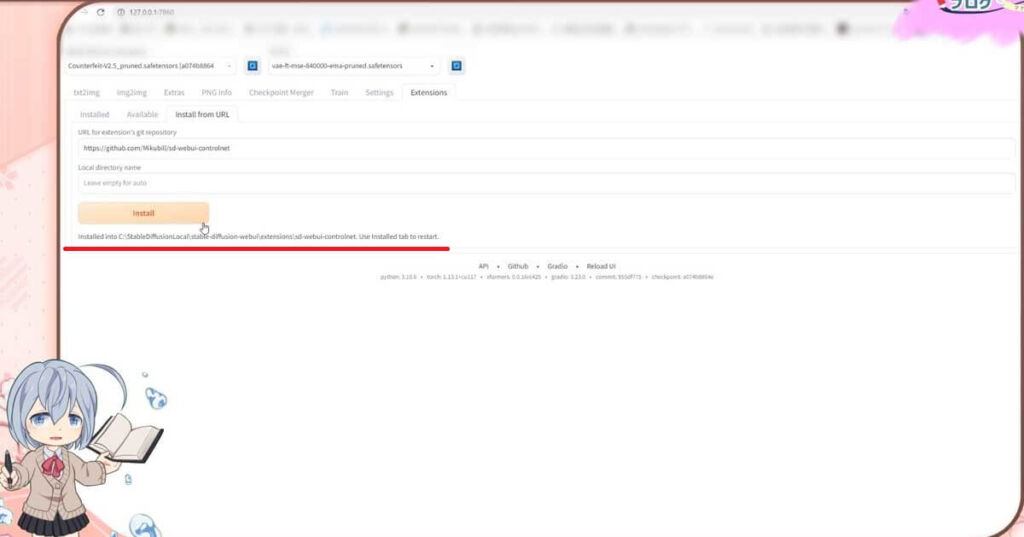
この表示以外は、特に音やポップアップする訳ではないので、チョット分かりにくいですが、これで大丈夫です
確認してみましょうか
フォルダの方を実際に見て見ますと、この様にフォルダやファイルが出来ていますね
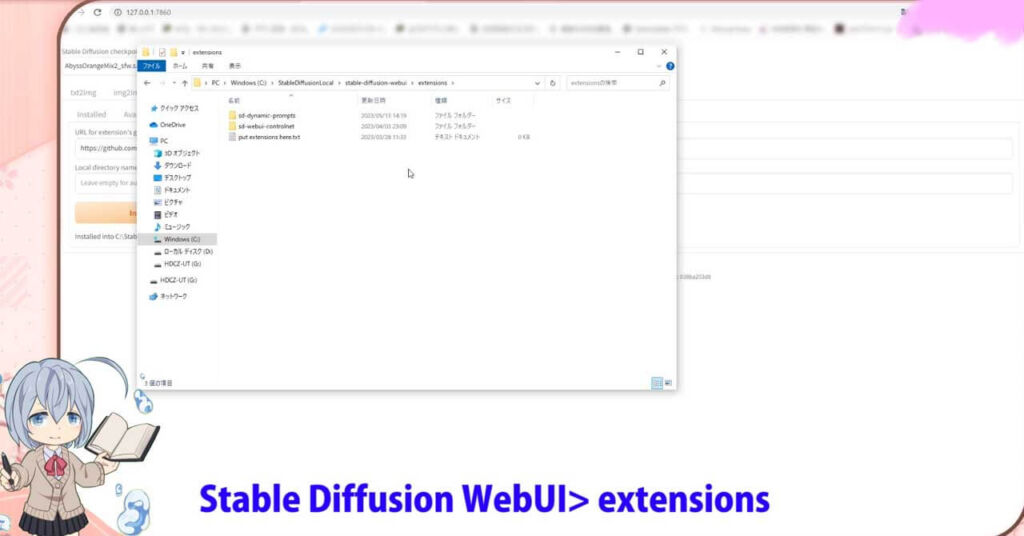
Stable Diffusion WebUIの画面の方でも確認することが出来ます
こちらの、インストールドのタブを開いてください
コチラの欄に、さきほどのURLが記載されていればインストールされていると言うことになります
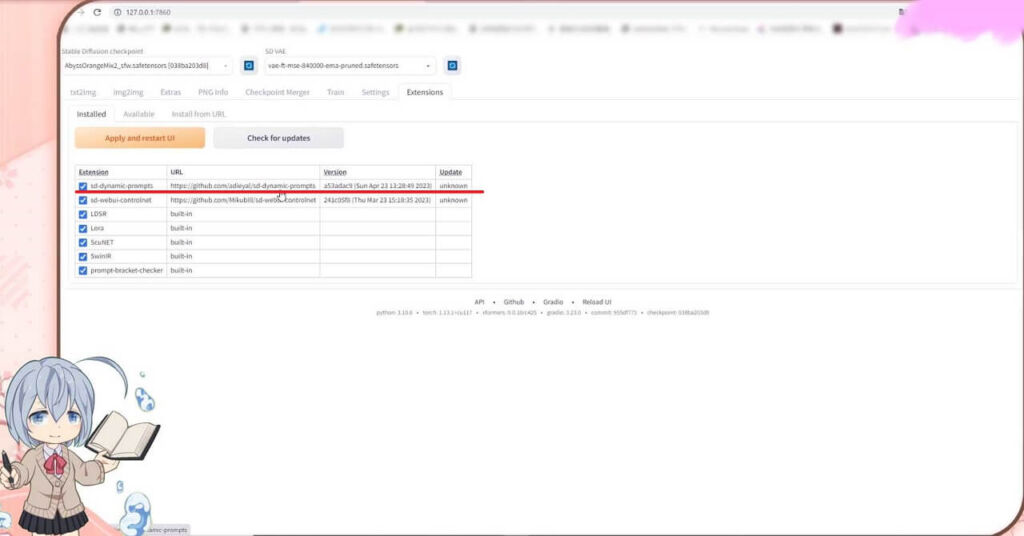
良かった
そうしましたら、【apply and restart UI】をクリックしてください
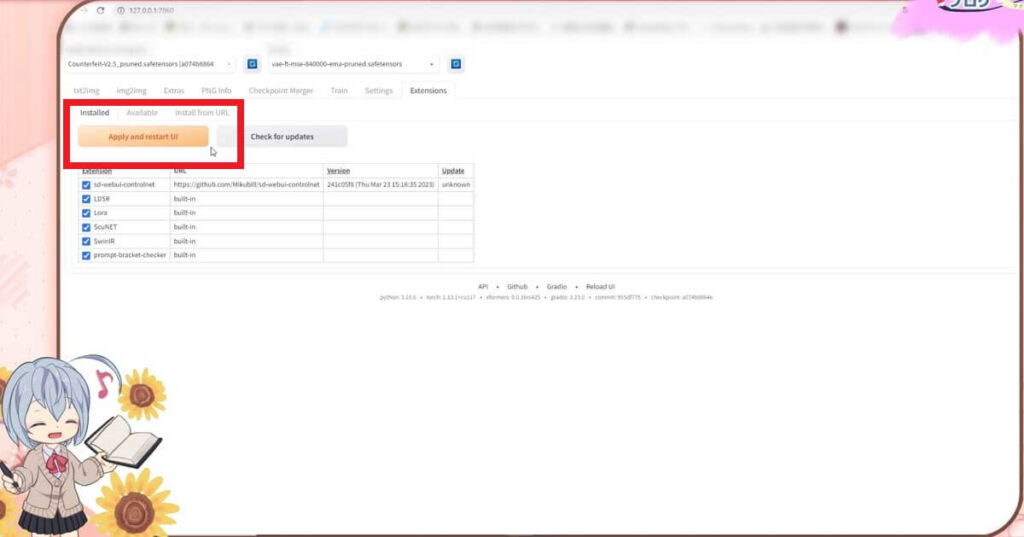
そうしますと、こちらにDynamic Promptsの表示がされるようになりました。
表示されましたね
それで、どうやって使っていくの?
Dynamic Prompts使ってみよう
DynamicPromptsは、ControlNetの様に多くの機能を持っています。
詳しくは、非常に長くなりそうなので1つ1つの機能の使い方や、特殊構文の書き方は、1つのつかいかたづつ動画にまとめていきますが、今日は、1つ参考例を紹介します。
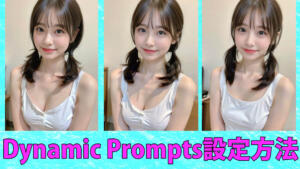
髪型や、洋服、サイズを決めかねている時に、とりあえずプレビューして、複数のデザインの中から1つを選びたい時に、候補の一覧を作れるようになる機能をご紹介します
それでは解説していきます
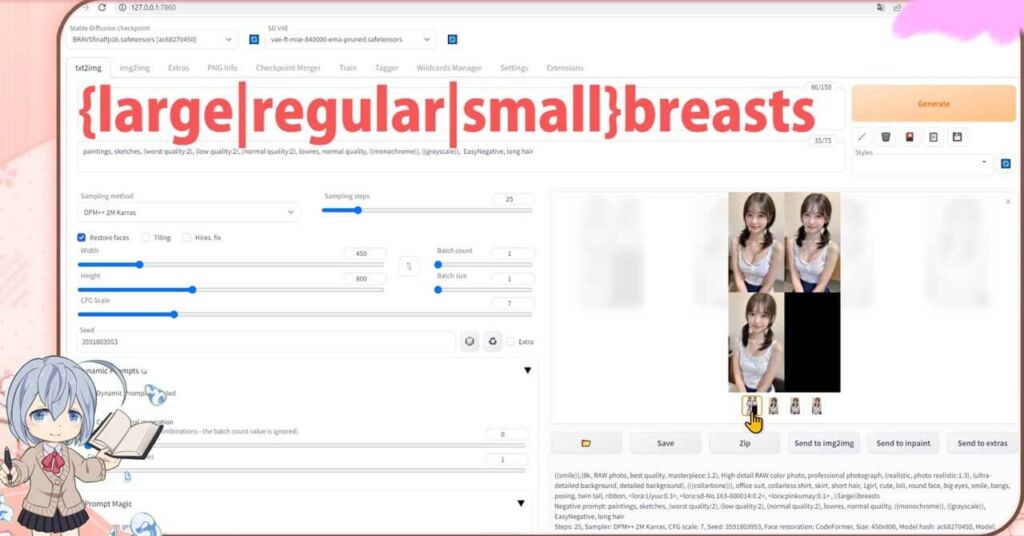
Dynamic Prompts 設定方法
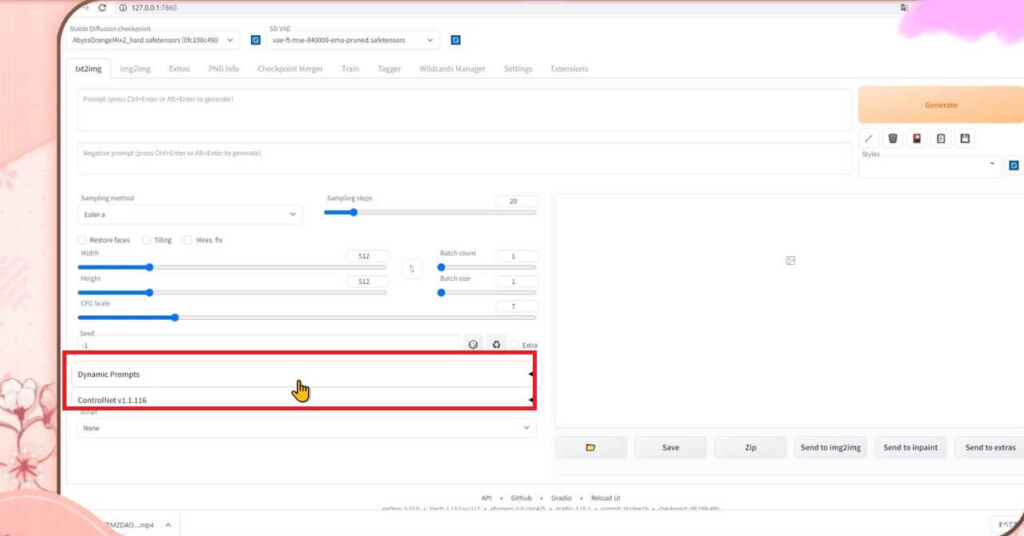
Stable Diffusion WebUIの画面下のダイナミックプロンプツDynamicPromptsのところをクリックして、設定項目表示させてください。
この設定の中にあるコンビネーションナルジェネレーションがありますので、チェックを入れます

あとは、Advanced optionsをクリックします
そしてその設定項目の中にあるfixt Seedにチェックを入れてください
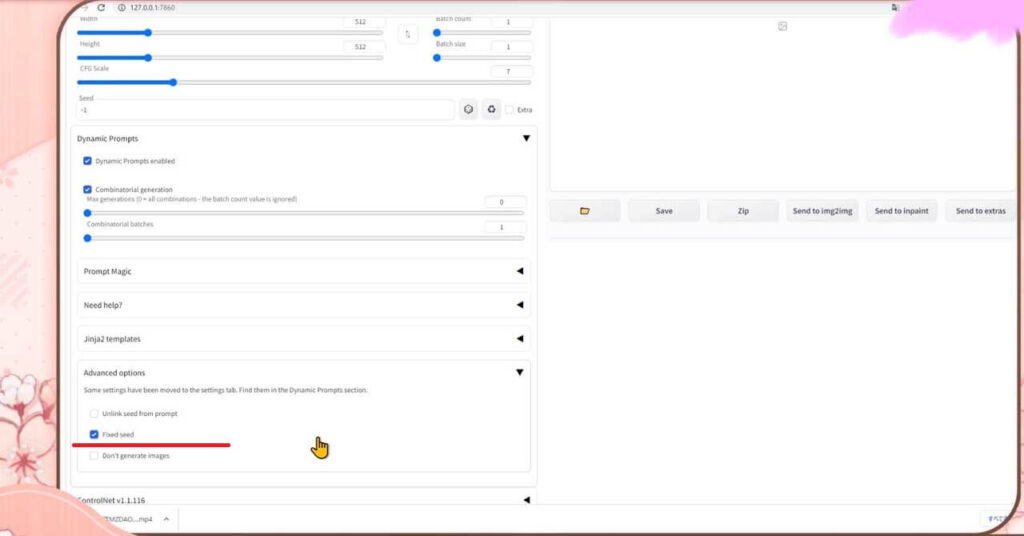
fixt Seedにチェックを入れることで作成する画像の顔を固定することができますよ
DynamicPromptの設定はこれだけです
DynamicPromps 特殊構文
次に、DynamicPromptを使うための特殊な構文を書いていきます
特殊な構文は、普段やっている様な単語ベースのプロンプトではなく、プログラミングの様な入力方法です
え、難しそう
全部、理論から覚えると難しいので、1つの文字列を覚えてしまえば簡単です
英語の勉強の時みたいに、単語と文法を別々に覚えるんじゃなく、ひとぶん丸ごと覚えちゃう戦法だね
覚える特殊構文はコチラです
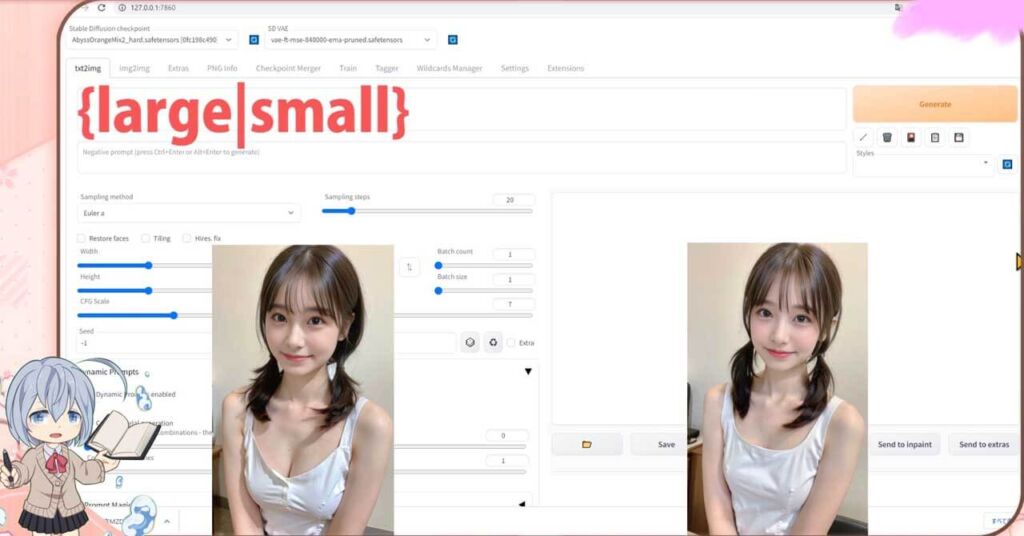
まず波括弧で囲みます。
そして、生成したいパターンの種類をバーティカルラインで区切ります
そのため大きいと小さいの2つのパターンを指定したい場合はこのようになります
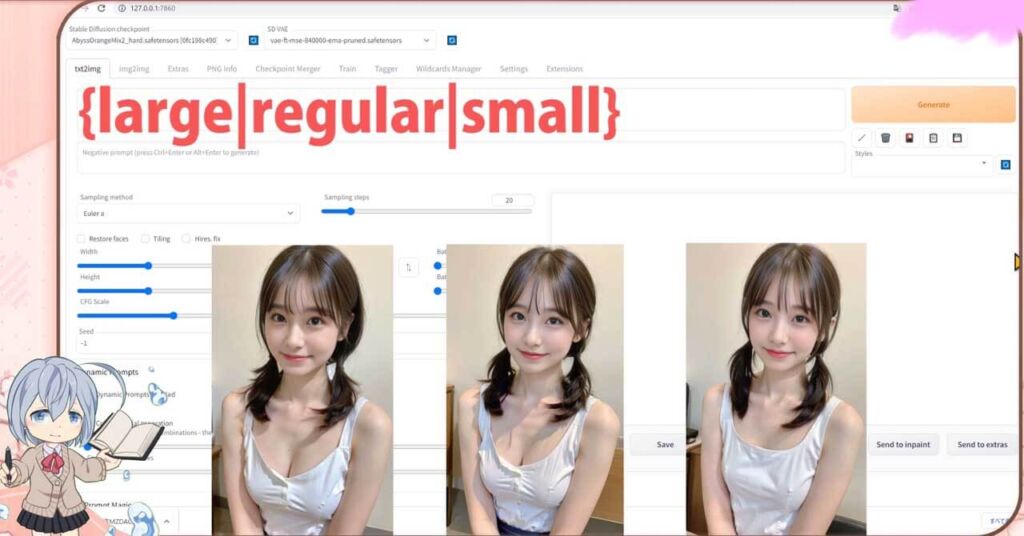
この法則さえ守れば、数はいくつ増やしても大丈夫です。
例えば3つ目に、ノーマルなサイズを意味するレギュラーを入れてみます
普段ならここで、ミディアムを使いたいところですが、不要な変化が起きてしまうのでレギュラーを使わせて頂きました
そして、その波括弧のうしろに、表示させたい対象を記載します
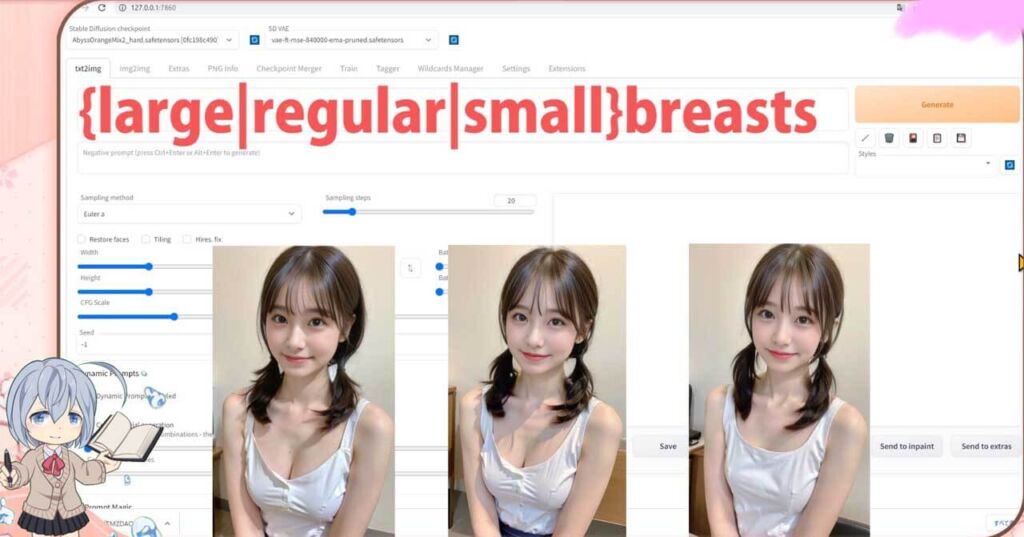
そして、ジェネレイトします
一回で複数の生成が行われるんだね
波括弧で囲んであるワード分だけ生成されますよ
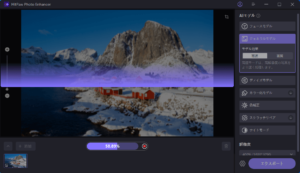
そうしますと、この様に3つのサイズを生成することが出来ました
構成を迷っている時には、良さそうな機能ですね
DynamicPromptの機能は他にも使い道がありますが、特殊構文が複雑になっていきますので、また違う動画で語らせて頂きますね
以下のコンテンツとコラボさせて頂いてますので、ご興味ありましたら覗いてもらえたら嬉しいです

おまけ:動画版 ダイナミックプロンプトの使い方と特殊構文
本格的にやりたい人は、デジタルイラスト/アイコンお絵描きする必要なおすすめ道具をまとめましたので参考にしてね
StableDiffusion WebUI v1.6.0(随時更新リサーチ中)
- StableDiffusion WebUIバージョン1.6.0リリース速報まとめ
- 【SDXL1.0のVAE】StableDiffusion WebUI v1.6.0 導入&設定方法
- StableDiffusion WebUI ver1.6.0「VAE」切り替えを便利なインターフェイス
- SDXL1.0環境のEasyNegative【negativeXL 】ネガティブプロンプト省略embeddings
StableDiffusion webUI基本設定
- StableDiffusion WebUIをローカル環境で使う設定のやり方♪
- StableDiffusion WebUIバージョンアップ方法。更新手順や注意点
- StableDiffusion WebUIバージョンの確認方法
- 【操作画面の解説・txt2img】分かりやすくパラメータの使い方を説明
- 【画像生成AIイラスト】VAEインストール方法と便利な使い方
- 「VAE」かんたんに切り替えするインターフェイス
- 【日本語化】StableDiffusionWebUI インターフェイス設定方法。
- 大きく、キレイな画像を出力する方法Hires.fix使い方。解像度アップ!
- 操作画面の5つのボタン解説
- 【X/Y/Z plot】使い方。プロンプトや設定を調整し比較してみよう!
- 【img2imgインペイント】画像生成AIイラストを修正/inpaintのパラメータ
- 【学習モデルの追加と変更】かんたん切り替え
- StableDiffusion WebUIバージョン1.3。LoRAを使う方法
- 【まとめ】画質が悪いを改善する7つの機能の使い方!
【学習モデル・checkpoint】
- 【実写系学習モデル・3選】写真の様なリアルな美少女が作れるモデルまとめ
- 【BracingEvoMix】日本人風の顔に特化した最新学習モデル
- 【BeautifulRealisticAsiansV5通称BRAV5】
プロンプト
- Stable Diffusionプロンプト(呪文)に関しての書き方。
- 【画質を上げる・画質に美しく芸術性を持たすプロンプト】呪文の書き方
- 【Tag complete】プロンプトのコツを掴める入力補助機能。
【ControlNet】
- 【ControlNet】使い方とインストール方法。画像生成AIイラストに便利な神機能。
- 【ControlNet-V1.1206】最新バージョンアップデート&モデル更新方法。
- 【ControlNet】不具合?表示されない…反映されない時には?
- 骨(棒人間)を使い、思い通りの姿勢をとらせた方法。
- 原画の絵と同じ姿勢(ポーズ)のAIイラスト生成のやり方♪
- AIイラストから線画を抽出する方法♪
- AIイラストを手描きで修正し、生成するやり方♪
- 【ControlNet】自作の線画イラストを画像生成AIに色塗り(ペイント)させる方法
- 自作の線画イラストをAIイラストに色塗り(ペイント)させる方法♪
【その他 拡張機能について】
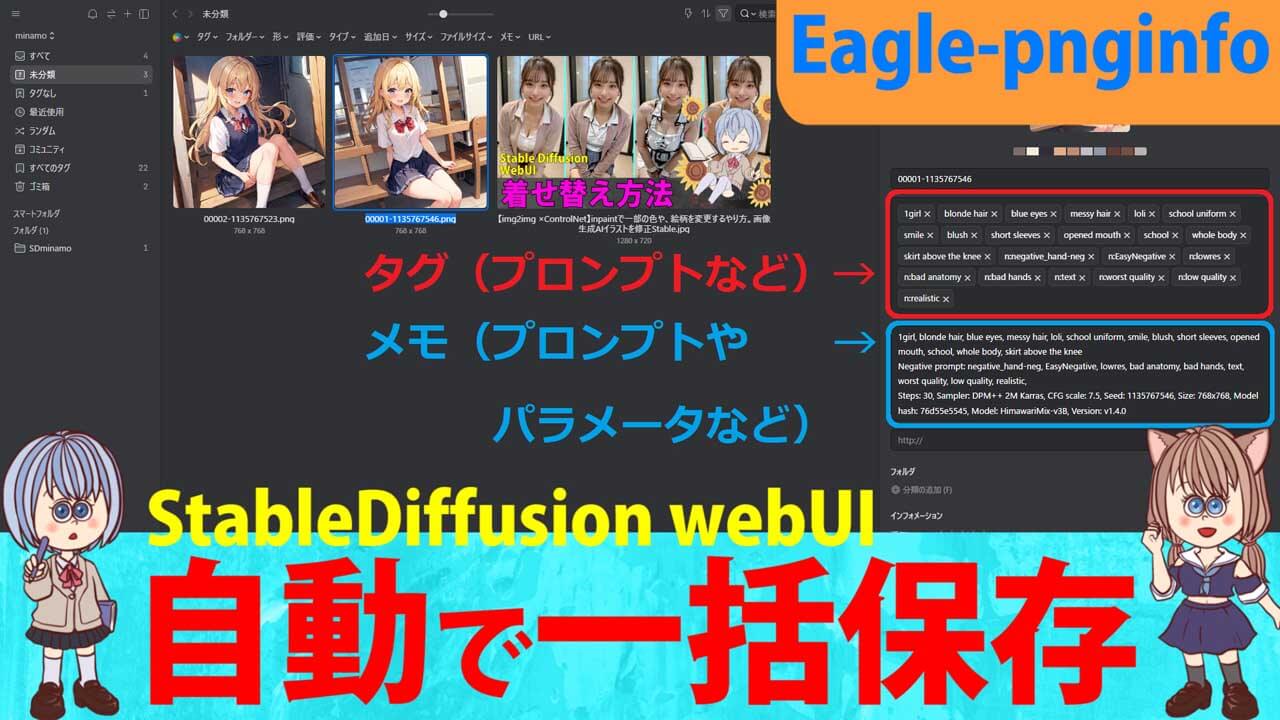
- 【Eagle-pnginfo】画像やプロンプトを自動で一括管理できる拡張機能
- 【eagle】画像管理おすすめアプリ使い方
- 【eagle】公式サイト
- 【EasyNegative v2】導入&使い方♪設定方法
- 【EasyNegative V2】反映されないときには?原因と対処方法
- 【EasyNegative V2】【LoRA】にサムネイルを付ける方法
- 【LoRA】画像生成AIの追加学習データの使い方。
- 【Dynamic Prompts】ダウンロードとインストールの設定方法と特殊構文の使い方