
うーん、英語の操作画面は良くわかりにくいなぁ

そんな時には、StableDiffusion WebUIの操作画面を日本語表示にする方法があるよ
え、そうなの?できるんだ

現在、Stable Diffusionや画像生成AIに関する記事は、以下のものがありますので参考にしてね
この記事に、特に関連する記事はコチラ
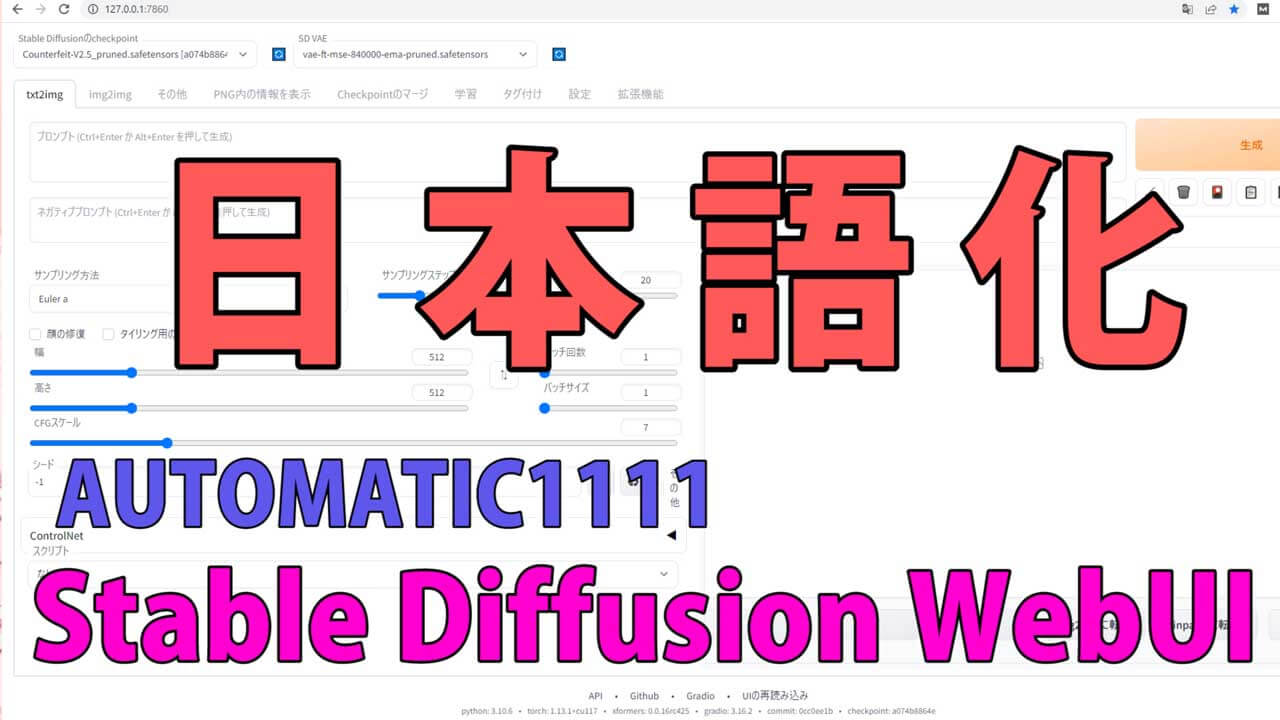
StableDiffusionWebUI 操作画面を日本語にする方法
まずは、StableDiffusion WebUIを起動してください
StableDiffusion WebUIを日本語化するためには、日本語化の拡張機能を、こちらのextensionsからインストールする必要があります
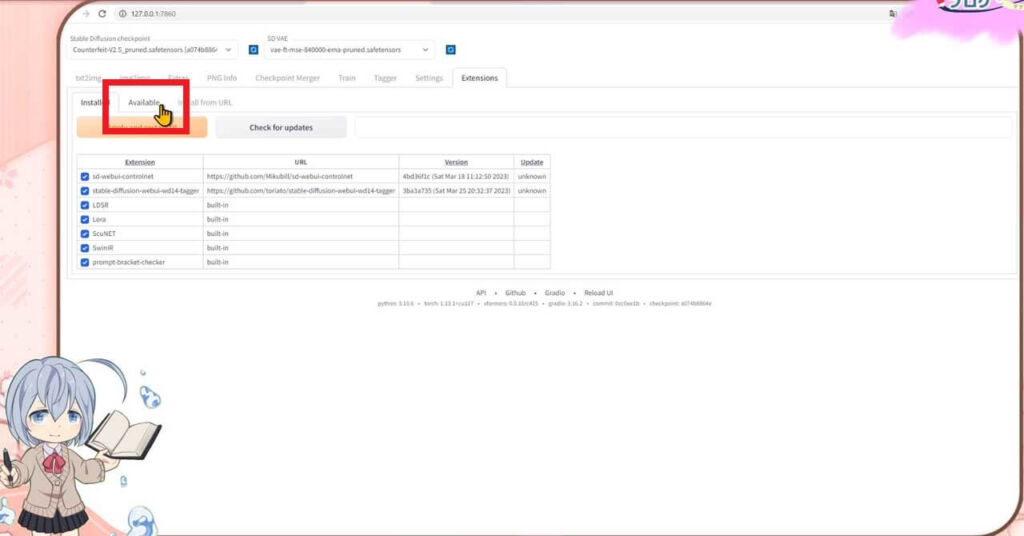
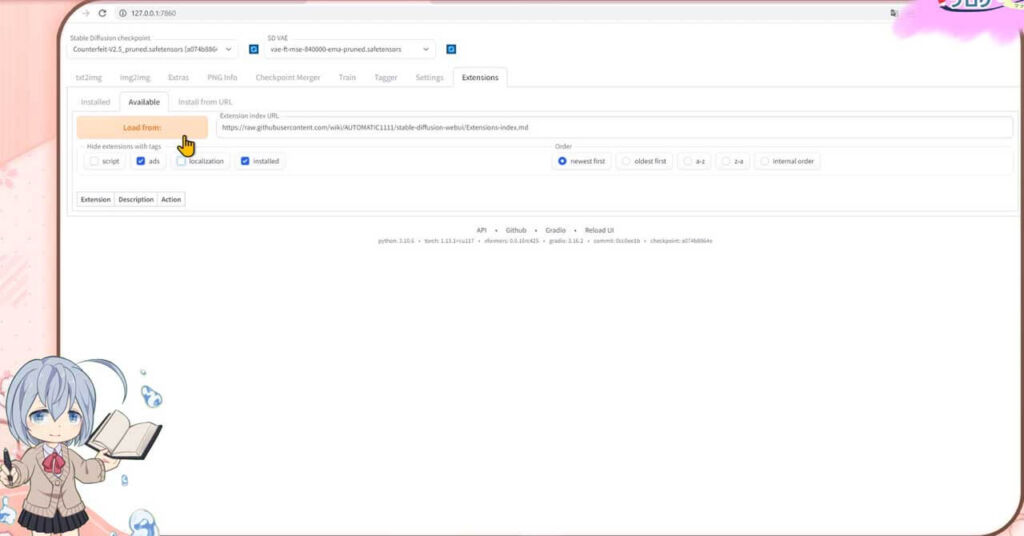
エクステンションズextensionsのタブをクリックしてください

この様な画面が表示されますので、Availableをクリックしてくださいね
コチラの画面にかわりましたら、localizationのチェックボックスを外してください
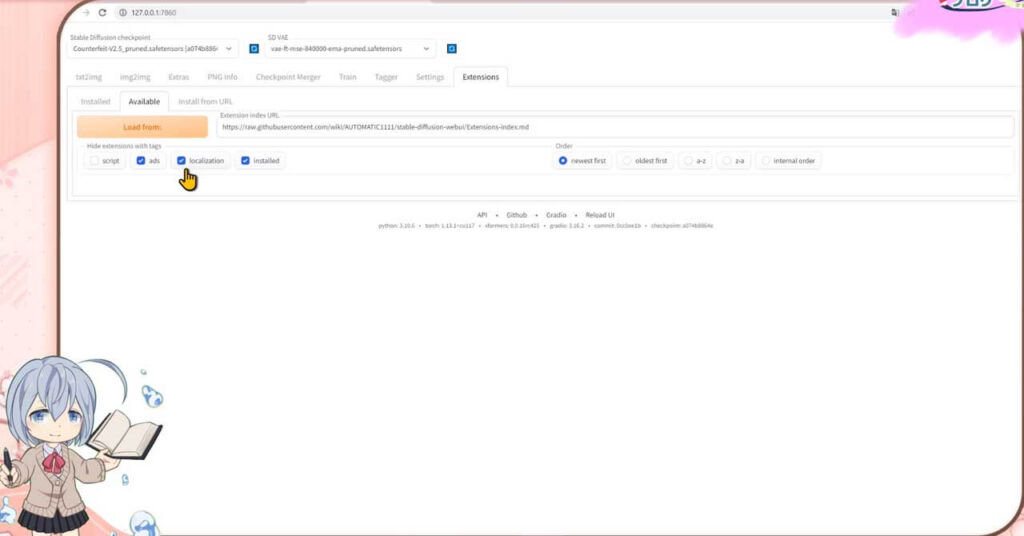
↓
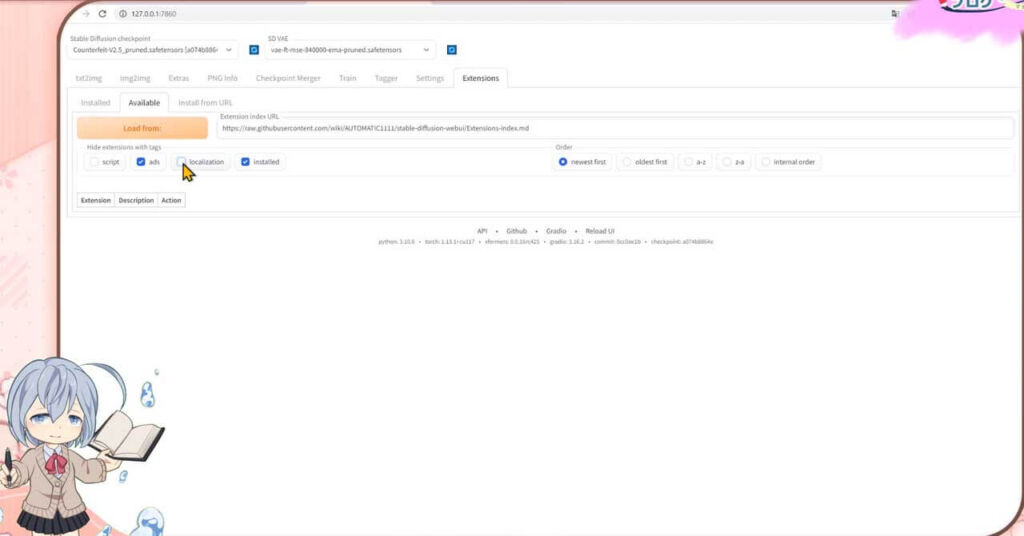
そうしましたら、Load Fromのボタンをクリックしてください
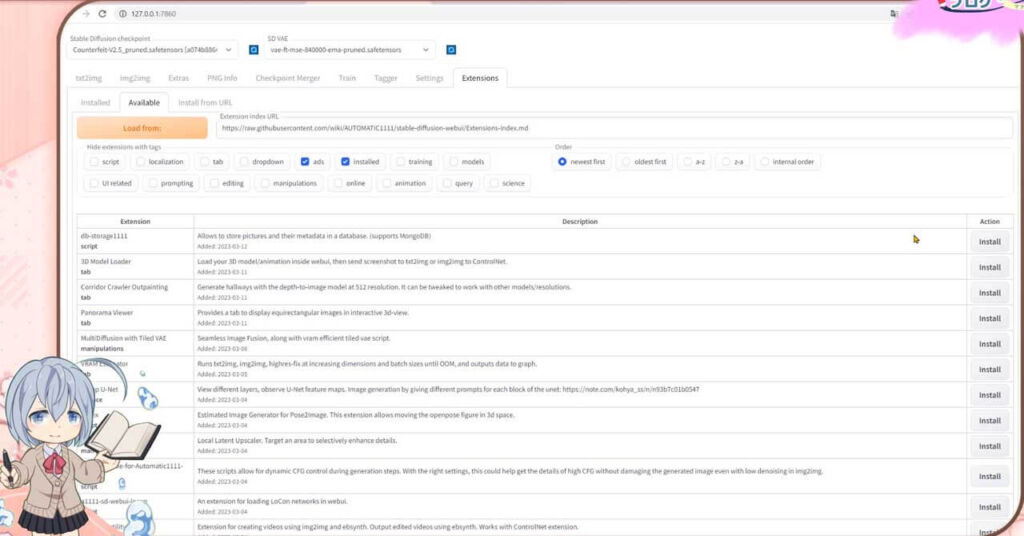
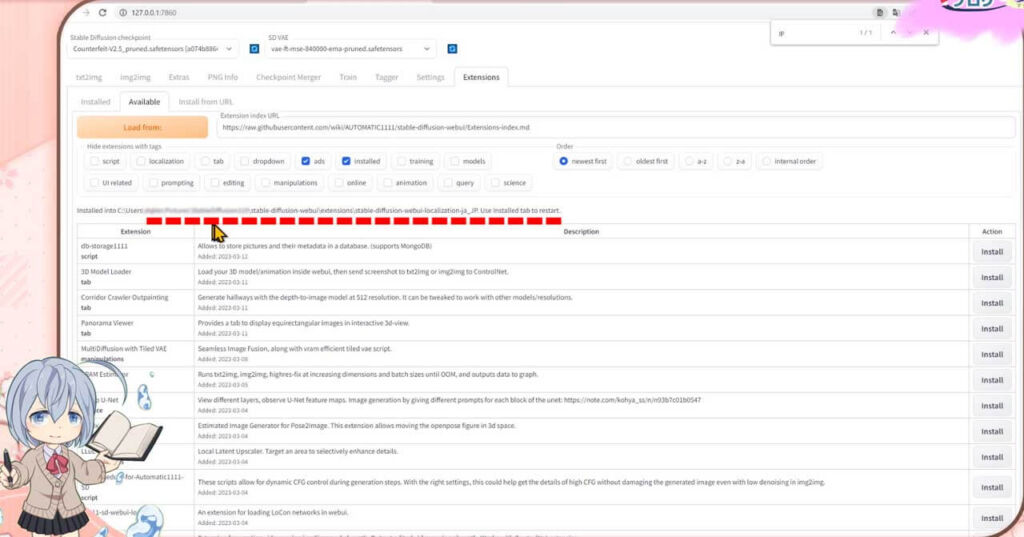
インストールできる拡張機能の一覧が表示されたと思います
なんか、いっぱいでた
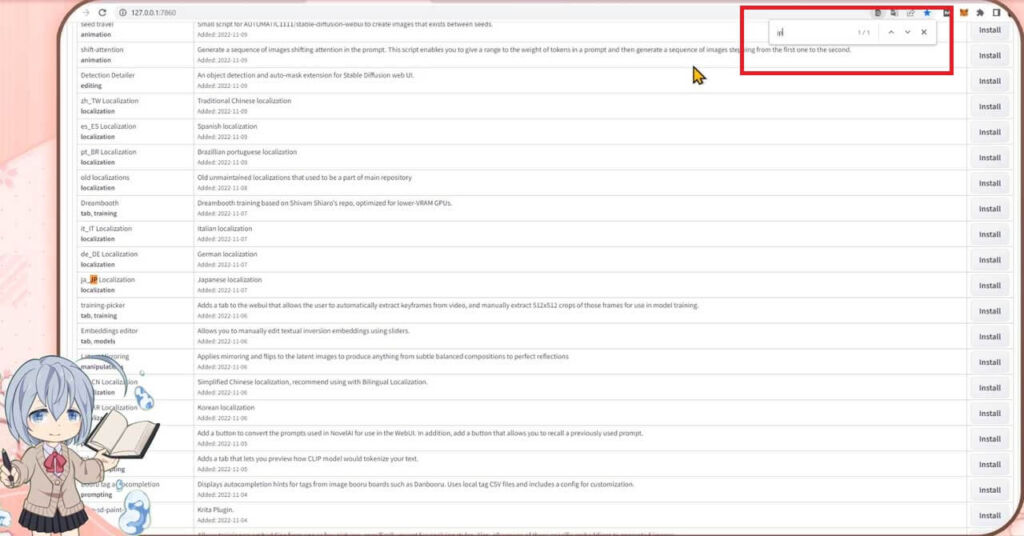
【Ctrl】 と 【F】キーの同時押しすれば、ページ内検索ができますので、jaといれて検索をかけるとすぐにみつかりますので、ja_JP Localizationを探してください
見つかりましたら、ja_JP Localizationのところにある、インストールのボタンをクリックしてください
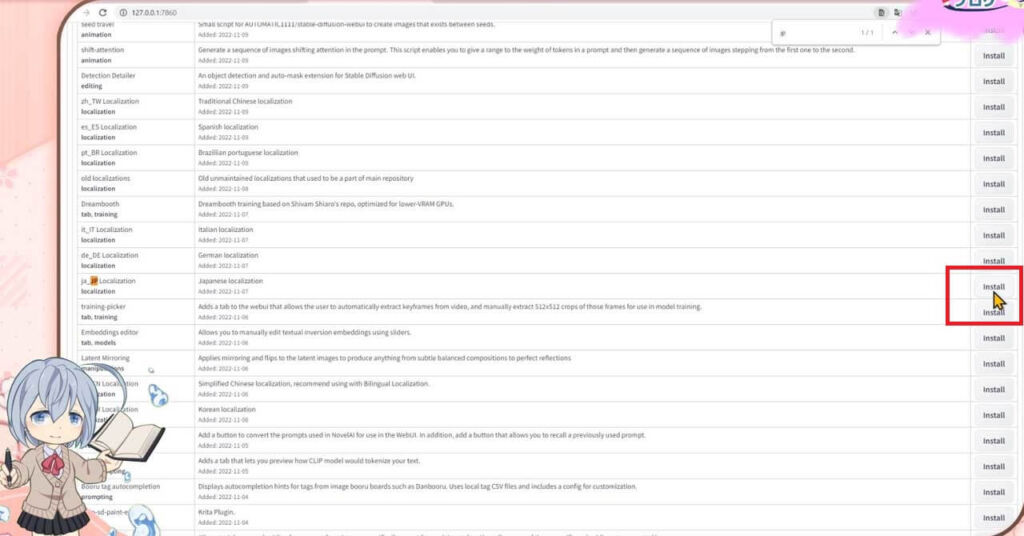
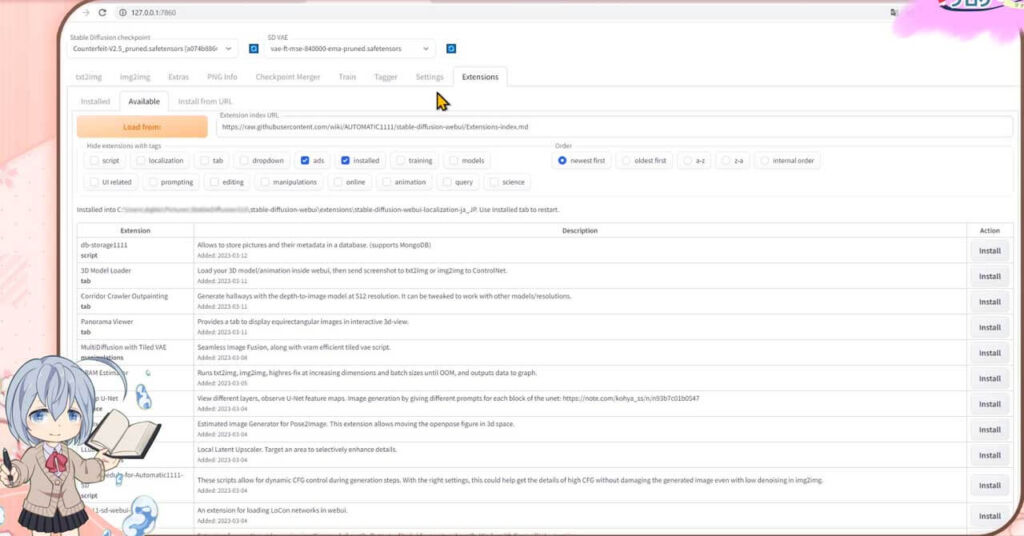
インストールが終わりますと、ja_JP Localizationの欄は、非表示になります
ページの上の方に戻ると、日本語化の拡張機能がインストールされたことを示すメッセージが表示されています
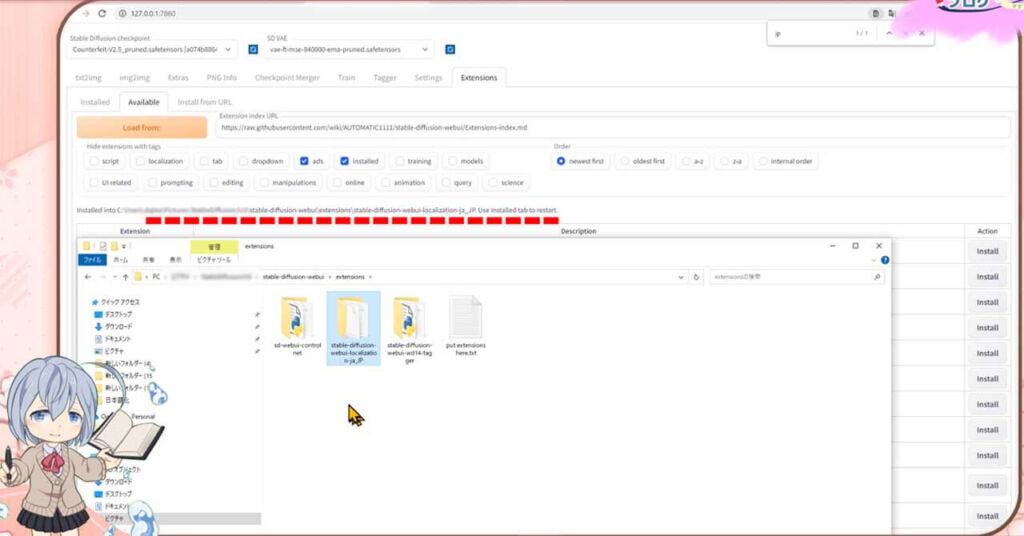
StableDiffusion WebUIをインストールしてある、extensionsフォルダにも、この様に新しいファイルやフォルダが出来ていますね
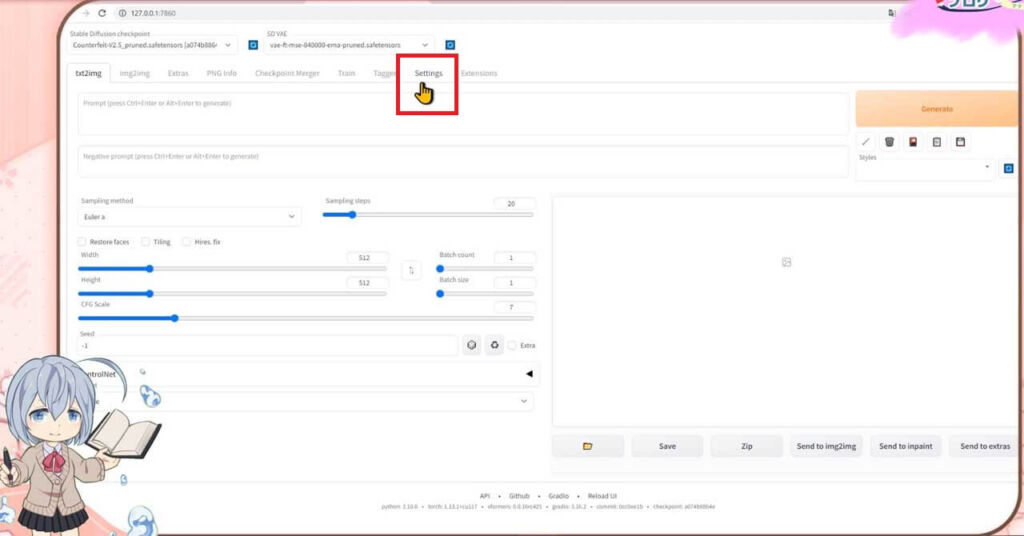
今度は、settingsタブをクリックしてください
今度は、settingsタブをクリックしてください
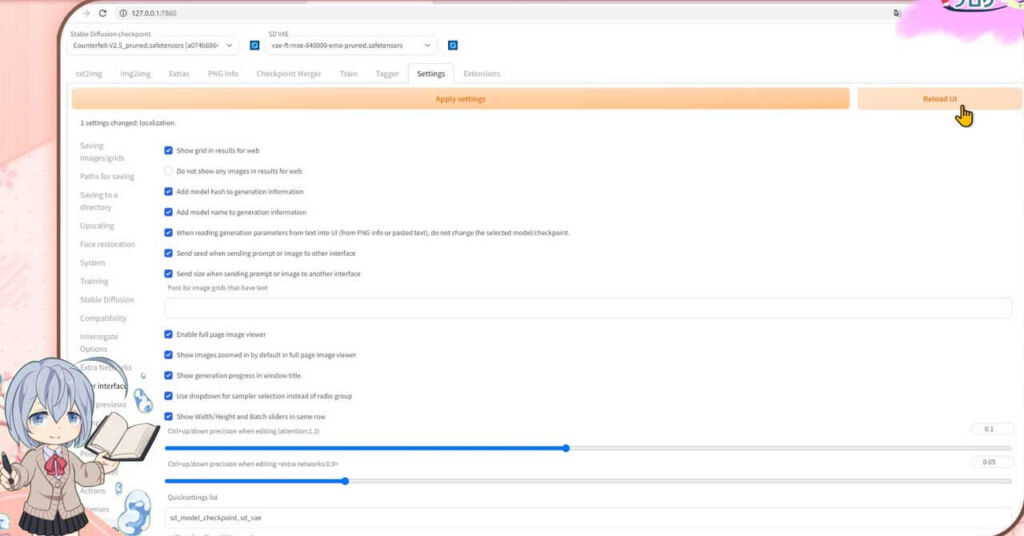
Reload UIボタンをクリックします
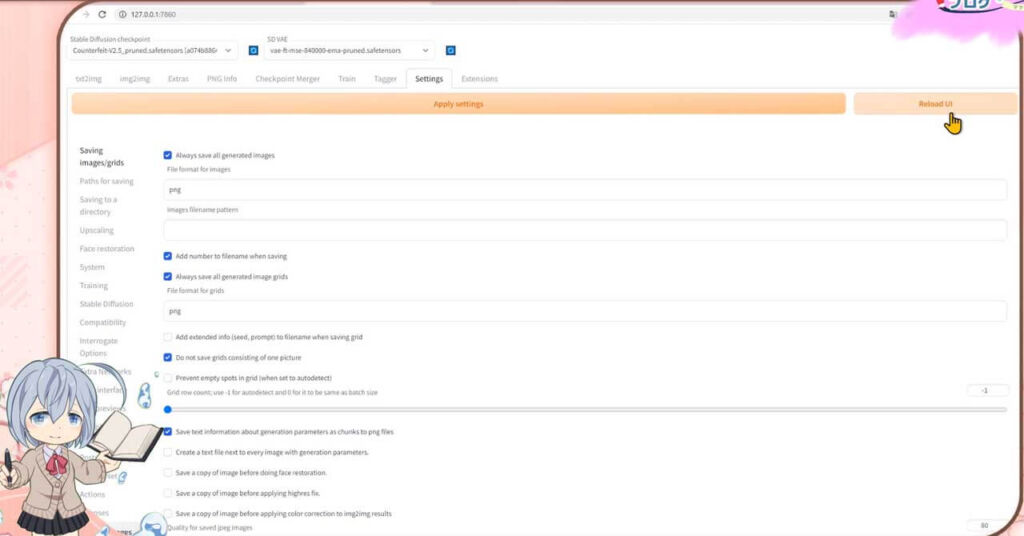
StableDiffusion webUIがリロードされ、更新されました
インストールが終わったけど、日本語になってないよ

【日本語化】StableDiffusionWebUI インターフェイス設定方法。
そうですね、今度はインストールされたデータを設定する必要がありますので、ここからは設定方法を解説します
もう1度、セッティングタブを開いてください
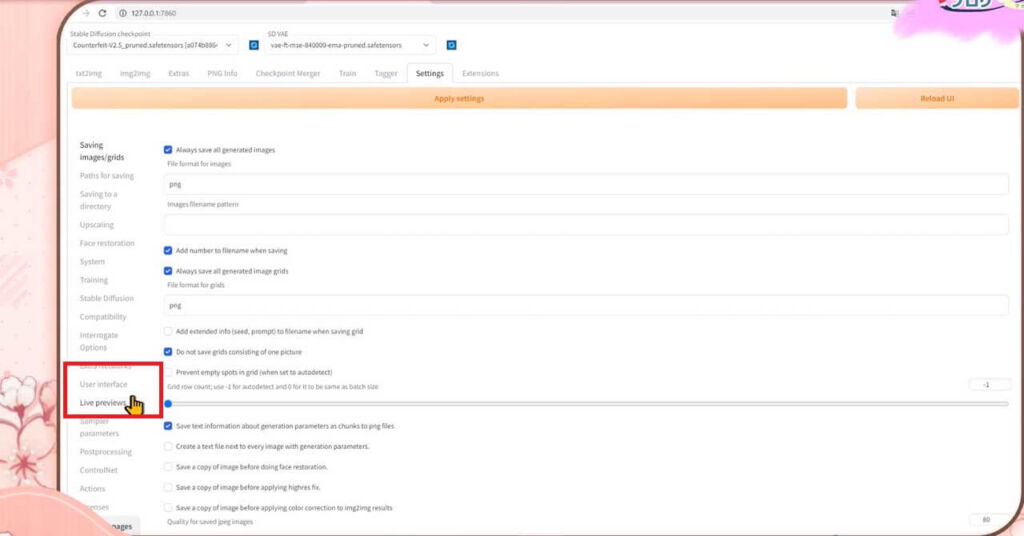
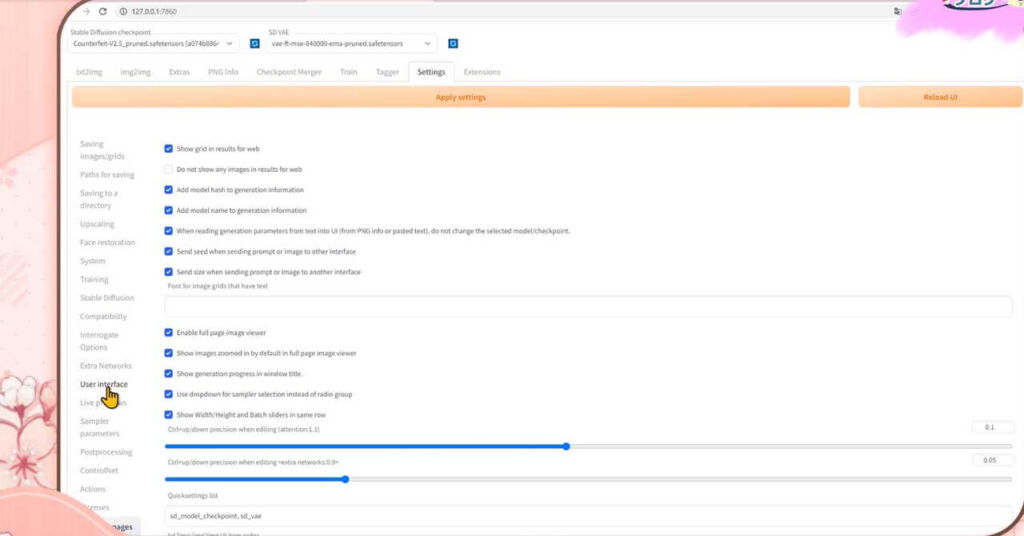
開きましたら、左のメニューの中からユーザーインターフェイスUser interfaceをクリックしてね
この画面に変わりましたら、一番下までスクロールしていただきまして、こちらのプルダウンメニューからja_jpを選択してください
↓
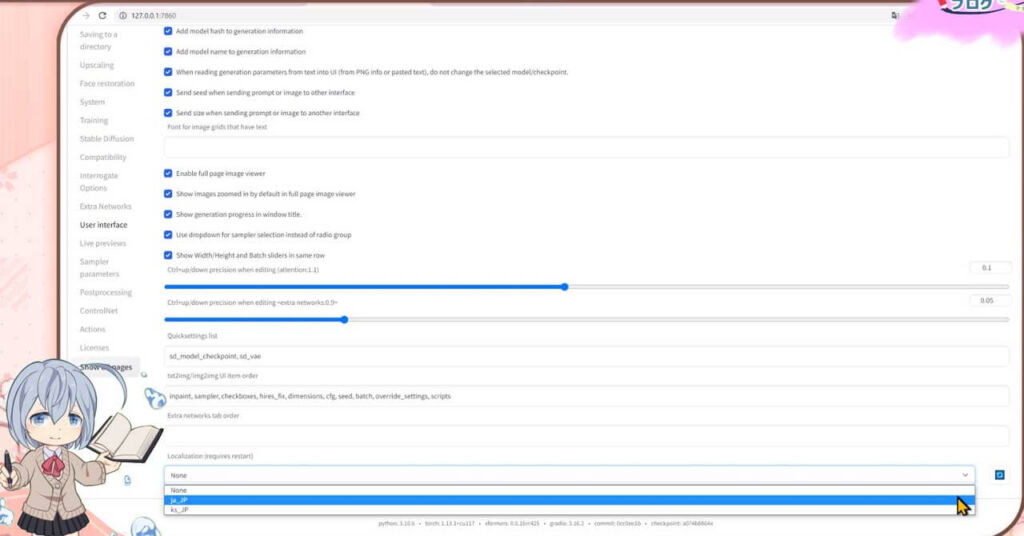
終わりましたら、上の方に戻りまして、アプライセッティングスapply settingsボタンをクリックして設定を完了させてください
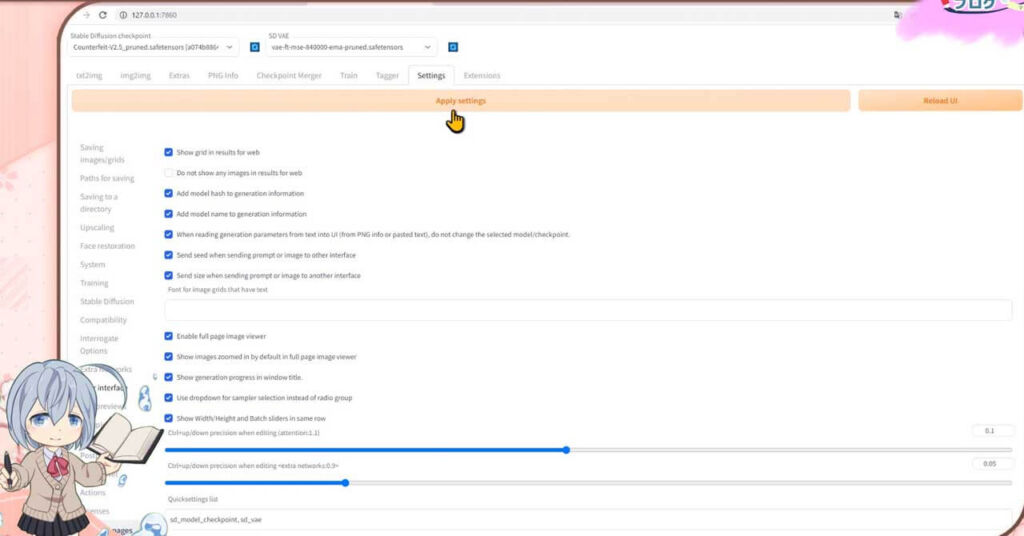
その後に、StableDiffusion webUIリロードする、Reload UIボタンをクリックします
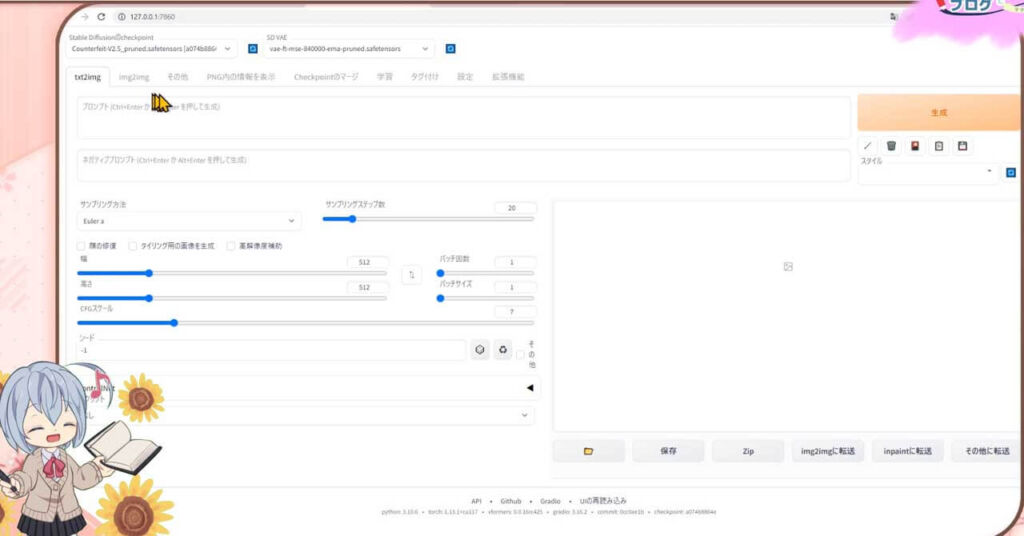
おぉ~、日本語になってる。これで見やすくなったね
日本語化が反映されないよ~っていう方はいますか?
わたしもStableDiffusion webUIを設定してると上手く反映されない事がありますが、多くの場合は、
アプライセッティングスボタンの押し忘れか
リロードしてないか、
もしくはwebUIバッチと、StableDiffusion webUIを再起動してないか?
の理由のどれかになることが多いので、落ち着いてやり直してみてください
以下のコンテンツとコラボさせて頂いてますので、ご興味ありましたら覗いてもらえたら嬉しいです
おまけ:動画版ステーブルディフュージョンwebUI日本語化の設定
本格的にやりたい人は、デジタルイラスト/アイコンお絵描きする必要なおすすめ道具をまとめましたので参考にしてね
StableDiffusion webUIリンク集
StableDiffusion WebUI v1.6.0(随時更新リサーチ中)
- StableDiffusion WebUIバージョン1.6.0リリース速報まとめ
- 【SDXL1.0のVAE】StableDiffusion WebUI v1.6.0 導入&設定方法
- StableDiffusion WebUI ver1.6.0「VAE」切り替えを便利なインターフェイス
- SDXL1.0環境のEasyNegative【negativeXL 】ネガティブプロンプト省略embeddings
StableDiffusion webUI基本設定
- StableDiffusion WebUIをローカル環境で使う設定のやり方♪
- StableDiffusion WebUIバージョンアップ方法。更新手順や注意点
- StableDiffusion WebUIバージョンの確認方法
- 【操作画面の解説・txt2img】分かりやすくパラメータの使い方を説明
- 【画像生成AIイラスト】VAEインストール方法と便利な使い方
- 「VAE」かんたんに切り替えするインターフェイス
- 【日本語化】StableDiffusionWebUI インターフェイス設定方法。
- 大きく、キレイな画像を出力する方法Hires.fix使い方。解像度アップ!
- 操作画面の5つのボタン解説
- 【X/Y/Z plot】使い方。プロンプトや設定を調整し比較してみよう!
- 【img2imgインペイント】画像生成AIイラストを修正/inpaintのパラメータ
- 【学習モデルの追加と変更】かんたん切り替え
- StableDiffusion WebUIバージョン1.3。LoRAを使う方法
- 【まとめ】画質が悪いを改善する7つの機能の使い方!
【学習モデル・checkpoint】
- 【実写系学習モデル・3選】写真の様なリアルな美少女が作れるモデルまとめ
- 【BracingEvoMix】日本人風の顔に特化した最新学習モデル
- 【BeautifulRealisticAsiansV5通称BRAV5】
プロンプト
- Stable Diffusionプロンプト(呪文)に関しての書き方。
- 【画質を上げる・画質に美しく芸術性を持たすプロンプト】呪文の書き方
- 【Tag complete】プロンプトのコツを掴める入力補助機能。
【ControlNet】
- 【ControlNet】使い方とインストール方法。画像生成AIイラストに便利な神機能。
- 【ControlNet-V1.1206】最新バージョンアップデート&モデル更新方法。
- 【ControlNet】不具合?表示されない…反映されない時には?
- 骨(棒人間)を使い、思い通りの姿勢をとらせた方法。
- 原画の絵と同じ姿勢(ポーズ)のAIイラスト生成のやり方♪
- AIイラストから線画を抽出する方法♪
- AIイラストを手描きで修正し、生成するやり方♪
- 【ControlNet】自作の線画イラストを画像生成AIに色塗り(ペイント)させる方法
- 自作の線画イラストをAIイラストに色塗り(ペイント)させる方法♪
【その他 拡張機能について】
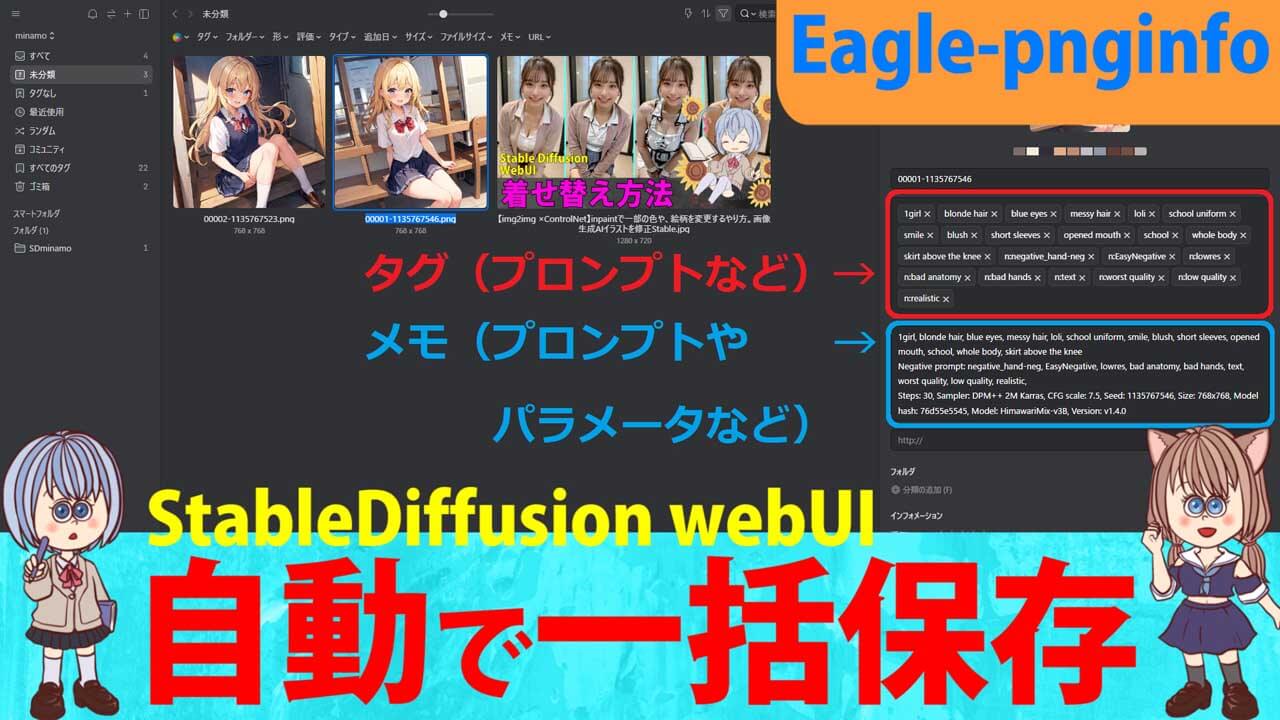
- 【Eagle-pnginfo】画像やプロンプトを自動で一括管理できる拡張機能
- 【eagle】画像管理おすすめアプリ使い方
- 【eagle】公式サイト
- 【EasyNegative v2】導入&使い方♪設定方法
- 【EasyNegative V2】反映されないときには?原因と対処方法
- 【EasyNegative V2】【LoRA】にサムネイルを付ける方法
- 【LoRA】画像生成AIの追加学習データの使い方。
- 【Dynamic Prompts】ダウンロードとインストールの設定方法と特殊構文の使い方