![](https://nagi.blog/wp-content/uploads/2022/03/e83fa52eac00d47020c79e84425066c0-150x150.jpg)
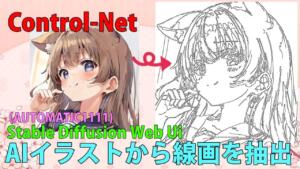
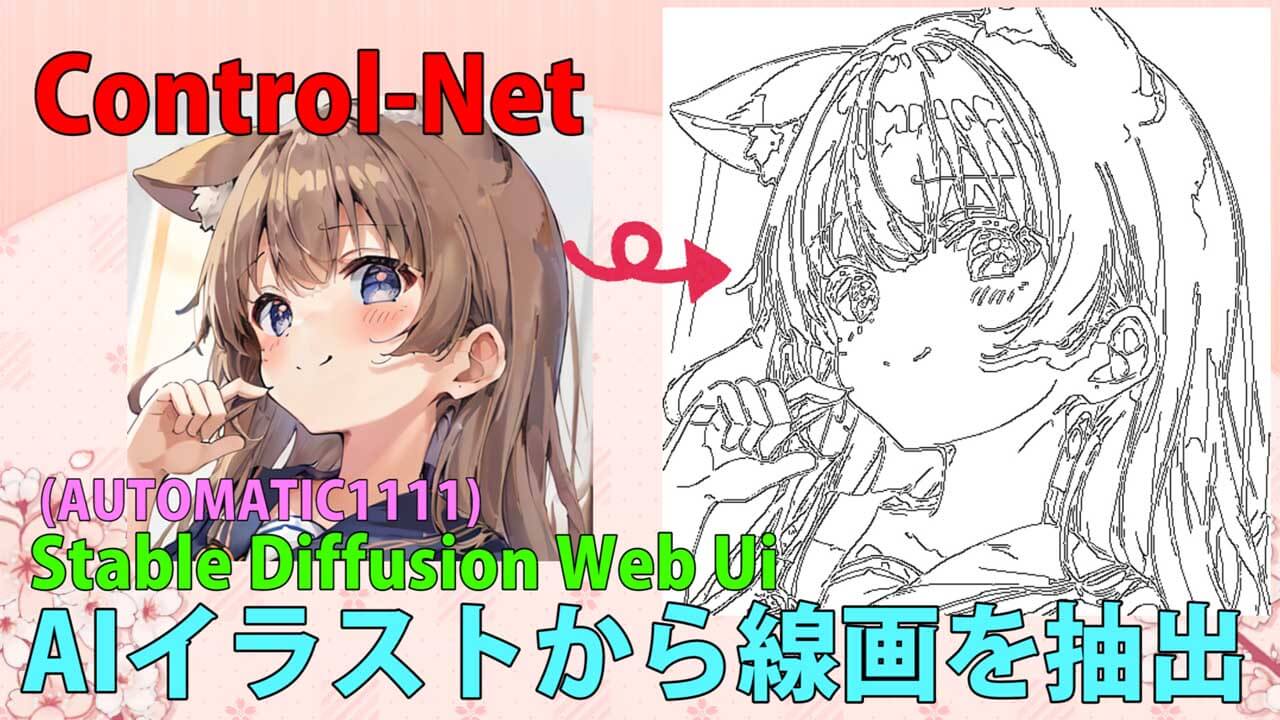
Stable Diffusion webUI (automatic1111)で、拡張機能のControlNet・cannyを使った、AIイラストから線画を抽出する方法を解説していきます
![](https://nagi.blog/wp-content/uploads/2022/03/49ef664720433fb37002b605195c5e9b-150x150.png)
線画だけ抽出しても使い道あるの?
「デザインは良かったけど、配色がイメージと違った…」や「別な配色のキャラクターが欲しい」などの時に、線画を抽出して、色の付け直しが出来るよ
![](https://nagi.blog/wp-content/uploads/2022/03/49ef664720433fb37002b605195c5e9b-150x150.png)
イラストはいいけど、配色だけ残念な感じの時とかあるので、そんな時便利そうね
![](https://nagi.blog/wp-content/uploads/2022/03/49ef664720433fb37002b605195c5e9b-150x150.png)
それに、ロールプレイングゲームの色違いのモンスター作るのに便利そうだね
cannyを使うと他にも以下のことをすることができます
![](https://nagi.blog/wp-content/uploads/2022/03/975429aa9a80f4f9bc5ca68a5e46d0cf-150x150.png)
現在、Stable Diffusionや画像生成AIに関する記事は、以下のものがありますので参考にしてね
![](https://nagi.blog/wp-content/uploads/2023/06/336bcf72aa257afff7a14e3b4fe93eb5-1024x576.jpg)
この記事に、特に関連する記事はコチラ
ControlNetを使い、AIイラストから線画を抽出するする手順
まずは、Stable Diffusion webUIには、元々ControlNetが導入されているわけではないので、使える状態に設定します。
![](https://nagi.blog/wp-content/uploads/2022/03/e83fa52eac00d47020c79e84425066c0-150x150.jpg)
設定が終わると、次のような項目が加わります
※今回のモデルは、andite/anything-v4.0を使わせて頂いてます
![Control-Net骨からAIイラスト生成StableDiffusionWebUi1](https://nagi.blog/wp-content/uploads/2023/03/84c5539923f69f65745e1a5e4a7a7195-1024x485.png)
![](https://nagi.blog/wp-content/uploads/2022/03/49ef664720433fb37002b605195c5e9b-150x150.png)
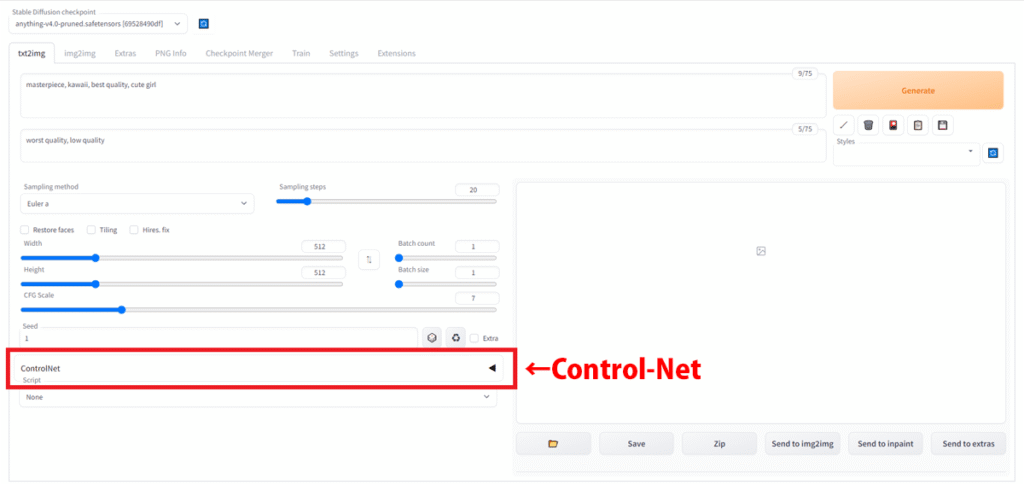
ControlNet欄のよこにある三角のボタンをクリックして、ControlNetを表示しましょう
AIイラストから線画を抽出するには、txt2imgを使って行えます
今回は、プロンプトとネガティブプロンプトに、最低限のプロンプトのみ以下のように記載しました
プロンプト
masterpiece, best quality, kawaii, cute girl
ネガティブプロンプト
worst quality, low quality
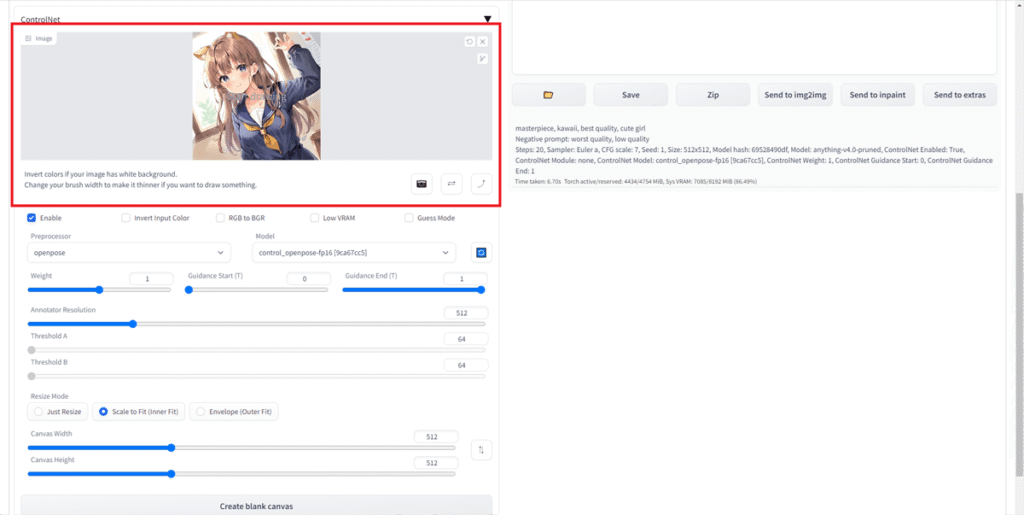
ControlNet画面を表示し、設定していこう
ControlNetを開くと、次のような画面が開きます
![Control-Net骨からAIイラスト生成StableDiffusionWebUi2](https://nagi.blog/wp-content/uploads/2023/03/f63b7c89acc523ac1f81cf3120a14e71-1024x508.png)
![](https://nagi.blog/wp-content/uploads/2022/03/e83fa52eac00d47020c79e84425066c0-150x150.jpg)
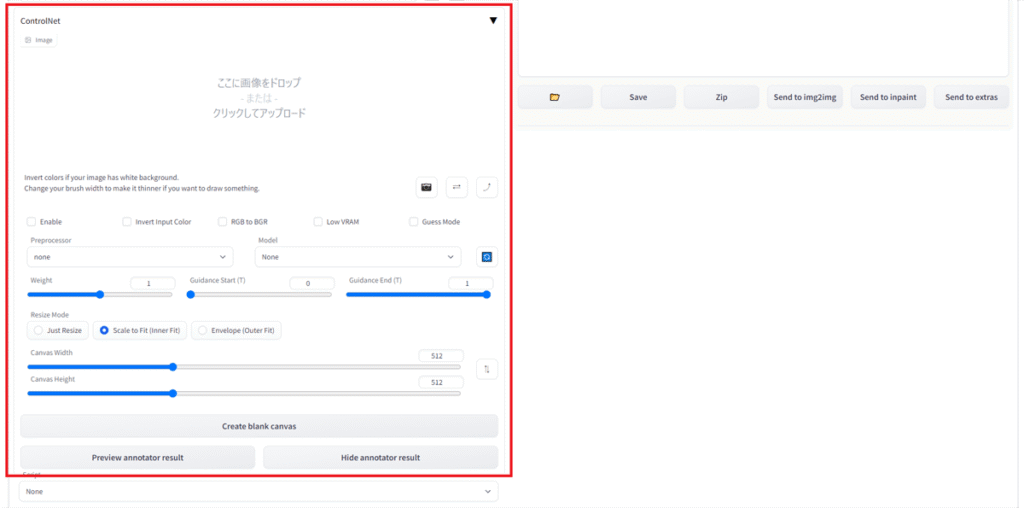
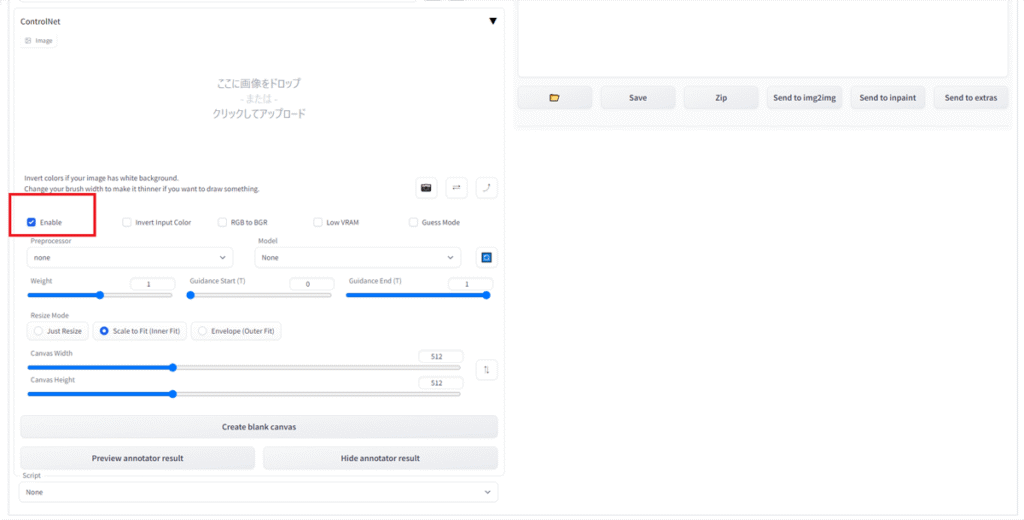
まずは、Enableの所にチェックを入れてください
Enableは、ControlNetを有効にすると言う意味です
![Control-Net骨からAIイラスト生成StableDiffusionWebUi3](https://nagi.blog/wp-content/uploads/2023/03/41d54fa21f19b80b848df6e886865244-1024x520.png)
![](https://nagi.blog/wp-content/uploads/2022/03/e83fa52eac00d47020c79e84425066c0-150x150.jpg)
次にimageの所に、線画を抽出したい画像を入れます
![Control-Net原画の絵と同じ姿勢ポーズのAIイラスト生成のやり方StableDiffusionwebui1](https://nagi.blog/wp-content/uploads/2023/03/ac3aec4c838766dd3780953a3509fe8f-1024x515.png)
![](https://nagi.blog/wp-content/uploads/2022/03/e83fa52eac00d47020c79e84425066c0-150x150.jpg)
次に、プリプロセッサ(Preprocessor) と、モデル(Model)を設定します
プリプロセッサは、canny
モデルは、canny
に設定してね
![AIイラストから線画を抽出する方法Control-Net1](https://nagi.blog/wp-content/uploads/2023/03/15cf838a0cb61f16658260c14072df3a-1024x521.png)
![](https://nagi.blog/wp-content/uploads/2022/03/e83fa52eac00d47020c79e84425066c0-150x150.jpg)
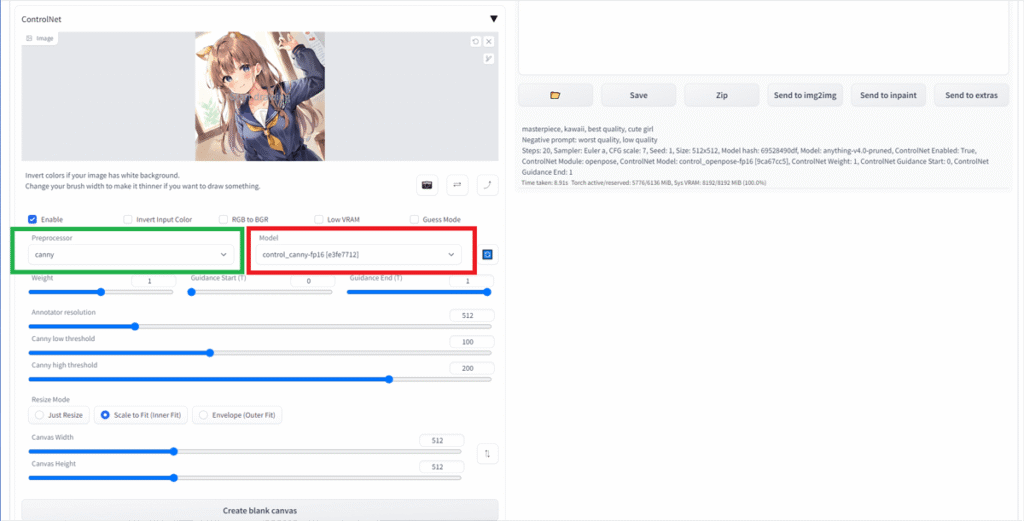
それでは、ジェネレイト(Generate)ボタンをおしましょう
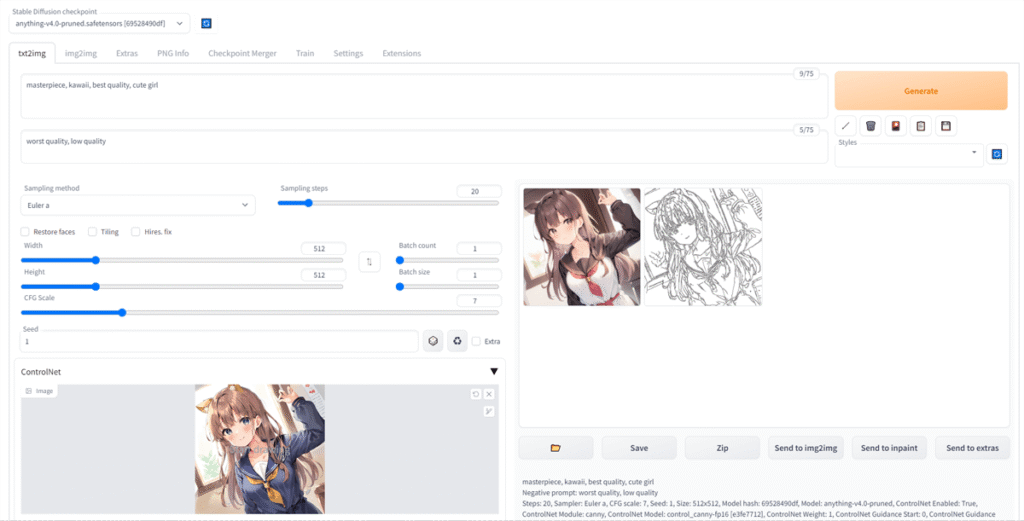
![](https://nagi.blog/wp-content/uploads/2023/03/9c4d6eb05fa058704e84c65693cdd076-1024x521.png)
![](https://nagi.blog/wp-content/uploads/2022/03/49ef664720433fb37002b605195c5e9b-150x150.png)
線画が抽出されましたね
線画の他にプロンプトをほとんど入れてないので、配色はAIが自動生成したものになります
![](https://nagi.blog/wp-content/uploads/2022/03/975429aa9a80f4f9bc5ca68a5e46d0cf-150x150.png)
かなり細かく線画が抽出されましたね
全ての行程を静止画で分かりやすく解説しましたが、より詳細を見たい場合は、作業工程を動画に残してあります
AIイラストから線画を抽出してからの用途
![](https://nagi.blog/wp-content/uploads/2022/03/49ef664720433fb37002b605195c5e9b-150x150.png)
AIイラストから線画を抽出は出来たけど、これって何に使うの?
![](https://nagi.blog/wp-content/uploads/2022/03/e83fa52eac00d47020c79e84425066c0-150x150.jpg)
まずは、冒頭で話したように、別な色への塗り替えが出来ますよ
![](https://nagi.blog/wp-content/uploads/2022/03/e83fa52eac00d47020c79e84425066c0-150x150.jpg)
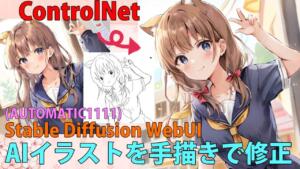
他にも、指や、構図を、デジタルお絵かきツールで手描きによる修正も可能です
ControlNetで線画抽出し、img2imgのインペイント機能と、さらにControlNetを使うと、一部の場所だけを再生成して別なものに変えることが出来ますよ
![](https://nagi.blog/wp-content/uploads/2022/03/e83fa52eac00d47020c79e84425066c0-150x150.jpg)
例えば、この様に髪色を変えたり、洋服を着せ替えたりも可能です
![](https://nagi.blog/wp-content/uploads/2022/03/e83fa52eac00d47020c79e84425066c0-150x150.jpg)
以下のコンテンツとコラボさせて頂いてますので、ご興味ありましたら覗いてもらえたら嬉しいです
おまけ:【動画版】AIイラストから線画を抽出&再ペイント方法
![](https://nagi.blog/wp-content/uploads/2022/03/975429aa9a80f4f9bc5ca68a5e46d0cf-150x150.png)
本格的にやりたい人は、デジタルイラスト/アイコンお絵描きする必要なおすすめ道具をまとめましたので参考にしてね
StableDiffusion webUI 解説:リンク
StableDiffusion WebUI v1.6.0(随時更新リサーチ中)
- StableDiffusion WebUIバージョン1.6.0リリース速報まとめ
- 【SDXL1.0のVAE】StableDiffusion WebUI v1.6.0 導入&設定方法
- StableDiffusion WebUI ver1.6.0「VAE」切り替えを便利なインターフェイス
- SDXL1.0環境のEasyNegative【negativeXL 】ネガティブプロンプト省略embeddings
StableDiffusion webUI基本設定
- StableDiffusion WebUIをローカル環境で使う設定のやり方♪
- StableDiffusion WebUIバージョンアップ方法。更新手順や注意点
- StableDiffusion WebUIバージョンの確認方法
- 【操作画面の解説・txt2img】分かりやすくパラメータの使い方を説明
- 【画像生成AIイラスト】VAEインストール方法と便利な使い方
- 「VAE」かんたんに切り替えするインターフェイス
- 【日本語化】StableDiffusionWebUI インターフェイス設定方法。
- 大きく、キレイな画像を出力する方法Hires.fix使い方。解像度アップ!
- 操作画面の5つのボタン解説
- 【X/Y/Z plot】使い方。プロンプトや設定を調整し比較してみよう!
- 【img2imgインペイント】画像生成AIイラストを修正/inpaintのパラメータ
- 【学習モデルの追加と変更】かんたん切り替え
- StableDiffusion WebUIバージョン1.3。LoRAを使う方法
- 【まとめ】画質が悪いを改善する7つの機能の使い方!
【学習モデル・checkpoint】
- 【実写系学習モデル・3選】写真の様なリアルな美少女が作れるモデルまとめ
- 【BracingEvoMix】日本人風の顔に特化した最新学習モデル
- 【BeautifulRealisticAsiansV5通称BRAV5】
プロンプト
- Stable Diffusionプロンプト(呪文)に関しての書き方。
- 【画質を上げる・画質に美しく芸術性を持たすプロンプト】呪文の書き方
- 【Tag complete】プロンプトのコツを掴める入力補助機能。
【ControlNet】
- 【ControlNet】使い方とインストール方法。画像生成AIイラストに便利な神機能。
- 【ControlNet-V1.1206】最新バージョンアップデート&モデル更新方法。
- 【ControlNet】不具合?表示されない…反映されない時には?
- 骨(棒人間)を使い、思い通りの姿勢をとらせた方法。
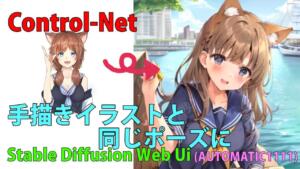
- 原画の絵と同じ姿勢(ポーズ)のAIイラスト生成のやり方♪
- AIイラストから線画を抽出する方法♪
- AIイラストを手描きで修正し、生成するやり方♪
- 【ControlNet】自作の線画イラストを画像生成AIに色塗り(ペイント)させる方法
- 自作の線画イラストをAIイラストに色塗り(ペイント)させる方法♪
【その他 拡張機能について】
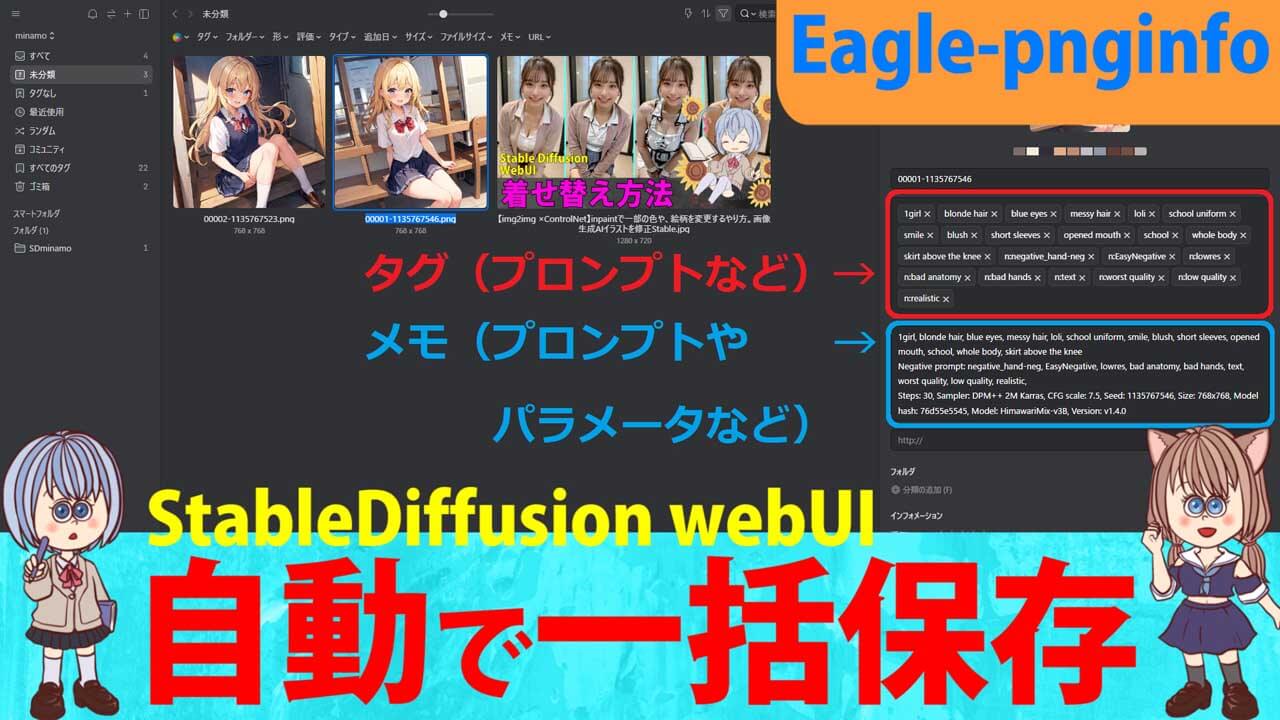
- 【Eagle-pnginfo】画像やプロンプトを自動で一括管理できる拡張機能
- 【eagle】画像管理おすすめアプリ使い方
- 【eagle】公式サイト
- 【EasyNegative v2】導入&使い方♪設定方法
- 【EasyNegative V2】反映されないときには?原因と対処方法
- 【EasyNegative V2】【LoRA】にサムネイルを付ける方法
- 【LoRA】画像生成AIの追加学習データの使い方。
- 【Dynamic Prompts】ダウンロードとインストールの設定方法と特殊構文の使い方