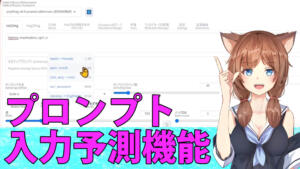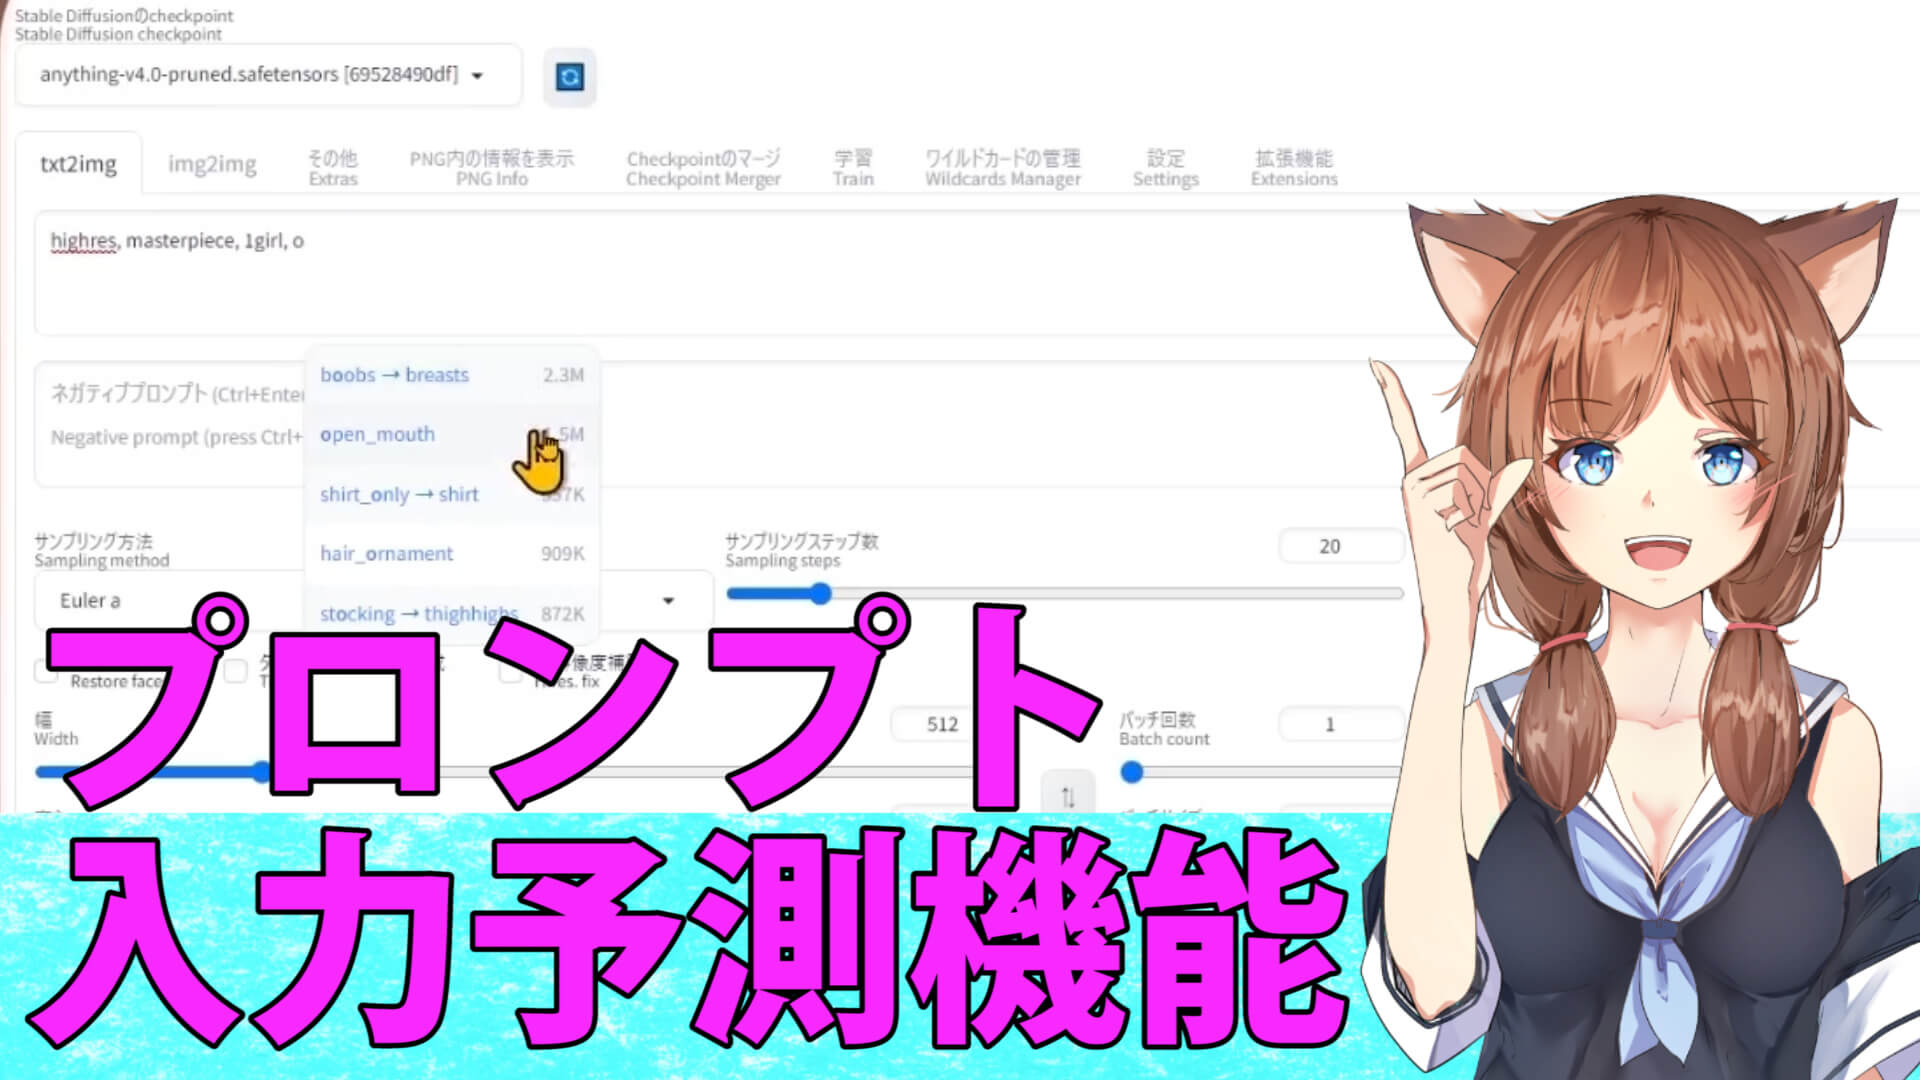

あれ?なにこれ?プロンプトを予測変換しているの?

そんな感じだね、予測補完機能って言った方がより正確ないいかたかカナ

 みけねこまる
めちゃくちゃ便利そうなのだ
私も使いたい
それでは、今回は、この予測補完機能をStableDiffusion WebUIで使えるようにしていきましょう

この予測補完機能はStableDiffusion WebUIの拡張機能ですので、ダウンロード方法から解説します
現在、Stable Diffusionや画像生成AIに関する記事は、以下のものがありますので参考にしてね
この記事に、特に関連する記事はコチラ
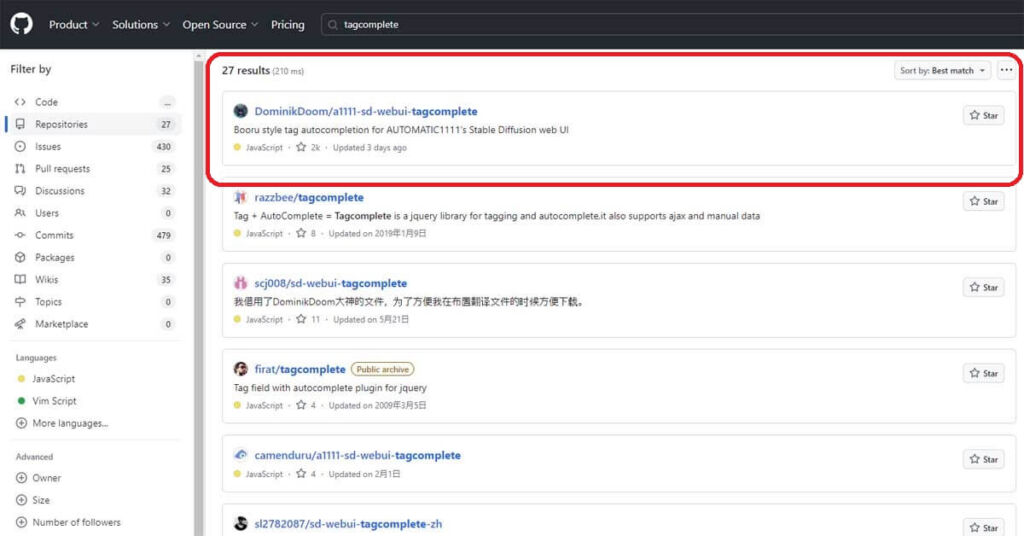
【Tag complete】の導入 まずは、ダウンロード
まずは、以下のリンクか、検索でgithubのページに行きましょう
(URLをコピペするだけでも大丈夫です)
いつもお馴染みのGitHubへ
githubに来ましたら、検索窓にtagcompleteと入力して検索をかけてください

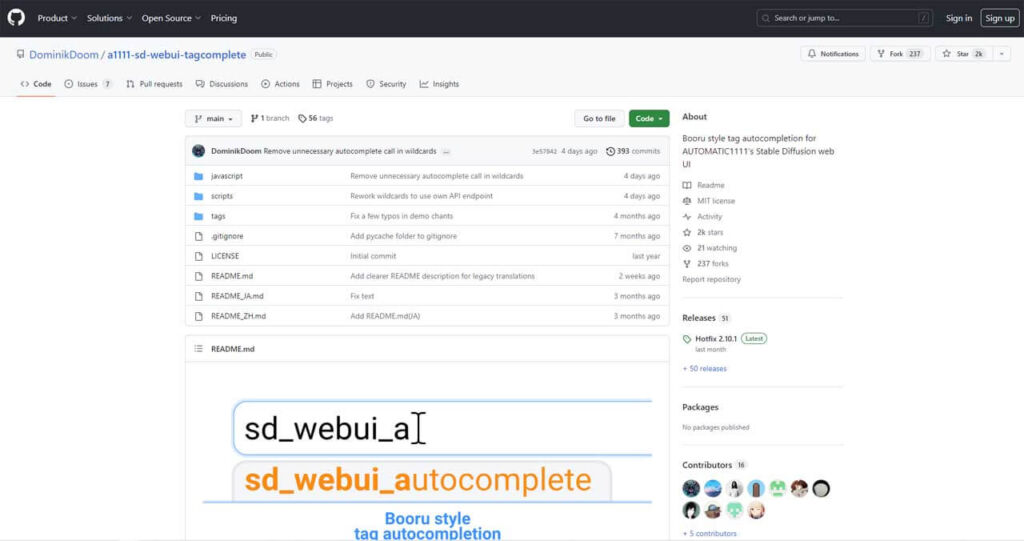
そうしますとコチラですね、コチラをクリックしてページを開きます
 みけねこまる
見つかったのだ
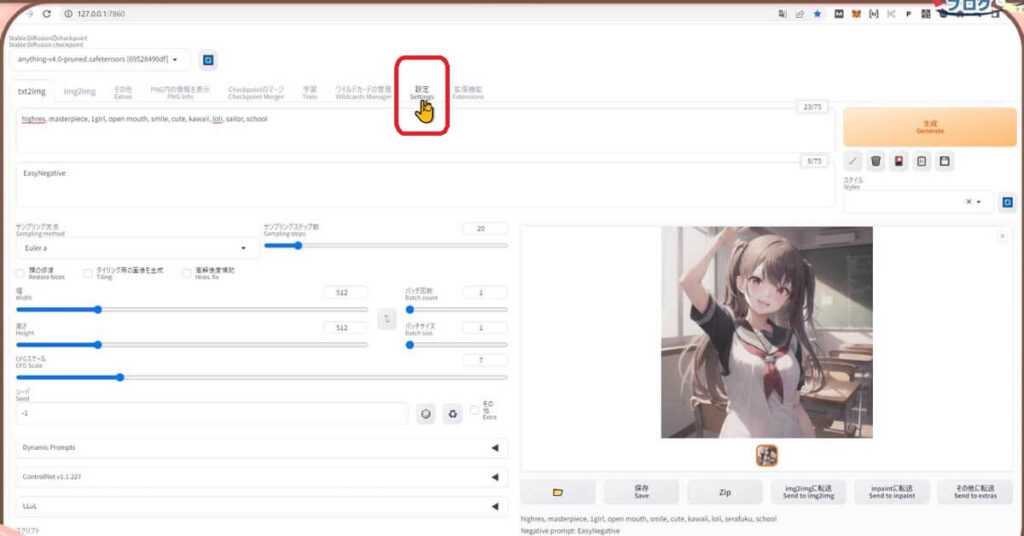
StableDiffusion WebUIを起動してインストール&設定していこう
それでは、今度はStableDiffusion WebUIを起動してくださいね
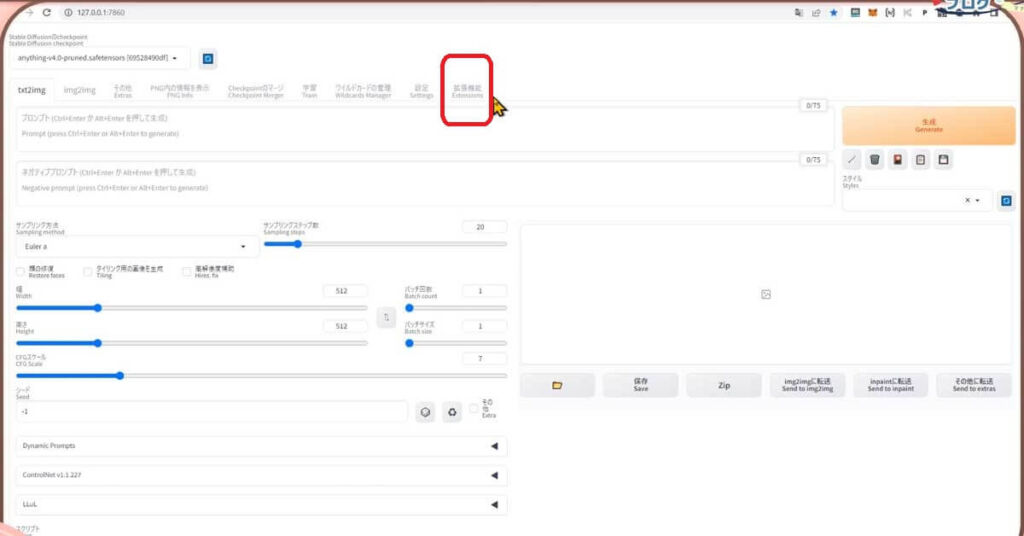
起動しましたら、Stable Diffusion WebUIのExtensions というタブがあるので開きます
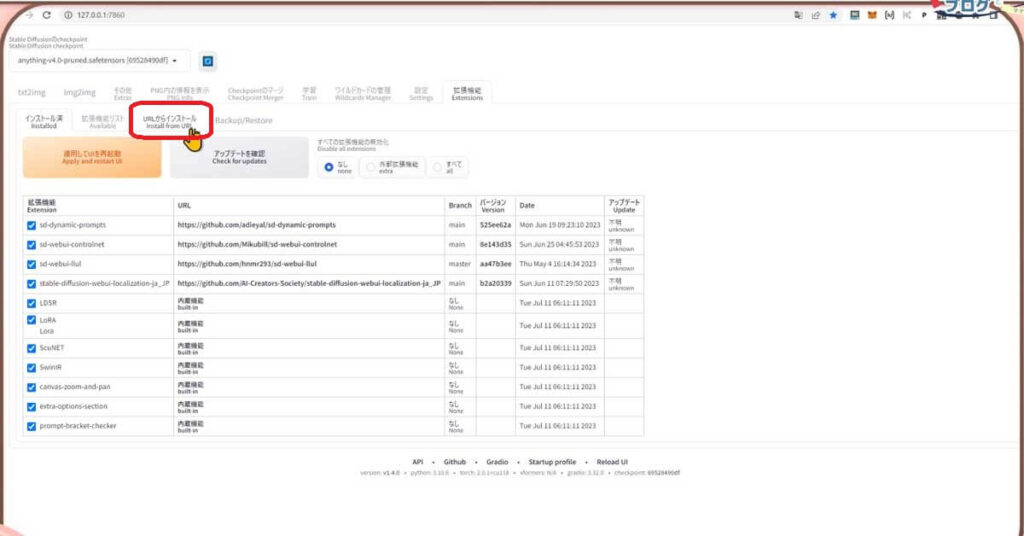
そのなかに、install from URLというタブがありますので開きます
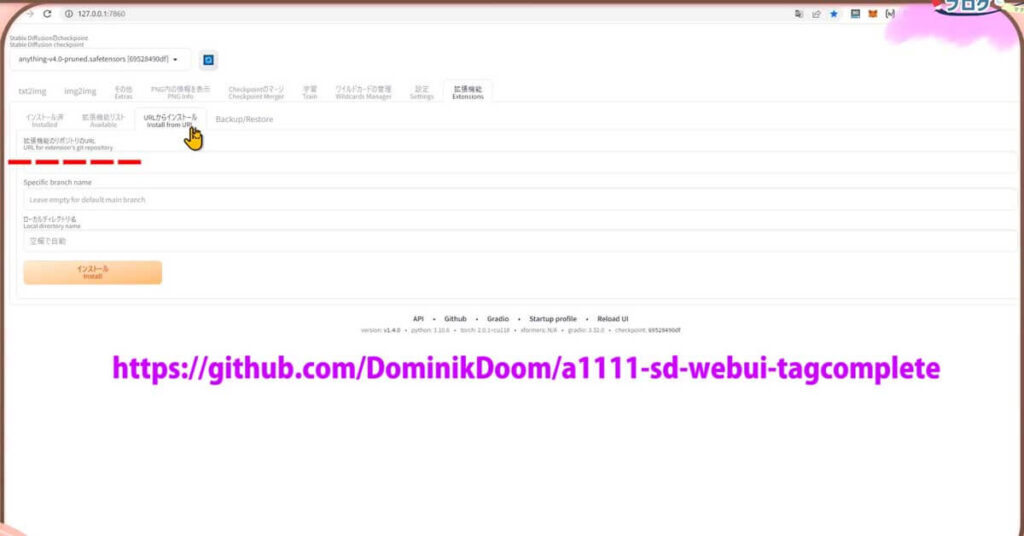
ここの上の空欄のところに、URL for extension’s git repositoryという欄があります
ここに、先ほどのtagcompleteがダウンロードできるページのURLをかきこみます
URLをコピーしまして、ペーストできましたか?
できましたら、の【install】ボタンを押してください
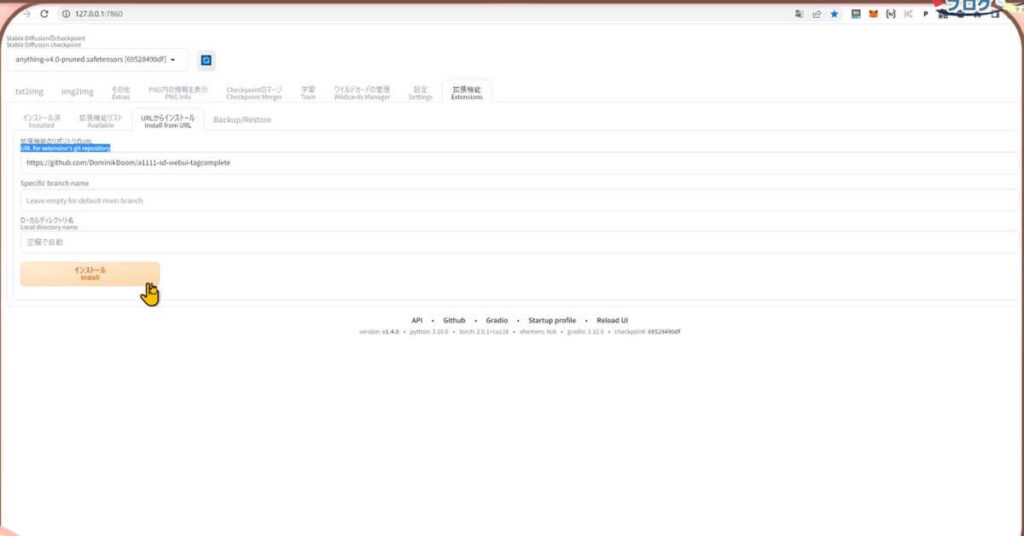
1分以内で、ダウンロードが終わると思います
なにか、表示されましたよ
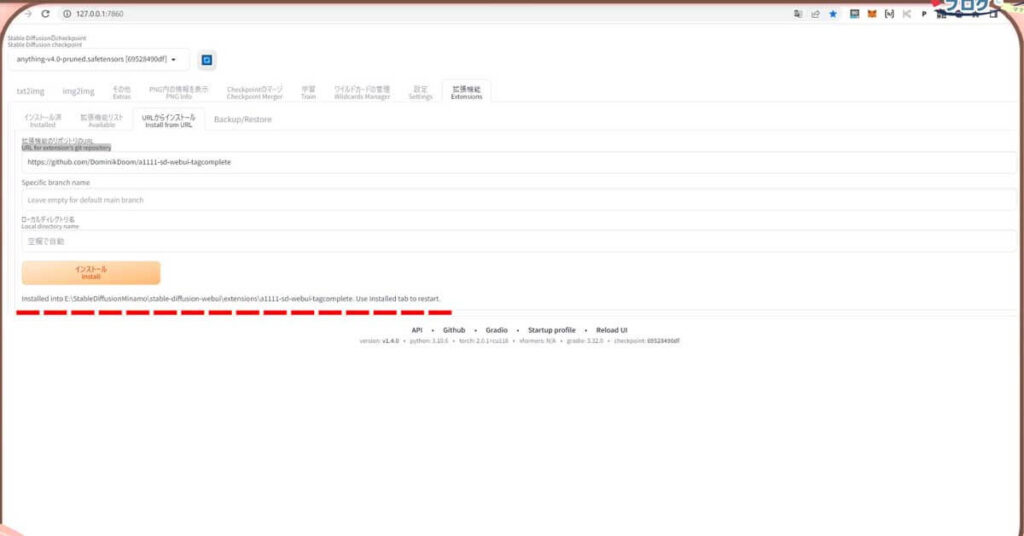
インストールが終わったみたいです
みけねこまるわかりにくいのだ
この表示以外は、特に音やポップアップする訳ではないので、チョット分かりにくいですが、これで大丈夫です
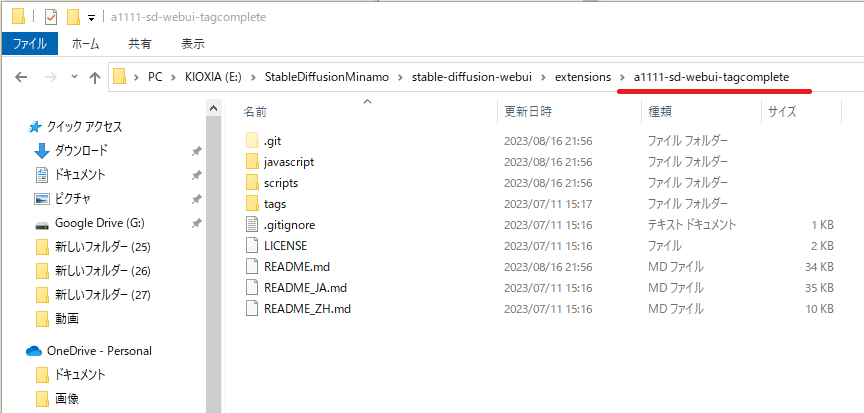
確認してみましょうか
フォルダの方を実際に見て見ますと、この様にフォルダやファイルが出来ていますね
Stable Diffusion WebUIの画面の方でも確認することが出来ます
こちらの、installedのタブを開いてください
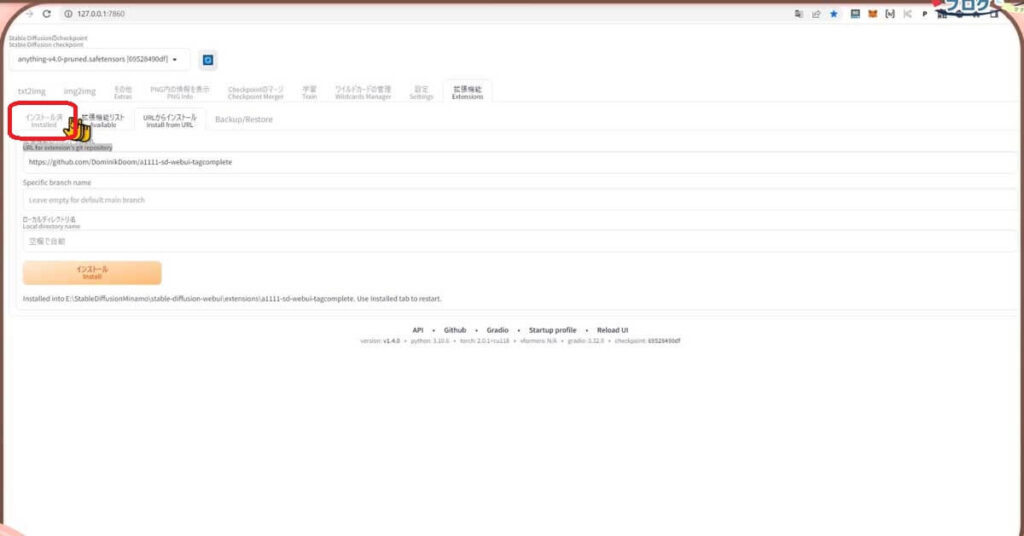
コチラの欄に、さきほどのURLが記載されていればインストールされていると言うことになります
 みけねこまる
良かったのだ
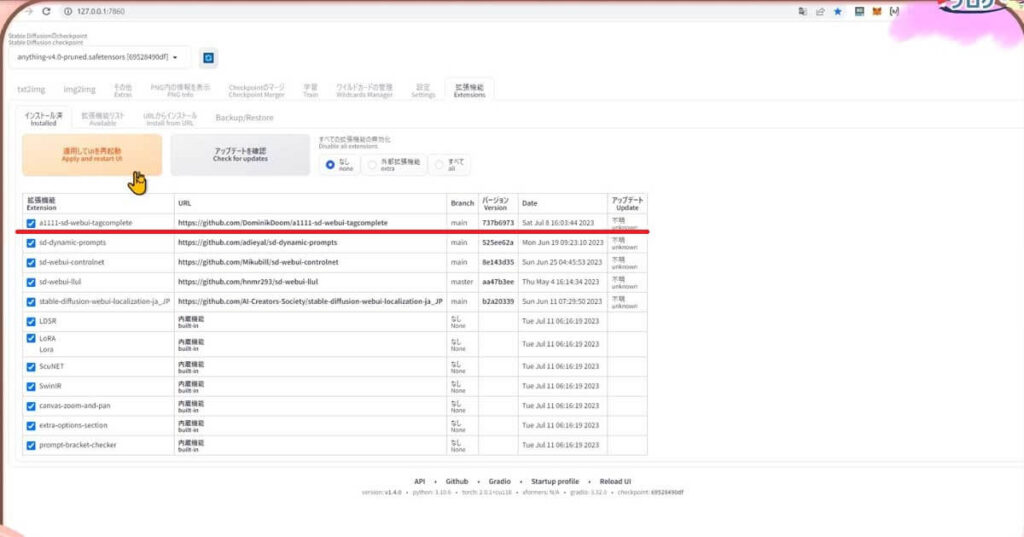
そうしましたら、【apply and restart UI】をクリックしてください
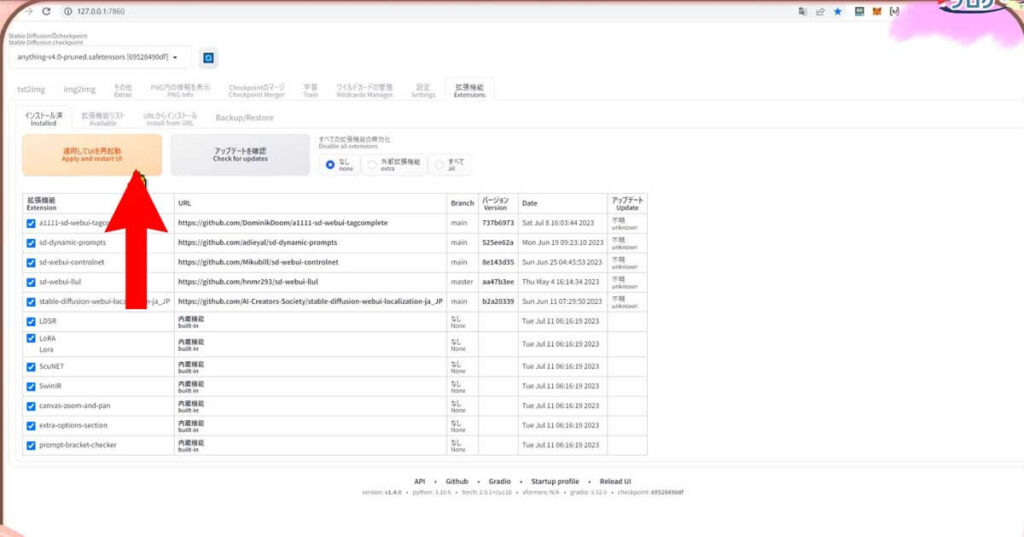
これでtagcompleteのインストールが終わったの?
はい、これでインストールが終わりました。プロンプト欄に文字を入力すると、入力を補助してくれる候補の表示がされるようになりますよ
Tag complete使い方と注意点
それでは使い方と注意点を、Tagcompleteの公式のサイトの情報を交えつつ解説していきますね
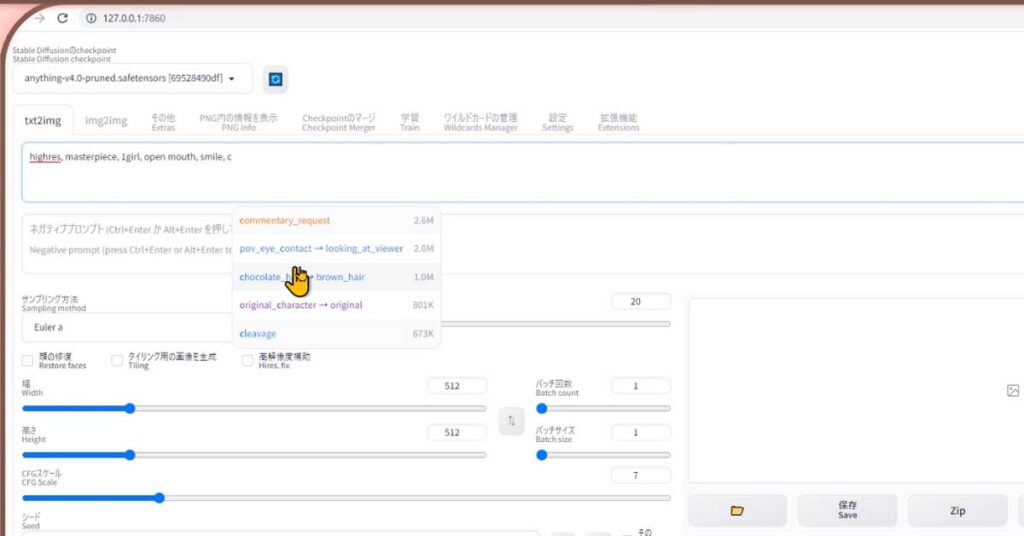
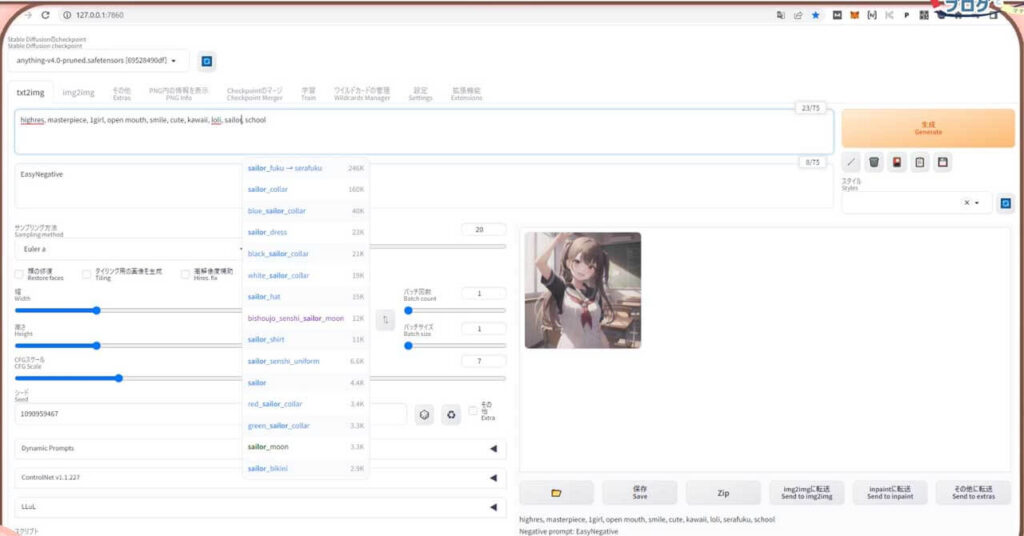
Tag completeはこの様に文字を入力するたびに、スマホの予測変換機能の様に候補を表示してくれます。
これは、プロンプトの入力がずいぶん楽になりそうだね、
みけねこまるアルファベットの入力ミスもなくなりそうなのだ
入力するときに良いプロンプトが思い浮かばなかったときにも、候補を参考にしたりできるから便利だよ
この拡張機能は、主にアニメ スタイルのイラストを閲覧するために使用される Danbooru などのイメージボールボードから認識されたタグの自動補完するための ヒントが表示される仕組みになっています
タグの右側に出てくる数字はそのタグのヒット数になります
みけねこまる数が多いと、使われた回数が多いって事になるんだな
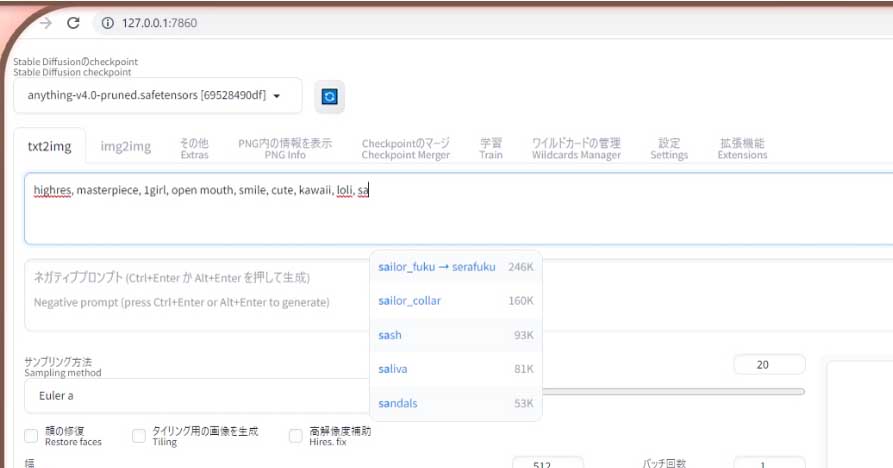
時々、似た様な単語をどちらを使った方がいいのか迷う単語があります。
そんな時にはヒット数を参考にするのもアリです。多く使われている場合の方が仕上がりがベターな場合が多い気がします。
例えば、セーラー服というプロンプトを入れる時、プロンプト的にはsarafukuと入れた方がいいのか、sailor suitとして入れた方が迷うときがありますよね
この場合、ヒット数がsarafukuと入れた方が最も多くて、sailor suitは上位の5つにはでてこないですね
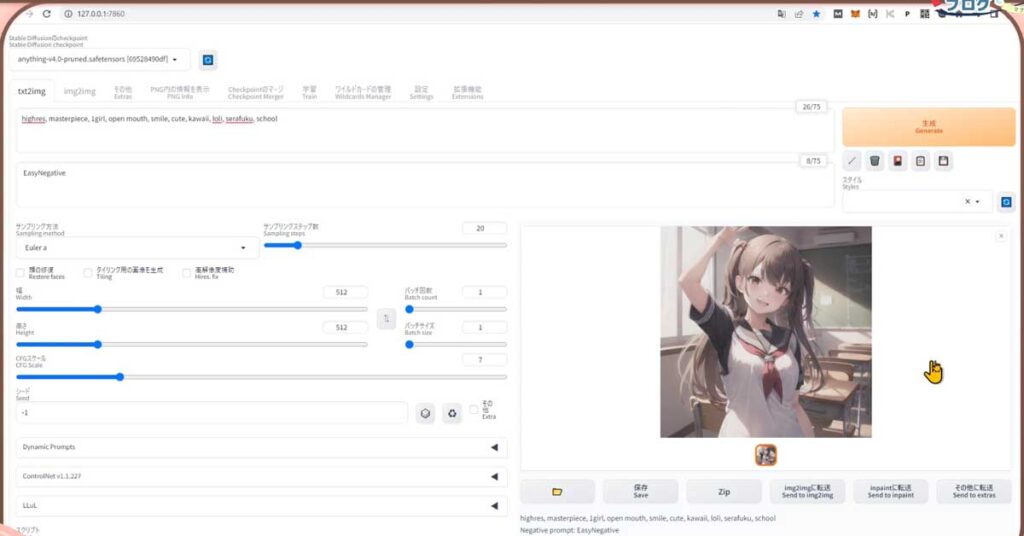
いったん、sarafukuと入れて生成してみましょう
この様な感じになりました
それでは、sailor suitとスペルを変えて、生成してみますね
この様な感じです
ズームアップされたけど、あまり変わらなそうだね
みけねこまる構図だけなら、sarafukuの時の方がよさそうなのだ
どちらが良いかは、ケースバイケースになりますが、アイディアをくれるのはありがたいですね
みけねこまるもっとアイディアが欲しいのだ
Tag completeの設定方法
デフォルトでは、候補が5件しか出ませんが、設定画面で数を増やすことが出来ますよ
やり方を教えて欲しいな
それでは、表示される候補の数の変更の設定を解説しますね。
まずは、Settingsタブを開いてください
設定画面が開きましたら、少し下にスクロールします
左のメニューの中から、tagcompleteをクリックしてください
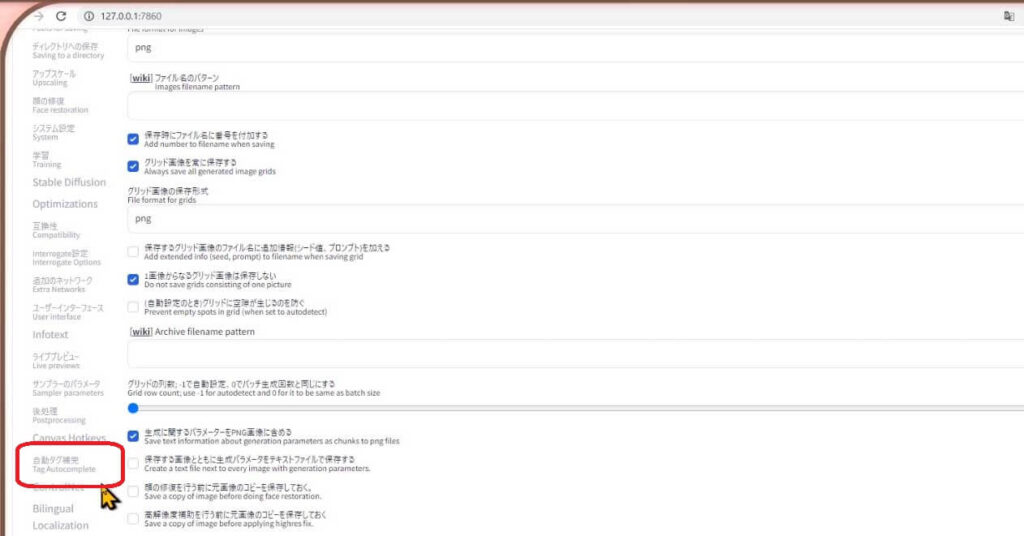
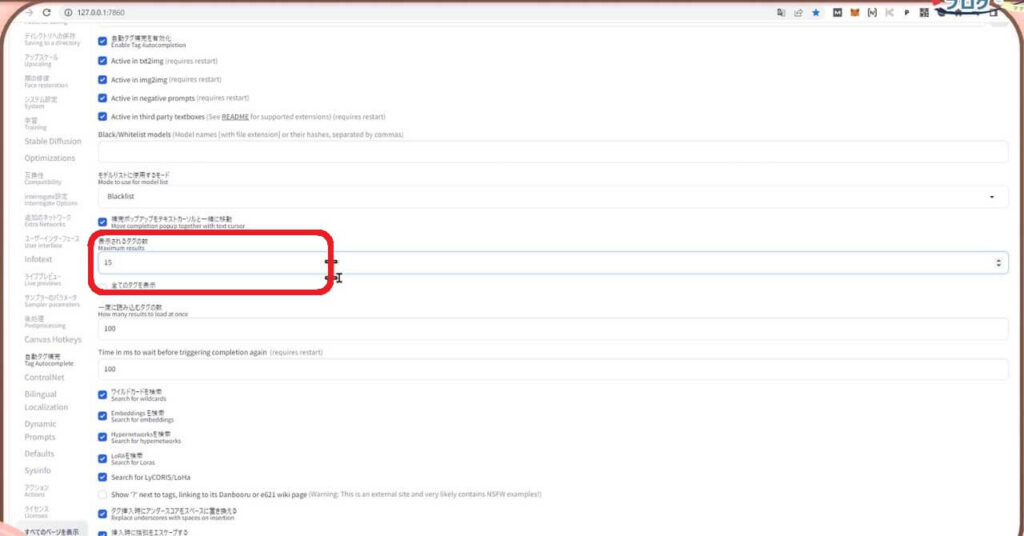
コチラの画面に切り替わりますので、Maximum resultsという欄がありますので探してくださいね
デフォルトでは、5になっていると思うのですが、表示させたい候補数を入れてください
今回は、15にしてみましょうか
そうしましたら、スクロールで上に戻りまして、【apply and restart UI】ボタンを押してくださいね
その後、リロードUIボタンを押します
そうしましたら、プロンプト欄に何か文字を入れてみますね
この様に、候補数が増えました
 みけねこまる
これなら、プロンプトの候補がたくさん出て、選択肢も増えるし、新しいアイディアも湧き出てきそうなのだ
どうせなら、日本語で入力できると便利なんだけどな
日本語で、入力できるような拡張機能もあるけど、いろいろ難しいみたいです
まず、正確に日本語を英語にするためのシステムが、DeepLやchatGPTのAPIを使わないと、上手く変換できない問題があったりします
また、ある程度上手く翻訳できたとしても、プログラミングは基本的にアルファベットや、英語などから成り立っている面があるので、プロンプトのコントロールが難しい面があるようです
というのも、文脈がない状態で「かわいい」を英語のプロンプトに変換すると、あたなたの思っているかわいいは、英語のCute,Charming,Lovely,Sweet,そしてKawaiiなのかテイストが変わってきます
みけねこまるかわいいおねぇさんにも、いろいろあるのだな
そして、さらにこれらの英単語をそれぞれにプロンプトとして使うと、思ったより生成される画像に変化が起きたりします
なるほど、簡単そうでいろいろな問題が生じるのね
StableDiffusionに関する以下のコンテンツとコラボさせて頂いてますので、ご興味ありましたら覗いてもらえたら嬉しいです

おまけ 動画版【Tag complete】プロンプト入力補助機能
StableDiffusion WebUI v1.6.0(随時更新リサーチ中)
- StableDiffusion WebUIバージョン1.6.0リリース速報まとめ
- 【SDXL1.0のVAE】StableDiffusion WebUI v1.6.0 導入&設定方法
- StableDiffusion WebUI ver1.6.0「VAE」切り替えを便利なインターフェイス
- SDXL1.0環境のEasyNegative【negativeXL 】ネガティブプロンプト省略embeddings
StableDiffusion webUI基本設定
- StableDiffusion WebUIをローカル環境で使う設定のやり方♪
- StableDiffusion WebUIバージョンアップ方法。更新手順や注意点
- StableDiffusion WebUIバージョンの確認方法
- 【操作画面の解説・txt2img】分かりやすくパラメータの使い方を説明
- 【画像生成AIイラスト】VAEインストール方法と便利な使い方
- 「VAE」かんたんに切り替えするインターフェイス
- 【日本語化】StableDiffusionWebUI インターフェイス設定方法。
- 大きく、キレイな画像を出力する方法Hires.fix使い方。解像度アップ!
- 操作画面の5つのボタン解説
- 【X/Y/Z plot】使い方。プロンプトや設定を調整し比較してみよう!
- 【img2imgインペイント】画像生成AIイラストを修正/inpaintのパラメータ
- 【学習モデルの追加と変更】かんたん切り替え
- StableDiffusion WebUIバージョン1.3。LoRAを使う方法
- 【まとめ】画質が悪いを改善する7つの機能の使い方!
【学習モデル・checkpoint】
- 【実写系学習モデル・3選】写真の様なリアルな美少女が作れるモデルまとめ
- 【BracingEvoMix】日本人風の顔に特化した最新学習モデル
- 【BeautifulRealisticAsiansV5通称BRAV5】
プロンプト
- Stable Diffusionプロンプト(呪文)に関しての書き方。
- 【画質を上げる・画質に美しく芸術性を持たすプロンプト】呪文の書き方
- 【Tag complete】プロンプトのコツを掴める入力補助機能。
【ControlNet】
- 【ControlNet】使い方とインストール方法。画像生成AIイラストに便利な神機能。
- 【ControlNet-V1.1206】最新バージョンアップデート&モデル更新方法。
- 【ControlNet】不具合?表示されない…反映されない時には?
- 骨(棒人間)を使い、思い通りの姿勢をとらせた方法。
- 原画の絵と同じ姿勢(ポーズ)のAIイラスト生成のやり方♪
- AIイラストから線画を抽出する方法♪
- AIイラストを手描きで修正し、生成するやり方♪
- 【ControlNet】自作の線画イラストを画像生成AIに色塗り(ペイント)させる方法
- 自作の線画イラストをAIイラストに色塗り(ペイント)させる方法♪
【その他 拡張機能について】
- 【Eagle-pnginfo】画像やプロンプトを自動で一括管理できる拡張機能
- 【eagle】画像管理おすすめアプリ使い方
- 【eagle】公式サイト
- 【EasyNegative v2】導入&使い方♪設定方法
- 【EasyNegative V2】反映されないときには?原因と対処方法
- 【EasyNegative V2】【LoRA】にサムネイルを付ける方法
- 【LoRA】画像生成AIの追加学習データの使い方。
- 【Dynamic Prompts】ダウンロードとインストールの設定方法と特殊構文の使い方